Scripts Menu

This menu includes secondary scripts for working with scene objects.
Animation Scripts

This section contains various commands for working with animation.
Add noise to selected objects
This option adds ramndom values to the selected objets' transforms.
When you select it, you'll see this window:

Here, you'll need to choose one of the two options:
Same random value on frame means the same noise value is applied to every selected object.
Different random value on frame means a different noise value is applied to each of the selected objects.
Once you select one of them, you'll get a window with various parameters for the noise:

Object space
Defines how the object(s) is being moved. True means the object will move on the specified axis in the World space, False - that it will move on the specified axis in the object's Local space.
Noise Upper Limit and Noise Lower Limit
These two options set the values for limiting the generated random value to add to the object's specified axis per frame.
For example, if upper limit is set to 5 and lower limit is set to -1, the script will generate random values in the range between -1 and 5.
Position, Rotation and Scale
These options specify which axis you want to apply the script on specified transforms.
To do this, type the letters X, Y and Z to the input field.
If the field is left empty, the script won't be applying random values to the transform
Set interpolations to Fixed
Specifies if you want the script to apply the random values on interpolated frames too, by 'soft baking' the interpolation to Fixed.
Once you set these parameters, click Ok to apply the noise to the objects you've selected.
Go to origin
This option translates the animation so that its first frame would be placed at the origin (0, 0) point of the scene.
Can be useful when working with motion-captured animaton.
This command only works when the character has a Root Constraint: otherwise, it won't have any effect.
Invert selection
Select all the objects that are not currently selectd, and deselects those that currently are selected.
Keyframe reduction
Removes every Nth keyframes in the selected timeline interval, on the selected animation tracks.
Remove step interpolation frames
Removes empty frames with the Step interpolation by shifting the keyframes to fill the gaps.
Reverse animation
This option changes the direction of the animation on the selected interval.
The first frame of the original animation becomes the last in the reversed one, the second becomes the second to last etc.
Untwist Animation
Recalculates the animation for the selected Joint to remove rotation.
Can be useful when, for example, Quick Rigging Tool is unable to generate a rig because of twisting Joints.
Center of Mass

This set of features is designed for working with Centers of mass.
Connect with dir controllers
Attaches the selected Direction Controllers to the selected Center of Mass.
Using this feature is required for the direction controllers to work properly with the newly created Center of mass.
Create composite
Generates a composite center of mass for two or more selected Centers of mass.
Create from rigids
Generates a Center of mass based on the selected Rigid Bodies.
Snap mesh to the center of mass
Attaches the selected Mesh to the selected center of mass.
Collision

A set of commands for working with the Interaction with Environment feature.
Add box
Creates a box-shaped collision object.
Add capsule
Creates a capsule-shaped collision object.
Add kinematic mesh
Adds a kinematic mesh collision to the selected Mesh objects. The Mesh asset with the default transform settings is used as a collider.
Also adds a collision material, if it is missing.
Delete selected
Removes the currently selected collision shape(s).
Generate by skinning
Generates a convex mesh collision behavior for the selected rigid bodies with skinned meshes.
Generate convex mesh
Adds a convex mesh collider for the selected Mesh object. The collider is generated by approximating convex decomposition on the selected Mesh, using a set of parameters that can be adjusted by the user.
Also adds a collision material, if it is missing.
Debug

Contains various debugging features.
Run tests
Performs tests for various Cascadeur features. Can be useful if you, for example, make alterations to the rigging system, and want to be sure these alterations do not introduce any issues.
Select objects by id
Selects the scene object with the diven GUID.
IK

(TODO)
MCP

Contains commands for working with Cascadeur local MCP server.
There are two items:
Start script server
Starts the local Cascadeur MCP server.
The server data is outputted to the Event log:

Stop script server
Stops Cascadeur MCP server if it is running.
Meshy

Contains commands for working with Meshy.ai service.
Available commands are:
Start Cascadeur Bridge
Starts the Meshy bridge server for importing assets from the Meshy website.
The server data is outputted to the Event log:

Stop Cascadeur Bridge
Stops the Meshy bridge server if it is running.
Quick Export

A set of commands for quickly exporting the current scene to an FBX file.
Export to default folder
Exports animation from a selected interval to a predefined folder.
Print export path
Outputs the path to the export file to the Event Log.
Reexport
Exports the scene.
Set default export
Sets the file that will be used to export the scene.
Set/Read default folder export
Allows you to set the default export folder, or to print the path to this folder.
When you select this item, you’ll see the following window:

Here, you can choose what to do:
Set allows you to define a path to the folder used for export.
Read prints a note (at the bottom right corner of the Viewport) containing the path to this export folder.
Rig Additional

A set of options for working with rig elements.
Add joint behavior
Applies Joint behavior to the selected object(s).
Batch rename
A set of option for working with the names of the scene objects (finding/replacing, removing characters, changing cases etc.).
Can work with multiple selected objects at once.
Bind additional joint
Binds additional parent to the selected Joint.
Change rigid bodies mass
Can be used to set mass for Rigid Bodies.
Correct Auto Rig Pro proto rig
Adjusts the skeletons generated by Auto Rig Pro (an add-on for Blender) so they could be used with Quick Rigging Tools.
Correct Daz Genesis8 rig
Makes improvements to the rigs of the Genesis8 DAZ Studio models, so there won't be issues when working with them.
Should be used in the Rig Mode.
Create edge
Creates an Edge between two selected Point Controllers.
Delete joint with 0 weight
Deletes Joints that are not skinned to any mesh and have no skinned Joint descendants.
Remove joint behavior
Removes Joint behavior from the selected object(s).
Separate unskinned joints
Unparents Joints that are not skinned to any mesh and have no skinned Joint descendants.
Set additional parent
Creates an additional parent (used for hierarchical selection) for one of the two selected objects.
Two objects should be selected for this feature to work.
After the option is selected, the following window will appear:
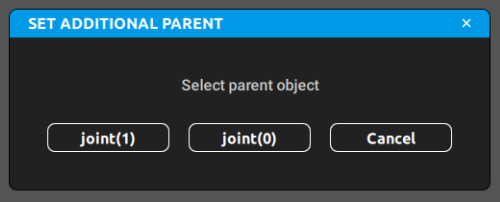
In this window, you should select the object that will be used as the additional parent for the other one.
Switch euler filter for selected
Disables Euler filter for the selected objects, i.e. the program won't automatically set objects' rotations to lowes possible values (such as 270, 630 or 990 all becoming -90).
Can be used to avoid problems in some specific cases, for example, animating full-circle rotations.
Currently, this feature doesn't work with Manipulators; only manually set values values (via Object Properties or Graph editor) are supported.
Rig Info

This set of options is used for working with Rig Info: a special kind of object used for containing all information that concerns a Cascadeur rig.
Add joints
Adds selected Joints to the selected Rig Info.
To use this option:
1. Select the Joint(s).
2. Select the Rig Info.
3. Click Add joints.
Create
Creates a new Rig Info object.
Remove
Deletes the selected Rig Info object(s).
Save json
Saves the content of the selected Rig Info to a JSON file.
Works in the same way as the Export option in the Rigging tools, but doesn’t require Rig Mode to be enabled
Print mesh info
Outputs information concerning Mesh Objects in the scene (such as vetex and polygon counts) to the Event log window.