Additive Layers (Alpha)
- Home
- Tools
- Animation Tools
- Additive Layers (Alpha)

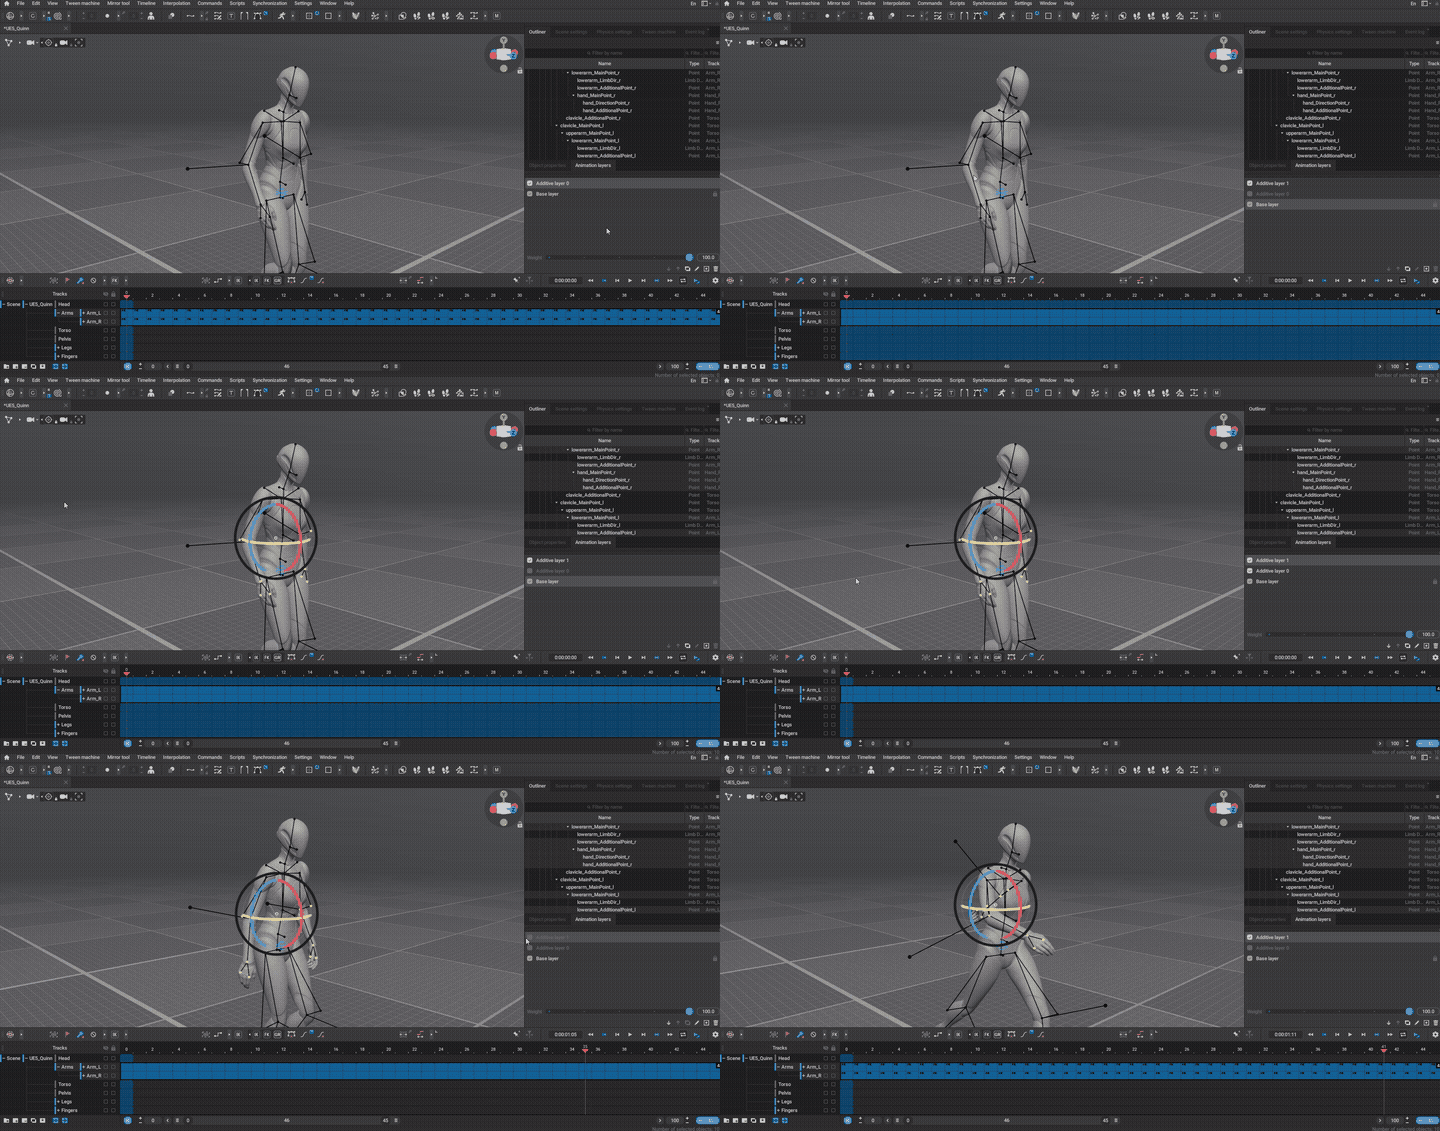
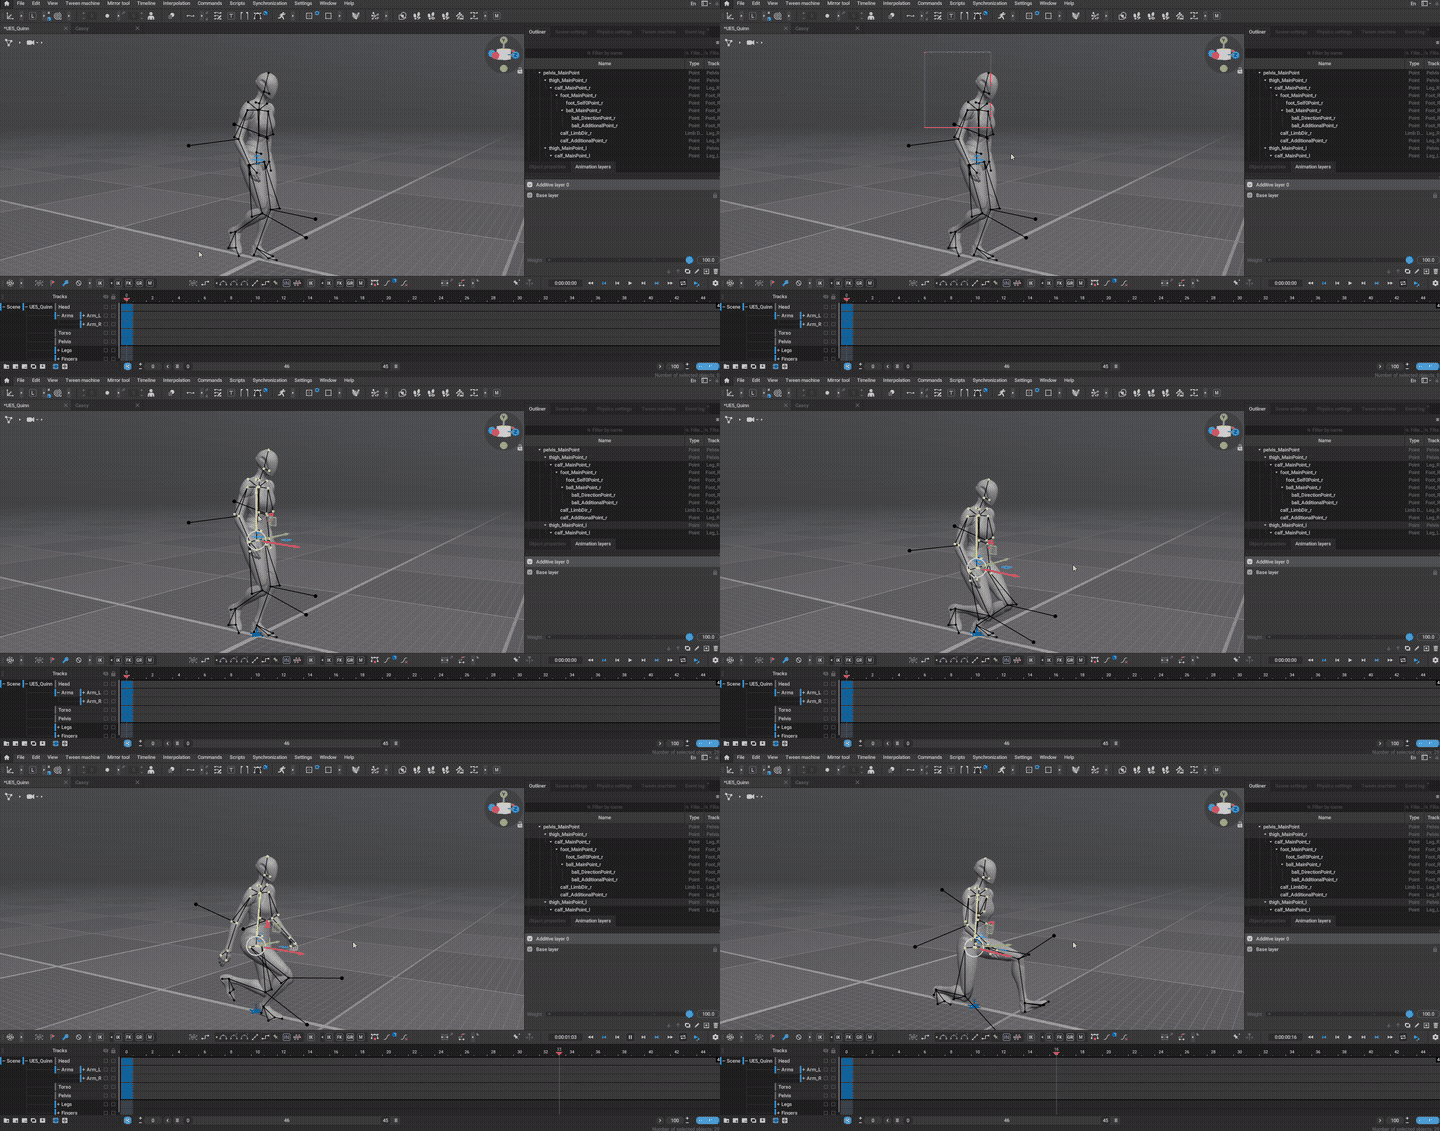
An example of using Additive Layers.
Animation Layers is a tool that allows storing animation data in 'layers' and editing animation in a scene non-destructively, without removing the original data.
Warning
This is the first iteration of the Additive Layers tool. Missing and extra features will be added in future versions and hotfixes.
Please check the Limitations section to learn more.
How Animation Layers Work in Cascadeur
Cascadeur’s Animation Layers function similarly to the way the Animation Layers work in other animation software (notably Maya).
The Base layer holds all of the primary animated data. When a new animation layer is added to the scene, it stores animation data as 'delta' - the difference between the motion on the underlying layer (which could be the base or another additive layer) and the current layer.
By changing the pose on a keyframe of an additive layer, you’re effectively adding an offset to the previous layer’s animation data. The added offset then influences the rest of the animation timeline.
You can not only add an offset to the current pose but also interpolate between the altered and unaltered keyframes, allowing you to apply changes at specific intervals along the timeline.
Accessing Animation Layers
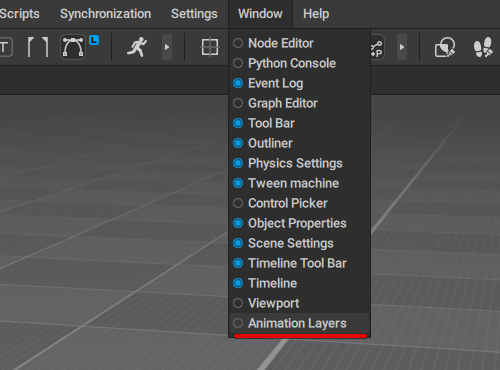
To access the tool, select Animation Layers from the Window menu:
This will open the Animation Layers window:
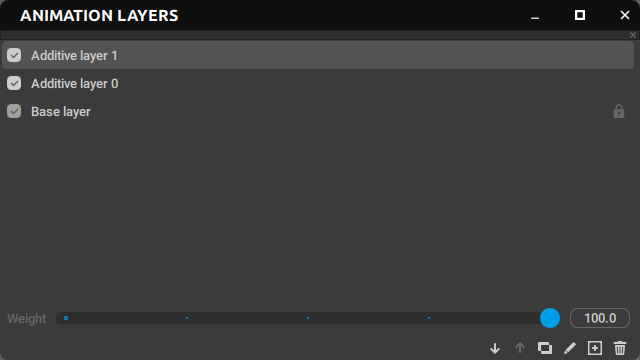
This window contains a list of Layers.
By default, there’s only the Base layer, but you can add new ones.
Interface
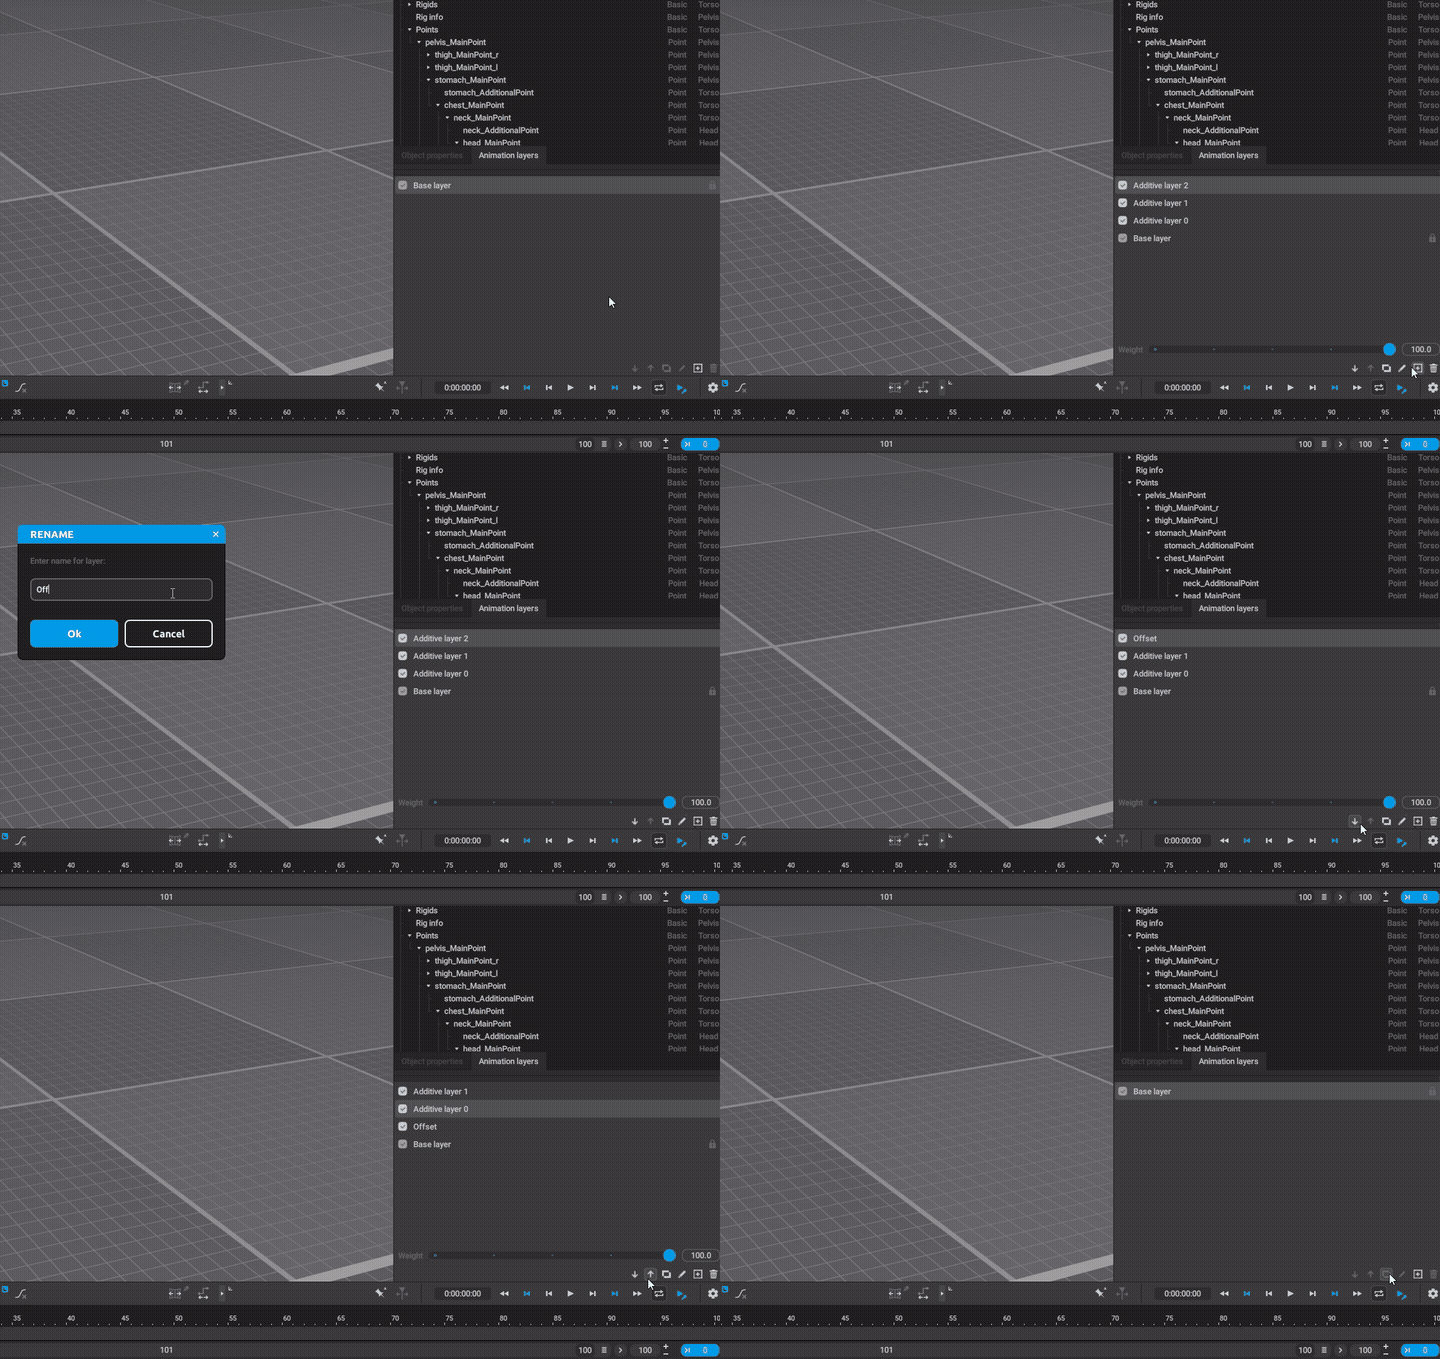
Layers are controlled by a set of tools found at the bottom of the Additive Layers window:

(1) The ‘weight’ of the layer i.e. how much it influences the animation.
(2) Moves the currently selected layer up (doesn’t work with the base layer).
(3) Moves the currently selected layer down (also doesn’t work with the base layer).
(4) Merges all existing layers to the base layer.
(5) Renames the currently selected layer.
(6) Creates a new layer.
(7) Deletes the currently selected layer (the base layer cannot be deleted).
(8) Resets the changes.
A Layer can be selected by clicking it.
Each Layer has a checkbox at the left side. Using this checkbox, you can disable or enable back the Layer and all its its animation data, effectively 'muting' its effect:
Using Animation Layers
Base Functionality
By default, each scene contains a Base Layer - the core animation data that the rest of the Animation layers “stack” on top of it. Animation Layers can be used on:
• Non-rigged transform objects (meshes, locators, joints, etc)
• Point Controllers
• Box controllers
Each animation layer individually stores all of the animation data that the regular Timeline holds, such as:
• Animated transforms of the objects in the scene
• Keyframes, interpolations and kinematics
• Animation tracks and the objects they hold
• Animation tangents
• Animated values stored in the objects
Effectively, you can manage different tracks, animated values and tangents on separate animation layers, making the animation process more modular.
You can modify an object’s motion on the animation layer by:
• Offsetting objects on frame 0, influencing the rest of the animation
• Setting single keyframes with the “base” and “altered” poses and interpolating between them
• Setting multiple keyframes in a row with the same or different poses
• Changing the kinematic type on keyframes and interpolations
Using Kinematics on Keyframes and Interpolations
In some specific cases, you’ll have to change the kinematics on specific keyframes and interpolated intervals in order to correctly apply or retain the additive animation.
By using the correct kinematic type, we can apply or retain motion in global space (IK) or in local space (FK/GR).
In general, FK and GR kinematics can be used for the following situations:
• Offsetting motion on the Arm and Foot tracks in local FK space.
• Retaining the relative orientation of the controllers when adjusting the pose of the bottom layers.
Example:
We’ve added a new additive layer and rotated the character’s upper torso forward. The expected result would have the character perform the same relative movement, but the hands are moving weirdly. Why is that?
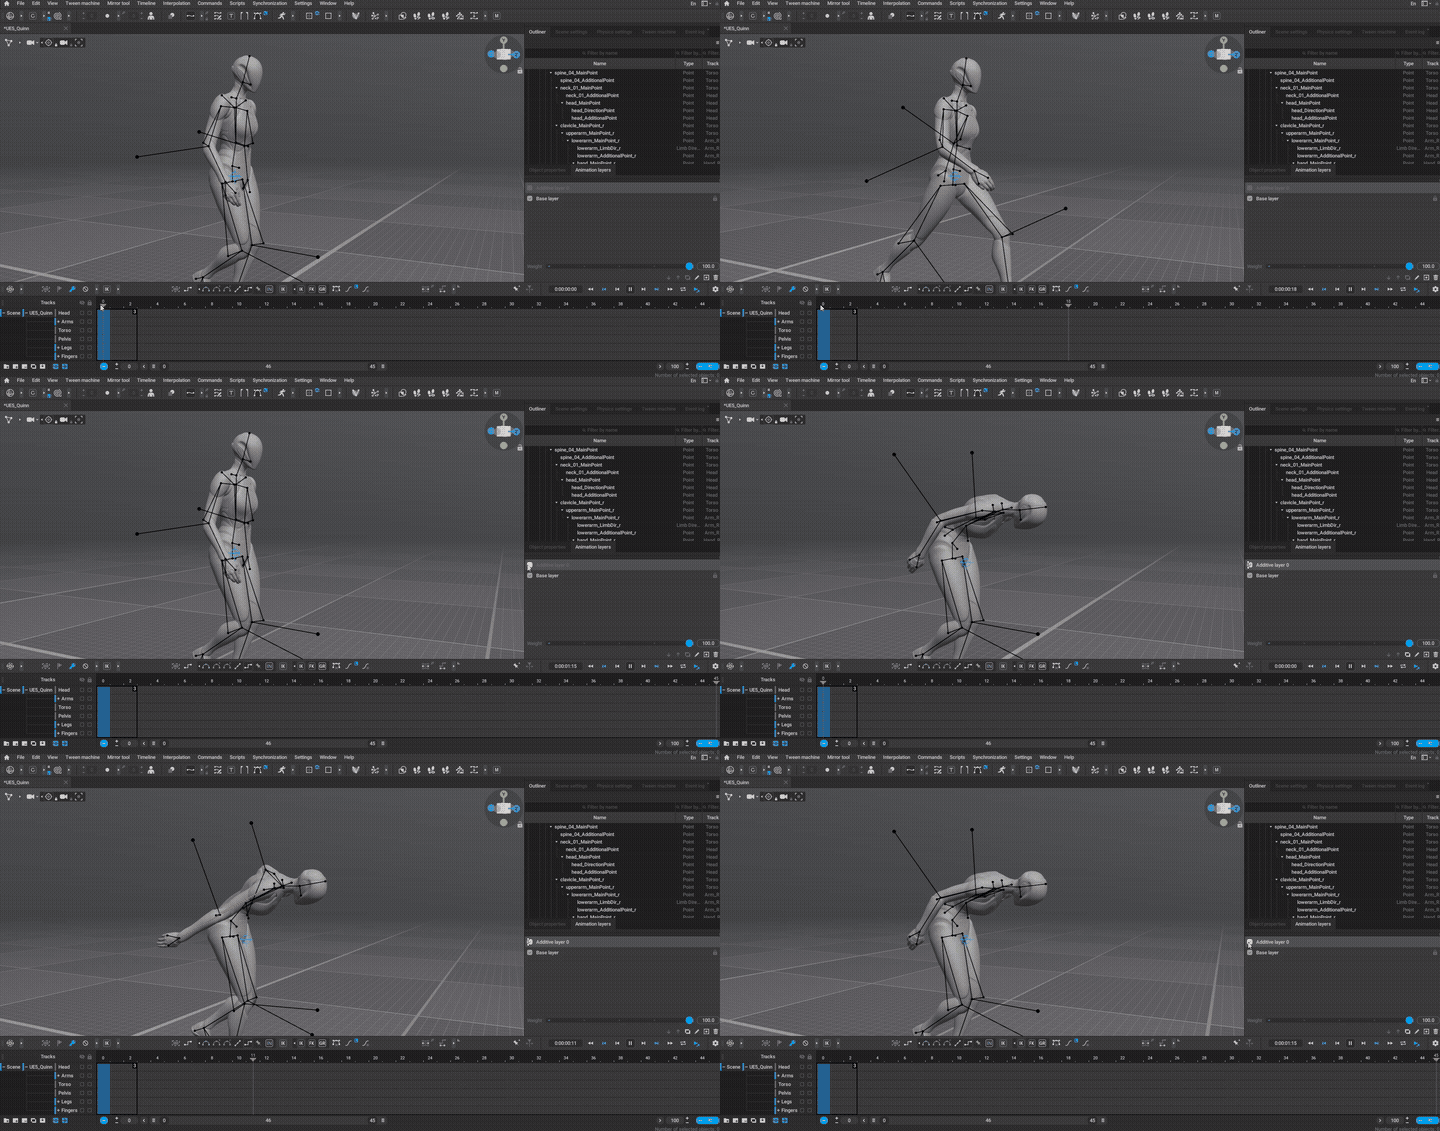
This is happening because the hands’ main point controllers are moving in global space. Since we’ve rotated the upper torso forward, we’ve also offset the hands’ global trajectory.
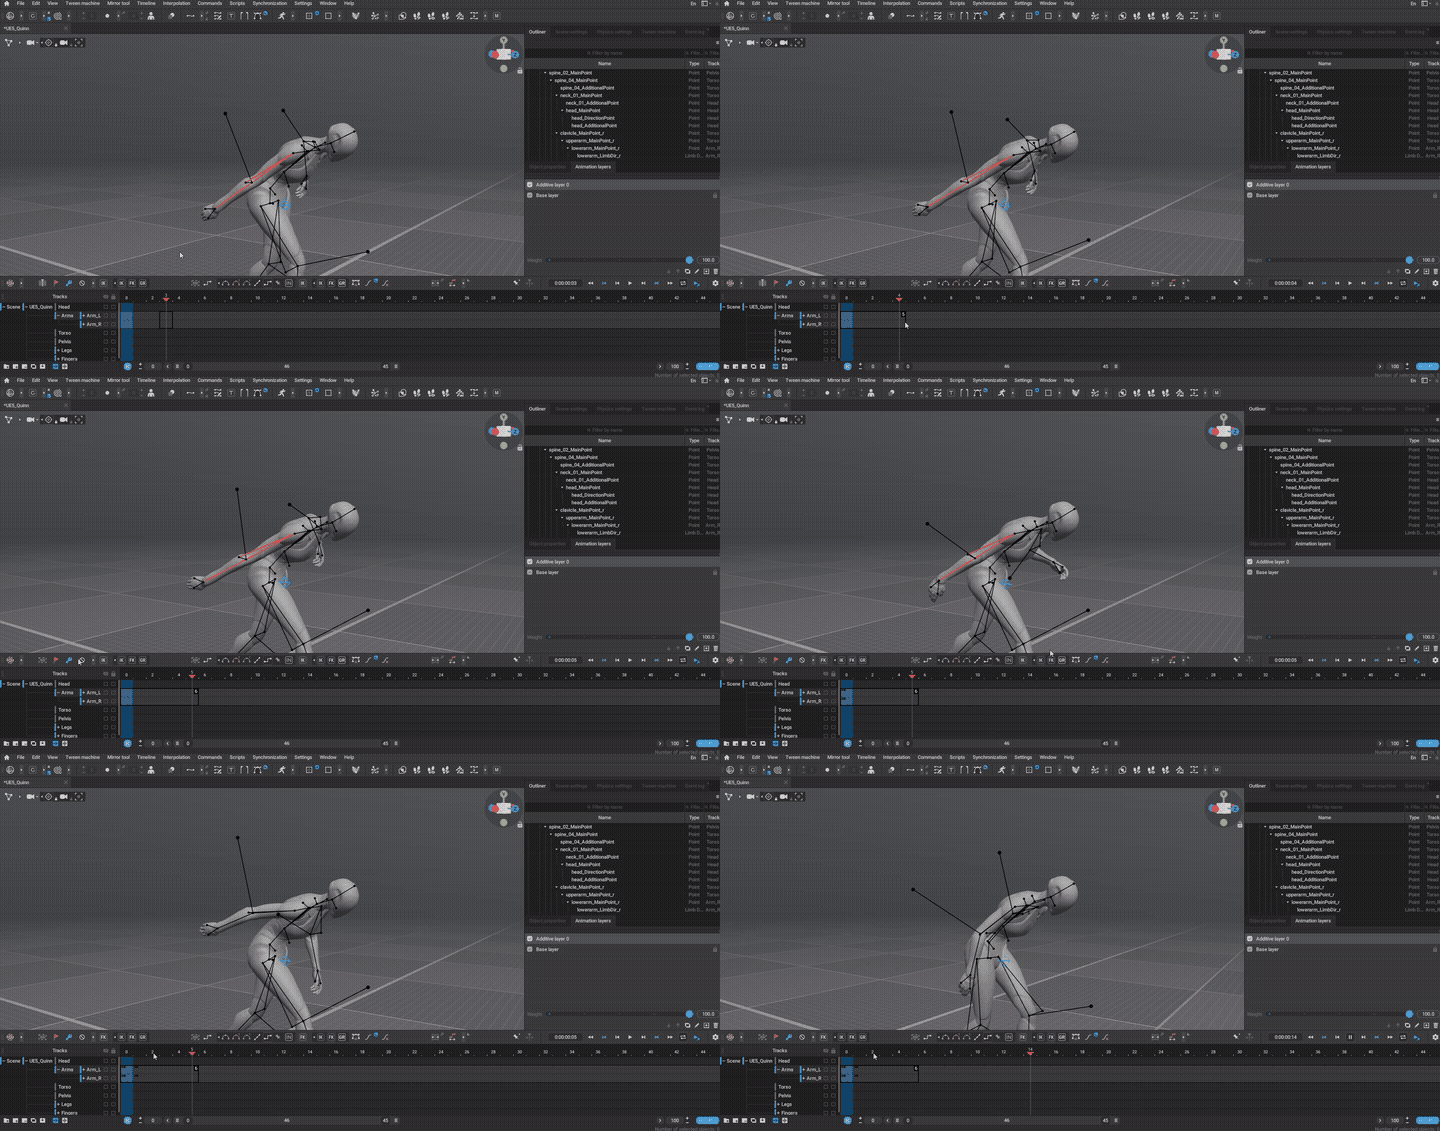
Instead, we need to keep the hand points’ trajectory relative to the upper arm. To fix this, we can change the kinematics on keyframe 0 and the Step interpolation after it to FK.
Limitations
1. The current implementation of Animation Layers is missing some functionality that’s present in other animation software, such as:
• Override layer mode*
• Reset controllers to the base layer transforms*
• Animatable layer weight*
• Merging only the selected animation layers
• Locking animation layers
• Linking/Parenting animation layers
• Import/Export animation layers
• Duplicate animation layers
*These features should get added in future versions.
2. AI Interpolation (Inbetweening) can be used only on the Base Layer. Additive layers can then be applied to the generated motion.
3. Rig mode can’t be entered unless you merge all layers into the base layer.
4. Trajectory blending for IK-FK-GR kinematics doesn’t work that well on the additive layers. You might need to use only the IK kinematics and/or set extra keys on the tracks to better guide the interpolation.
5. It’s not possible to see the exact offset value of the selected objects/controllers.
Examples
In this section, we’ll demonstrate how to apply Animation Layers on some practical examples. We’ll use one of the sample animations in Unreal Engine’s Third-Person template - MF_Unarmed_Walk_Fwd.
Extracting motion to a layer
Cascadeur doesn’t have a dedicated button for “extracting” the motion of the specific controllers to a new layer. So we’ll have to do it manually.
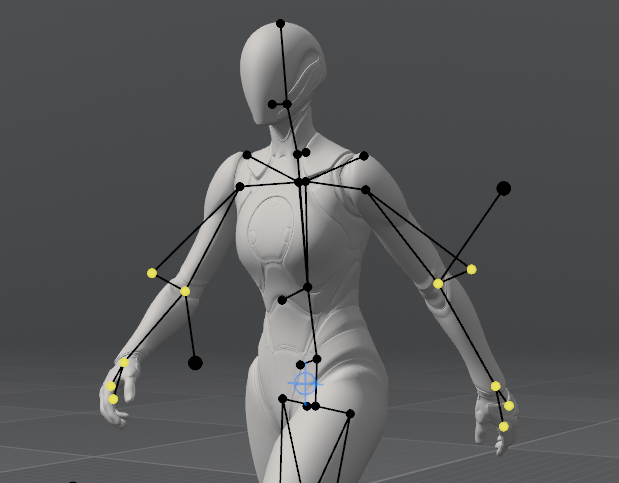
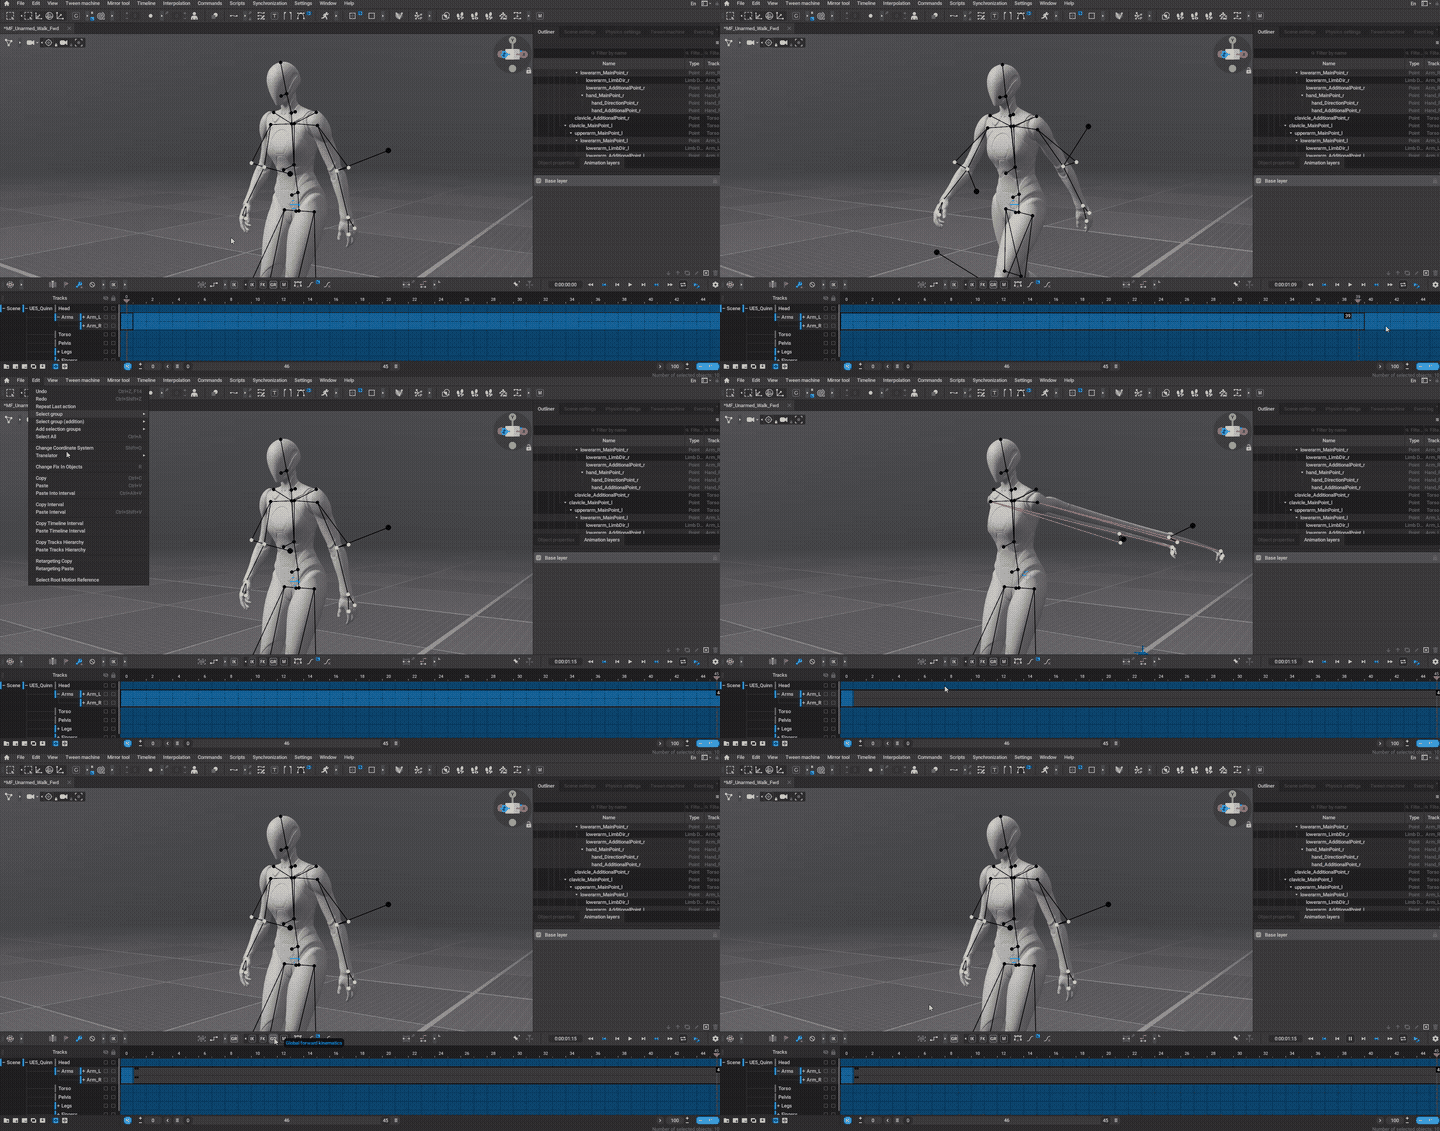
1. Select the point controllers that you want to extract the motion from. For this example, we’ll select the controllers belonging to the Arm tracks - elbow and hand point controllers:
2. Select the whole animated timeline on the tracks the selected point controllers belong to (in our case, it’s Arm_L and Arm_R) and remove all of the keyframes on it by pressing Alt+F one-two times.
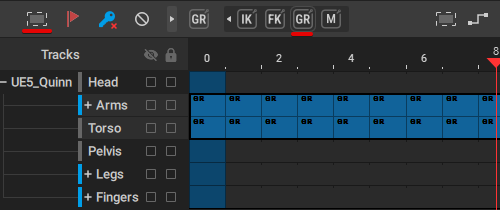
Then, change the interpolated kinematics to GR on the same tracks - this will keep the controllers' global rotation.
Note
If you intend to merge the layers later, add a keyframe at the last frame of the removed interval. Without a keyframe, the layers won’t merge properly.
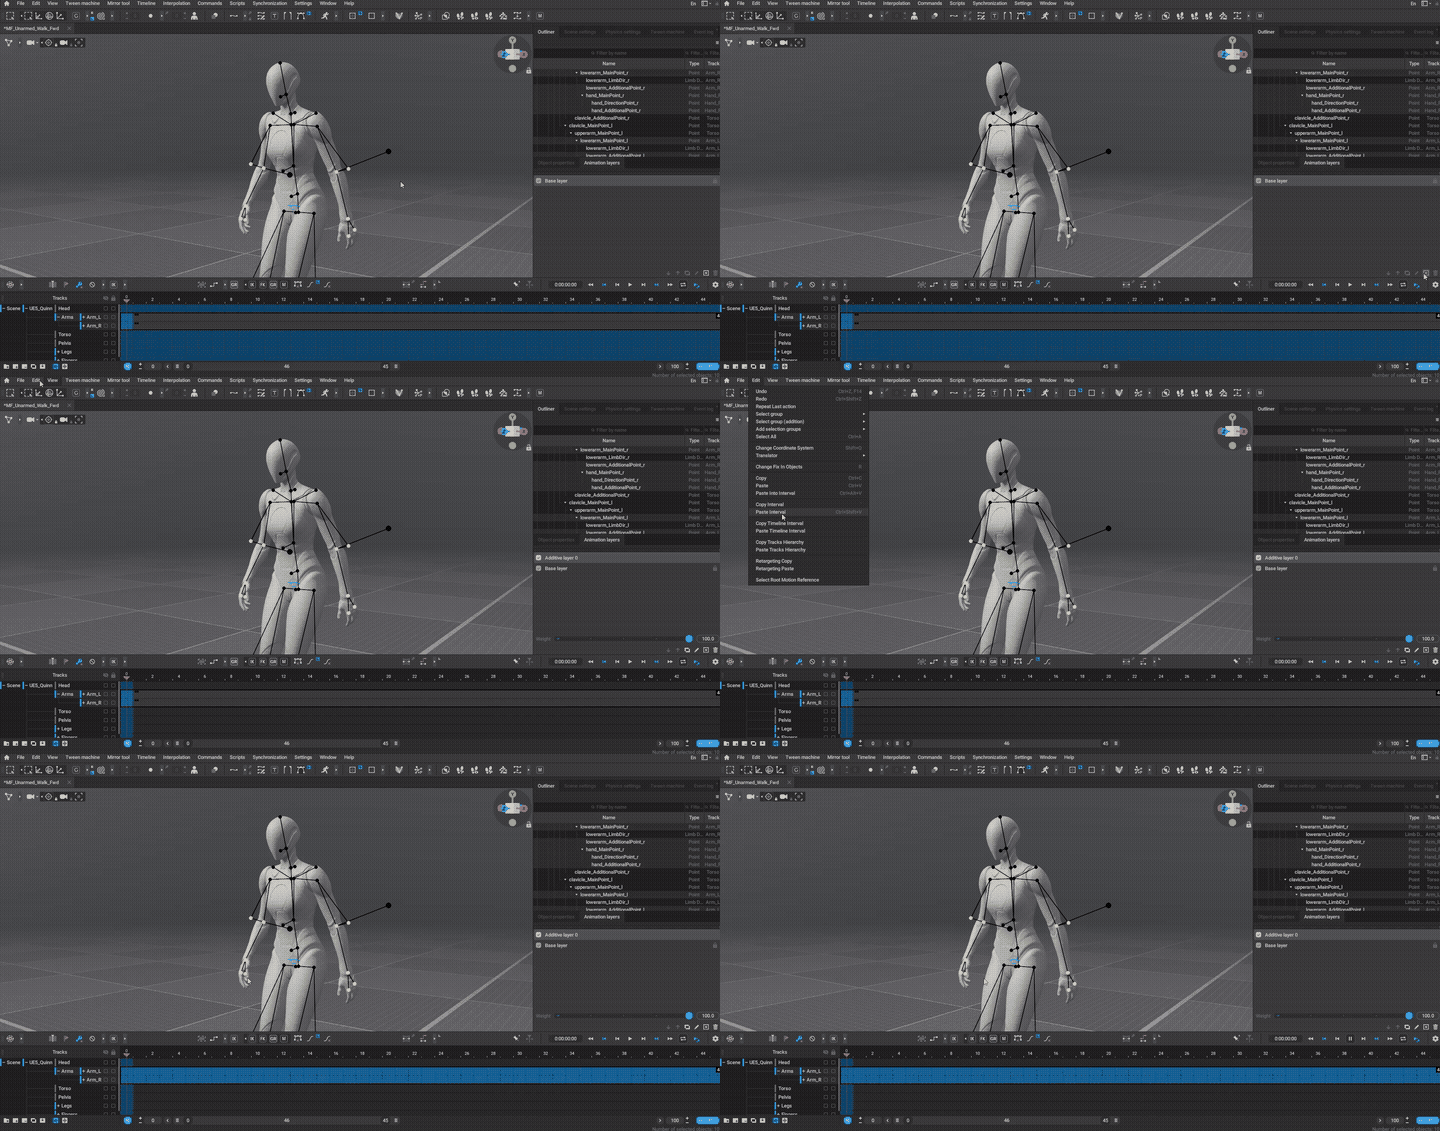
3. Create a new additive layer, then paste the copied motion to the same tracks and selected interval.
4. (Optional) Change the kinematics on all keyframes in the additive layer to FK or GR. This will help keep the motion intact if you decide to edit it on the lower tracks or extract motion from limbs further down the hierarchy:
Note
You can use this technique for animating using a 'layered animation method', in which you animate the movement of different body parts on separate axes.
Subtractive Motion
In some cases, you’d want to reduce the motion intensity. Although Animation Layers can only use Additive layers, we can reduce motion through a clever use of the 'layer weight' functionality.
1. Create the first additive layer. Then, select the controllers from which you want to extract the motion. For this example, we’ll again select the controllers belonging to the Arm tracks.
Note
If the selected target controllers are set up in separate hierarchies and don’t share a common parent controller (e.g., Arm_L and Arm_R), it’s better to perform the steps below for each hierarchy separately.
2. Next, we’ll need to stabilize the movement on the first layer of the selected controllers by copying and pasting their transforms from frame 0 across all of the latter frames. You can approach this with 2 similar methods:
• If you want to keep their transforms in local space, switch to the Local orientation. Copy (Ctrl+C) the local transforms from frame 0, key-fill (Alt+F) the rest of the timeline, and paste (Ctrl+Alt+V) the copied transforms into the key-filled interval.
• If you want to keep the arm’s global orientation, check which of the selected controllers is further up the hierarchy chain and put the pivot (right-click and select 'Set pivot') onto this selected controller’s parent controller. For example, among the controllers on the Arm_L track, lowerarm_MainPoint_l is higher up the chain. So we’ll put the pivot on its parent controller - upperarm_MainPoint_l.
Then switch to the Global orientation and turn on Relative to pivot mode (in the top-left corner, near the Global-Local orientation switcher).
Copy (Ctrl+C) the global transforms relative to the pivot, key-fill (Alt+F) the rest of the timeline, and paste (Ctrl+Alt+V) the copied transforms into the key-filled interval.
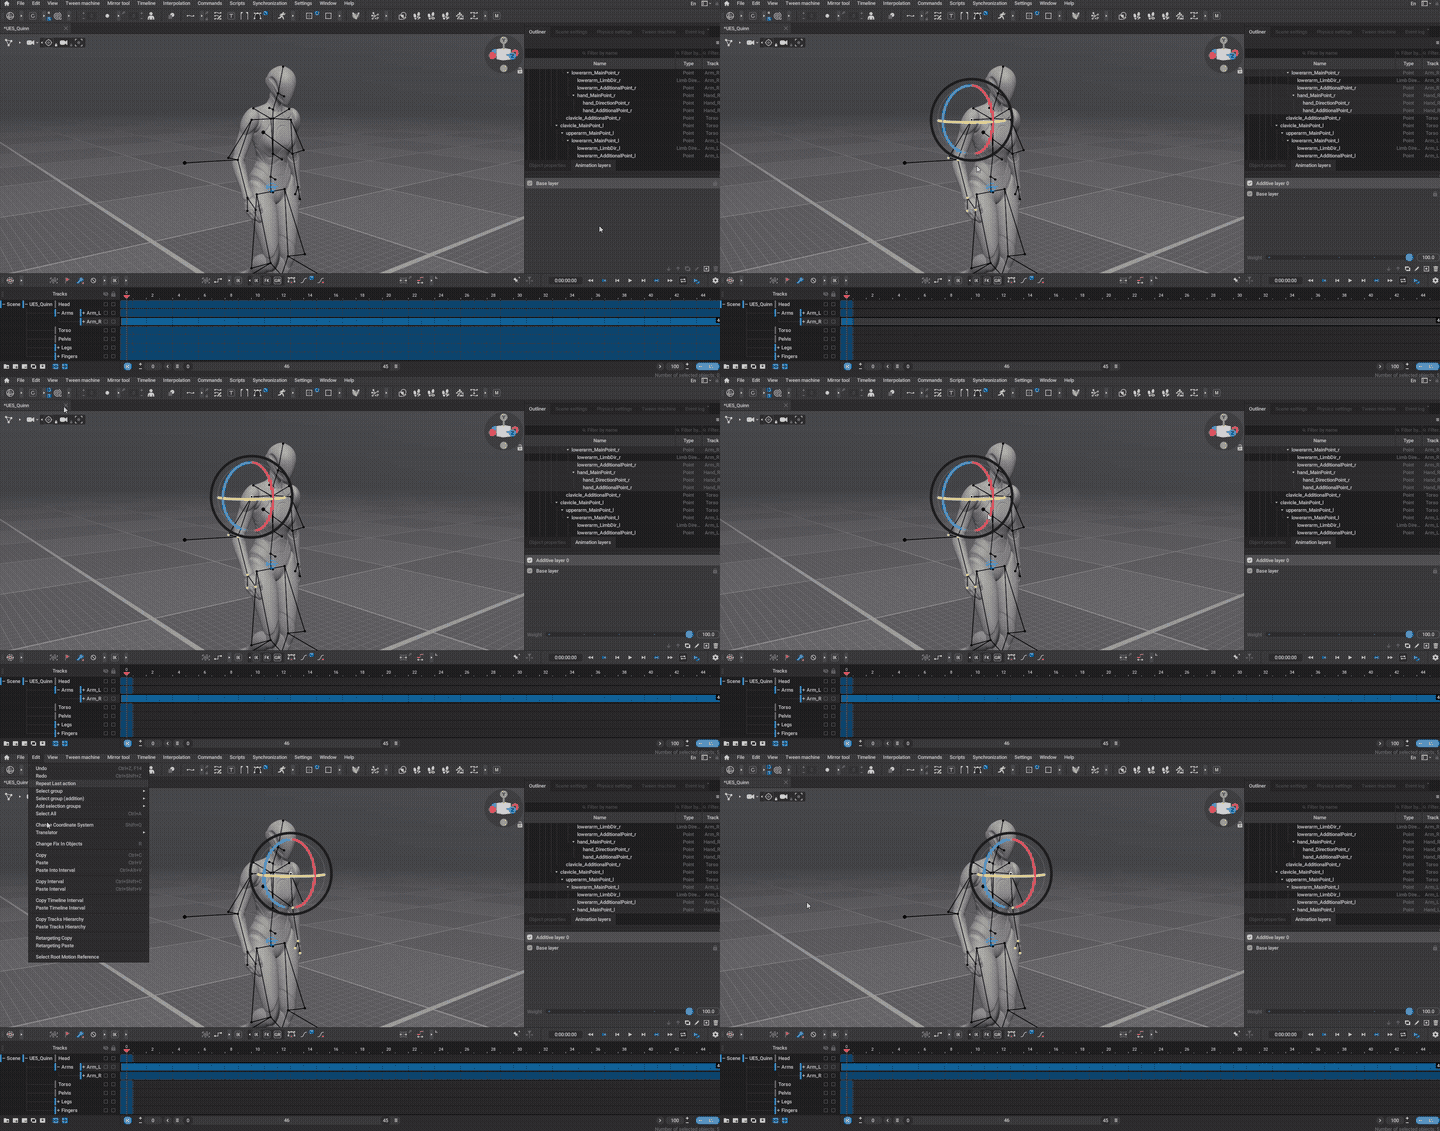
By adjusting the layer weight slider on this subtractive layer, you can control the blending state between the base and 'stabilized' motion.
Extra Additive Motion
In other cases, you may want to increase the motion intensity even more. At the moment, 'layer weight' functionality can go up to 100% strength, but there’s a way to overcome this limitation.
1. Do all of the steps in the Subtractive Motion section - we’ll need the motion subtracted to utilize the delta difference between the 'stabilized' and base motion.
2. Create a second additive layer. Turn off the first subtractive layer.
3. Switch to the base layer, then copy the animation from the same controllers that you’ve interacted with before.
4. Turn on the first subtractive layer. Paste the copied animation into the second additive layer.
5. Change the kinematics on all keyframes on the second additive layer to FK. Turn off the first subtractive layer.
By adjusting the layer weight slider on the extra additive layer, you can control the amount of added motion applied to the base animation.