Inbetweening
- Home
- Tools
- Animation Tools
- Inbetweening
Inbetweening tool generates animation on the selected Timeline interval, based on the poses stored in the interval’s keyframes.
Note
Before version 2025.3, the Inbetweening tool was applied via a dedicated “Inbetweening” button on the Toolbar.
Starting from version 2025.3, the Inbetweening tool is used as a type of interpolation or through an “Inbetweening Start” button in the Timeline Menu.
To use Inbetweening:
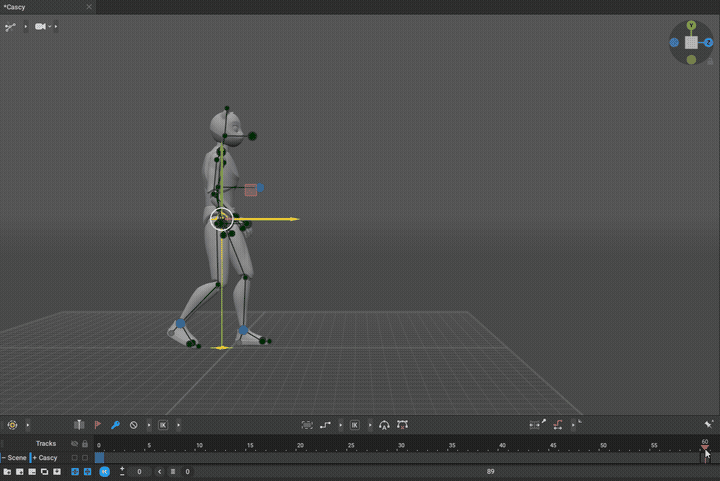
1. Select an interval on the Timeline:

This interval should include at least two keyframes.The distance between 2 nearest keyframes should not be longer than 120 frames (but the the total length of the selected interval is not limited).
2. Click the "AI" button in the Interpolation mode selector:

Or click the “Inbetweening Start” button in the Timeline Menu:
After this, the tool will generate an animation based on the poses set up in the keyframes on the selected interval.
AI interpolation can be applied not only to standalone poses, but also incorporated into your “manually crafted” animation with mixed keyframe placement and baked animation.
Just like other interpolation types, AI interpolation is also influenced by the kinematic type active on the interpolated interval. You can apply different kinematic types (IK, FK, GR) to the AI-interpolated intervals to improve the visual quality of the generated motion.
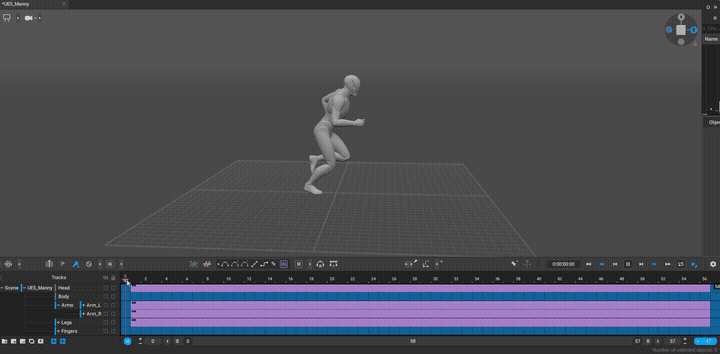
An example of AI interpolation applied to a baked animation. Body and Finger animation tracks have baked animation data, but the Legs, Arms, and Head rely only on the key poses at the start and end of the animation.
In this example, all AI interpolated intervals have the GR kinematics applied, to minimize the influence of the parent controllers (clavicles and thighs) on the generated motion in the arms and legs.

How It Works
Instead of interpolating between the nearest keyframes, Inbetweening “tries to guess” the poses between the keyframes of the selected interval, based on the animation data it was trained on. The generated animation is predicted based on the key poses, the timing and quantity of keyframes, and the animation style (e.g., walking, running, jumping, etc.).
Animations produced by this tool are sourced from motion capture data produced for Nekki’s game projects and Cascadeur. Generation itself is performed locally on your computer.
Animation generated by Inbetweening produces frames with the AI type of interpolation: essentially a sequence of frames with each frame containing a pose that’s context-dependent on the nearby keyframed poses.
This type of interpolation is similar to Fixed interpolation, in the sense that it contains “soft-baked” animation data.
The keyframes you selected, however, are preserved with no changes.
How to Use It
Although Inbetweening generates poses automatically, you have a lot of options to influence the result and make it as close to your idea as it is possible.
The motion is generated to fully coincide with keyframed poses.
This means that by changing these poses, you can alter the motion that results from them.
The motion is also greatly influenced by the timing and the distance between keyframes.
By moving the key on the Timeline - and by moving the character in the scene itself - you can get different types of motion even out of the same key poses. For example, when the distance is long and frames are few, the character will move faster.
You can also work in an iterative manner: by adding new keys based on the generated poses, making changes to them and re-generating the motion.
The motion produced by Inbetweening is not always physically accurate. So a good choice would be to use it in combination with Physical Assistant and other physics-based tools.
Note
If Inbetweening fails to produce an animation you need (this often happens with long/complex motions), a solution might be to separate the animation into parts and generate them one by one.
And if you only select a few - or even one - Animation Tracks, Inbetweening will produce animation only for these Tracks.
This can be used for mixing Inbetweening with hand-made animation. See the Kinematics in Cascadeur page to learn more about it.
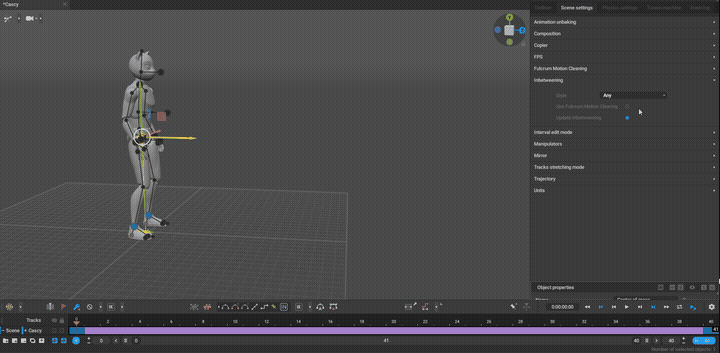
Settings
AI descriptionIn the Timeline context menu, you can apply “motion styles” to the intervals with the “AI” interpolation type. Each motion style influences the motion generation to a degree.

Style
Just like the “AI description” settings, the Style option controls the kind of motion (like walking or running) generated by the tool. But it’s used only with the “Inbetweening Start” button.
This setting is available in the Timeline menu, right under the Inbetweening Start button:

Note
“AI description” and “Style” options serve as more of a recommendation to the tool. It influences the kind of motion the tool would produce, but doesn't strictly dictate it.
For better control over the results, you should produce better key poses and include as many keyframes with the key poses as necessary to define the character's actions.
Use Fulcrum Motion Cleaning
Turned on by default
Similar to the Fulcrum Motion Cleaning tool, this setting stabilizes the feet sliding in the generated motion.
When the setting is on, the foot sliding in the generated motion is automatically cleaned up.
When the setting is off, the generated motion is produced as is.
Note
The setting may produce motion with overstretched limbs in some specific cases. To fix this, you can set up more keyframes to better guide the Inbetween tool.
Update Inbetweening
Turned on by default
This setting updates the motion in the intervals with the applied “AI” interpolation when the user makes changes to the poses, keyframe composition, or timing on those intervals.
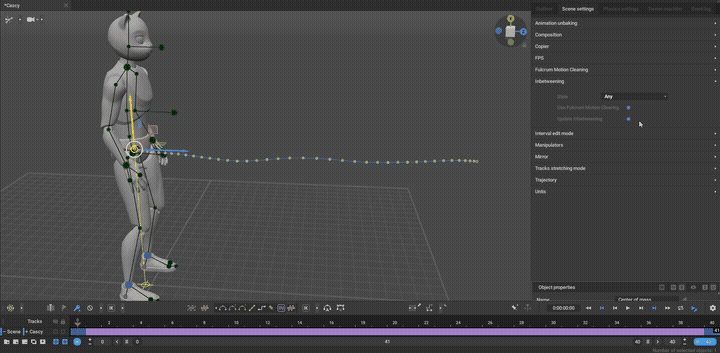
Visual example of the difference between making changes to the existing animation with the “Update Inbetweening” setting turned on and off.
Usage with other tools
You can continue editing and polishing the generation motion through the use of the following tools:
1. Animation Unbaking - to produce a keyframed, interpolated animation from the generated motion.
2. Fulcrum Motion Cleaning - to further clean up the foot sliding, if needed.
3. AutoPhysics - to improve the physical accuracy of your animation.
Limitations
When you work with Inbetweening and AI interpolation, keep in mind that it currently has some limitations:
● It only works for humanoid characters.
● It requires a standard Cascadeur rig that supports AutoPosing (such a rig can be easily made with the Quick Rigging Tool)
● Currently, the tool can semi-successfully generate locomotion animations (walk, run, jump, etc) and some limited interaction animations (acrobatic moves, combat moves). It’s not capable of producing certain types of motions, such as:
- Non-ground movement, such as flying, hovering, swimming, etc.
- Movement with altitude change, such as climbing, sliding down, ascending/descending stairs, etc.
- Movement and actions with props, such as guns, melee weapons, tools, etc.
● Currently, the generated motion can’t retain the specific position of controllers relative to their parent controller or other controllers. For example, if your animation has the character walking with their hands on their hips, the generated motion won’t have the hands stay on the hips.
● Currently, the generated motion takes into consideration only the poses and keyframes of the character itself. It doesn’t take into account the poses and movement of other characters in the scene, as well as the environment and collider objects in the scene.
● At the moment, Inbetweening can only generate motion on top of the scene's ground plane. It can't generate motion below or above the ground plane. This includes the use of collidable objects (e.g., a character walking on top of a large box mesh with a collider applied to it) - Inbetweening will simply ignore them.
● Inbetweening works separately from physics tools. Because of this, animations produced by it might not be physically accurate.
We continue to improve the tool and expand the available motion library.