Animation Tracks
- Home
- Tools
- Timeline Tools
- Animation Tracks
To make working with scene objects more convenient, the Timeline can be separated into several Animation Tracks. A scene always includes the main track called Scene, which contains every object. However, it is possible to create additional tracks and move scene objects to them.
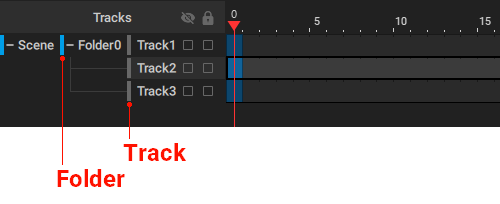
Animation Tracks can be viewed at the left side of the Timeline, on the Tracks panel.
There, Tracks are represented by gray vertical bars.
There are also Folders that are used to store Tracks and organize them into hierarchical structures. Folders are represented by blue vertical bars:
Note
When a Folder is closed and tracks inside of it are not visible, frames with Mixed interpolation type are colored magenta.
Why Use Animation Tracks
In other 3D software (Maya, Blender, etc.), each object's keyable attributes and properties are stored in their separate channels. The timeline is used to control and visualize the general keyframe timing, but the user can still edit the keyframe timings of the individual attribute values in the specialized menus (Graph Editor, Dope Sheet, etc.).
Essentially, the user can access and edit dozens of channels belonging to various attributes and properties. For example, objects' Local Transforms - Translation, Rotation, Scale - are each broken down into three separate keyable channels, one for each axis, which the user can key separately.
Cascadeur has the same general timeline, with each object storing a set of keyable and non-keyable properties. But there are some differences in the way Cascadeur handles keyframe animation:
1) Other DCCs sort each object's properties into their separate channels, while Cascadeur sorts all objects, with all of their underlying properties, into Cascadeur's version of "channels" - Animation Tracks.
2) In other DCCs, each object's attribute can be keyed on its separate channel. In Cascadeur, when the user sets a key on a specific Animation Track, all keyable properties of the objects belonging to that Animation Track are keyed.
3) In other DCCs, each attribute is automatically assigned to one channel. In Cascadeur, the Animation Tracks that the objects are "sorted into" are either automatically created during rigging with the Quick Rigging Tool or need to be created manually.
4) Other DCCs rely on the Graph Editor for keying and editing interpolated curves between the keyframes. In Cascadeur, the user can set keys and change interpolations between them on the general timeline, without requiring the use of the Graph Editor.

Visual example of differences in the approach to keyframed animation between Cascadeur and other DCC software.
Ultimately, Cascadeur's Animation Tracks provide a more generalized approach to keyframed animation, enabling users to animate groups of objects rather than individual attributes.
To make the animation process easier, the user can edit Animation Tracks - create new ones, assign objects (e.g, rig controllers) to them, delete, and merge. Some examples of this would be:
- If your character model has a tail, you can assign the tail's joints to a new Animation Track and create rig controllers for it. The created rig controllers will be assigned to the newly created Track, and you'll be able to animate them separately from the other objects.
- If you need to animate some objects separately (e.g, root joint, elbow LimbDirection controller, individual fingers, etc.), you can select these objects and create a new Animation Track for them.
Selecting Tracks
To select a Track, simply click it on the Tracks panel.
To select objects contained on a track, double-click it:
And if you select an object, the track containing it will be selected as well.
Note
Double-clicking a Track would only select objects that could be selected under the current Edit Mode.To select all objects on the Track, hold Alt while double-clicking it.
If you click a Track while holding Ctrl, this Track will be added to selection.
And if you click a Track while holding Shift, this will add to selection every Track between this and the currently selected one.
If you have an interval selected on one Track, clicking another Track while holding Ctrl would select the same interval on that track.
Objects on different tracks can be animated independently, i.e. each track can contain different sets of key frames and different interpolation settings.
Moving and Rearranging
To move an Animation Track:
1. Point it on the Tracks panel.
2. Hold the Left Mouse Button.
3. Drag the Track to a new position:
Note
Dragging one Track on top of the other will create a Folder (see below) on this other track; the Track you’ve been dragging will be placed inside this folder.
Renaming
To rename a Track:
1. Click its title with the Right Mouse Button.
2. Enter a new title.
3. Press Enter.
Working with Tracks
To work with Animation Tracks, there is a dedicated set of buttons on the Timeline:
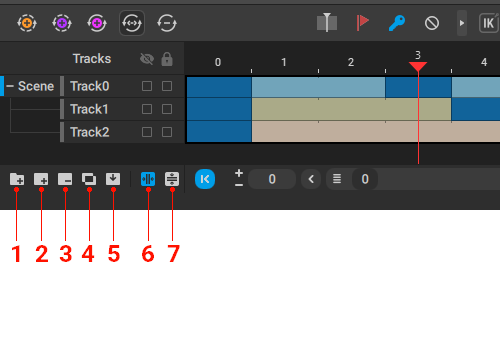
1. Add Folder
Creates a new Folder - an entity that is attached to an Animation Track and can store other Tracks in it. Folders are used to organize Tracks into hierarchical structures.
Also creates a new Track placed inside the Folder.
2. Add Track
Creates a new Animation Track. All currently selected objects are placed on this Track.
3. Remove Track
Deletes the currently selected Animation Track.
Tracks that have objects on them cannot be deleted.
4. Merge Tracks
Combines all the currently selected Tracks into one Track; this new Track would contain all objects from the merged Tracks.
This way you can remove Tracks without losing their content.
5. Add Objects to Track
Adds the currently selected scene objects to the currently selected Track.
The last two buttons control how the Tracks panel is scaled:
6. Automatically adjust tracks width
If this is enabled, the length of the Track panel is automatically scaled to fit the titles of the Tracks.
Enabled by default.
As shown in the example above, the option is automatically disabled if you scale the panel manually.
7. Automatically adjust tracks height
Same as above, but for the vertical size of the panel.
Disabled by default.
Locking and Hiding

You can also hide (1) and lock (2) Tracks by clicking checkboxes near their names.
If a track is hidden, objects it contains will not be visible in the scene.
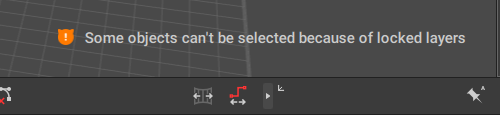
If a track is locked, you won’t be able to select objects in it in the Viewport.
If you double-click a locked track, you’ll get this error message:
Copying and Pasting Tracks
Animation Tracks and Folders attached to them can also be copied and pasted, much like keyframes and intervals.
To do this:
1. Select several Tracks on the Tracks panel.
2. Select Copy Tracks Hierarchy from the Edit menu.
3. Go to the other scene
4. Select Edit → Paste Tracks Hierarchy.
Then, the copied Tracks and Folders will be transferred to the new scene.
Keep in mind, though, that copied Tracks are always pasted to the root of the Tracks hierarchy, regardless of their position in the hierarchy.
Note
Normally, this function only copies the Tracks, and not the objects associated with them, so the pasted Tracks will be empty.
But if you select scene objects and then copy Tracks to a new scene - then in that new scene objects with the same names will be placed on the pasted Tracks; objects with different names won’t be affected.
Mixing Kinematics
Different types of Kinematics can be used for different parts of the rig independently from one another.
For this, said parts whould be placed on different Tracks.
Cascadeur sample scenes come with a necessary setup.
The same is true for rigs made using the Quick Rigging Tool.
If you, however, create your rig by hand (when you need it to have non-standard structure, for example), you'll need to manually distribute the parts to appropriate Tracks.
Simply putting Point Controllers on the different tracks might lead to the Edges being distorted during animation:
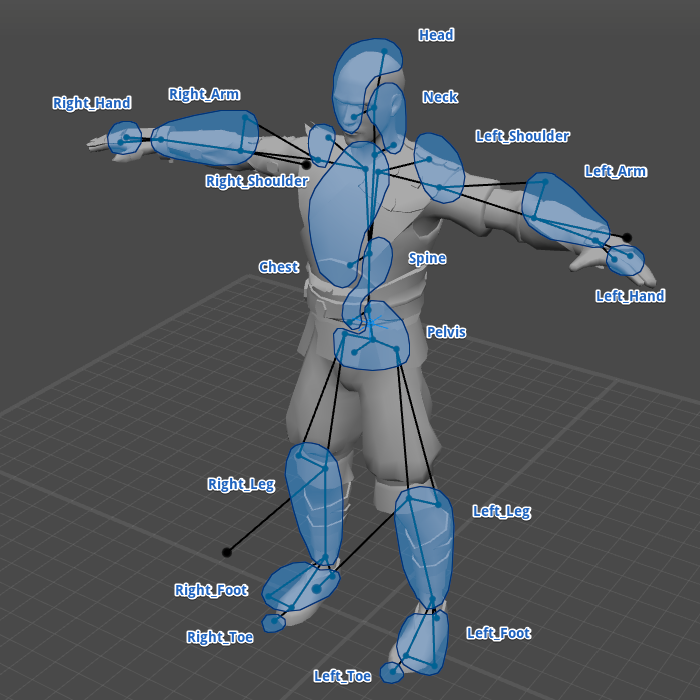
To avoid this, you'll need to distribute Points in a specific order. The following image shows an example of such order: