Import from Daz Studio
- Home
- Getting Started
- Import FBX/DAE
- Import from Daz Studio
Warning
This page is intended for users who already have some experience with rigging in Cascadeur.
To learn the basics of creating rigs, check out our tutorials.
To learn more about rigging and rigs in general, see the Rig section of the manual.
The process of importing Daz Studio models to Cascadeur is similar to the regular import process, but with some differences.
Preparing the figure for export in Daz Studio
If you want to export a character figure from Daz Studio to Cascadeur, there are several steps that you need to overlook, in order to guarantee a successful figure export:
1. Correcting the foot placement (optional)
2. Setting up the correct export settings
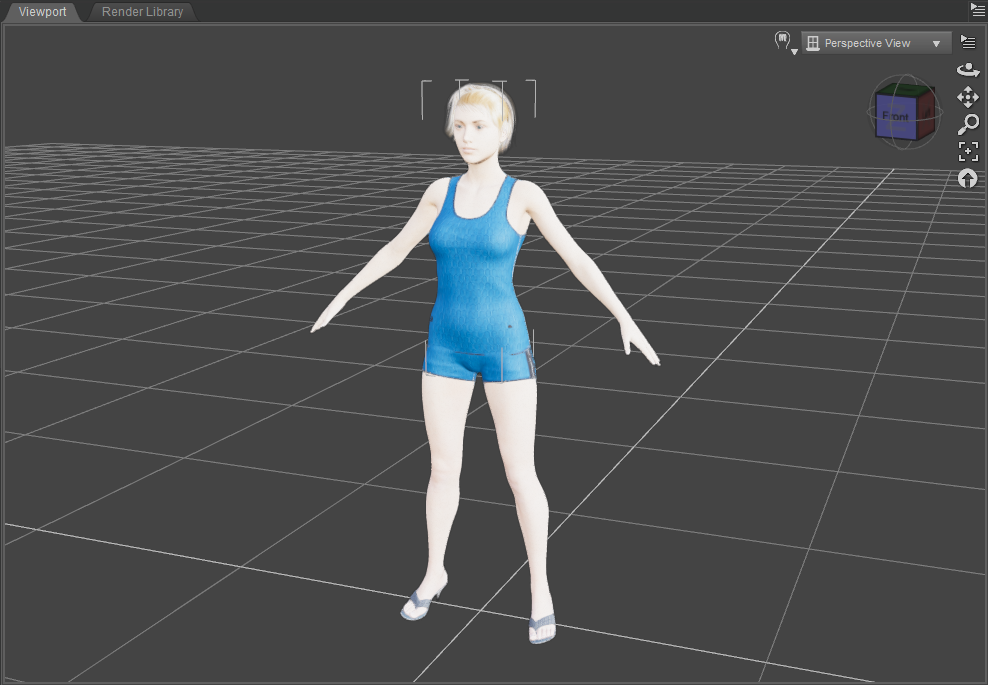
A base Genesis8 figure, wearing simple clothes and a pair of sandals with heels.
Taking these preparational steps will improve your user experience with using Cascadeur and Cascadeur’s Autoposing tool.
Correcting the foot placement
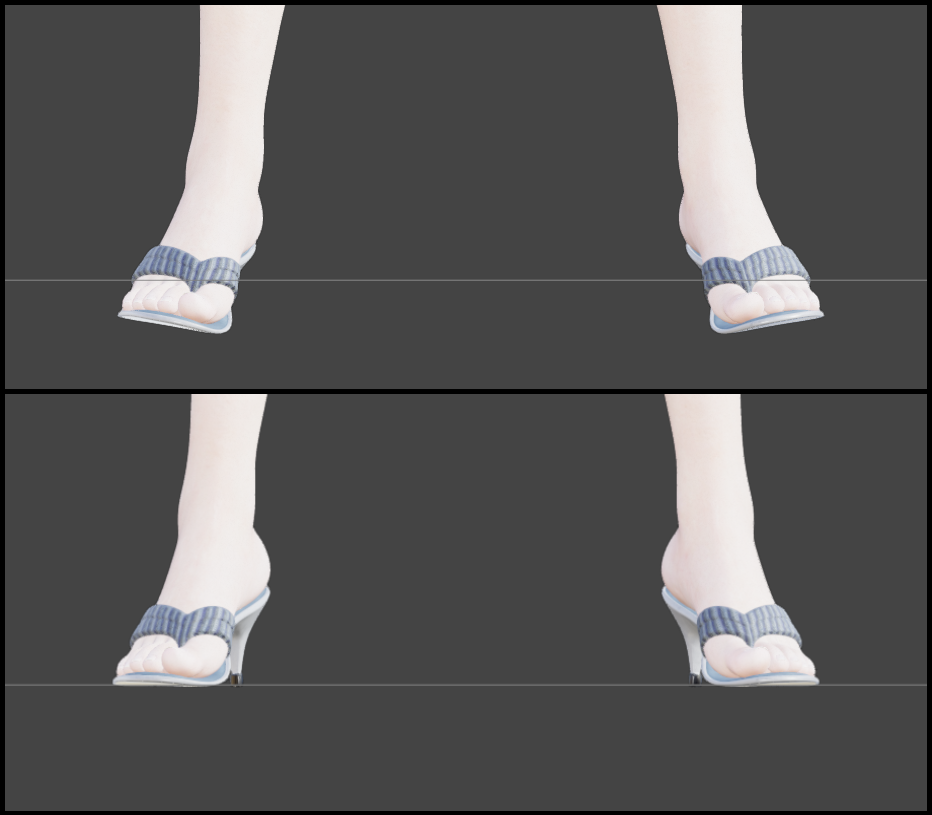
After you put the shoes on your Daz character, the bare feet that were previously standing parallel to the ground now may not be aligned with it.We’ll fix it inside the Daz Studio by adjusting the rotation of each foot and the position of the character from the ground plane.
Base and corrected foot positioning.
In Daz Studio, switch to the Universal Tool and select one of the figure's feet in the viewport window.
In the Parameters tab, locate the Rotation values - Bend, Side-Side, and Twist - and adjust them accordingly, so that the sole of the shoe is standing parallel to the ground plane. Alternatively, you can use the foot’s Pose Controls to adjust its rotation using the expression sliders.
After you’re done with one foot, mirror the other foot’s Rotation values accordingly.
Then, in the Scene tab, select the Hip joint and adjust its Y Translate value to make the character stand above the ground plane.
Setting up the correct export settings
There are some specific export settings that you need to take notice of:
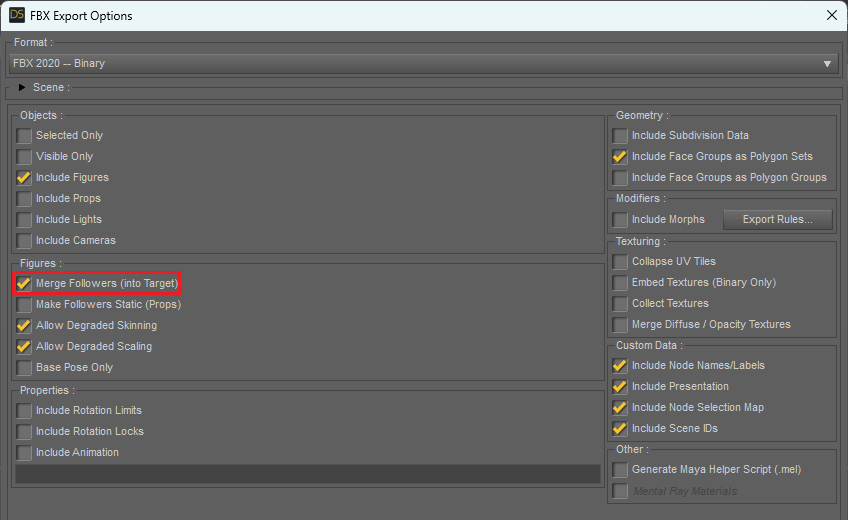
Merge Followers (into Target) - an important setting that has to be turned on. If it’s turned off, the exported figure will contain multiple copies of the base skeleton hierarchy, each one generated for every character and clothing mesh. Turning it on parents each character and clothing mesh to the base skeleton hierarchy.
Include Figures - has to be turned on. If not turned off, the exported file will not contain the character figure.
Embed Textures (Binary Only) - recommended to be turned off. As of version 2023.2, Cascadeur is unable to utilize the textures embedded into the imported FBX. Because of that, texture embedding can be turned off for the sake of reducing the file size.
Collect Textures - recommended to be turned off. The body mesh exported from Daz has separate textures for different body parts (main body, head, teeth, etc). As of version 2023.2, Cascadeur isn’t able to utilize these textures, because it requires the differently textured body parts to be separate mesh objects.
Include Animation - optional. This setting has to be turned on only if your scene has the character animated. If the character is standing in a base pose, you can turn this setting off.
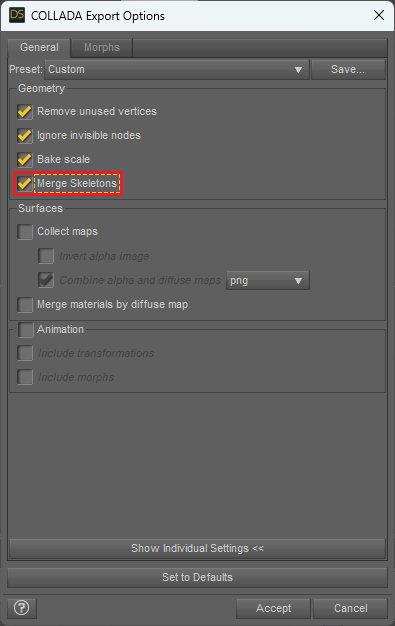
Recommended export settings for the Collada format.
Model Import
Import the model to Cascadeur by using the command at File -> Import Fbx/Dae -> Scene.

Rigging
Now you need to create a rig for your model.
The base of the rig can be created using Quick Rigging Tool. Cascadeur has the QuickRig templates for the models that are compatible with the Genesis8 and Genesis9 skeletons.
Warning
If your model is not compatible with the Genesis8 or Genesis9 skeletons, you would have to either fill in the fields in the Quick Rigging Tool yourself or create a rig manually.
Please note that the Quick Rigging Tool cannot properly work with additional objects. If your character includes complex hair or clothing meshes, you’ll have to rig them manually.
It is recommended to then use the regular Rigging Tool for making refinements to the prototype rig, such as adjusting the size of the rigid bodies, adding more controllers to the base rig, and more. As usual, your goal is to create sets of Prototype objects for the joints associated with your character. However, you don’t have to rig every joint.
For example:

The Standard Daz Studio skeleton starts with a root joint. It is sometimes used for moving the character as a whole, but for Cascadeur rig, it is not necessary. We recommend ignoring it and starting rigging from the next joint in the hierarchy (named Hip).
Note
It is highly recommended to add a control rig to the Daz character standing in their natural A-pose. Otherwise, you may have problems with using the "Export to Daz" and "Go to T-pose" commands.
Joints
Character skeleton in Daz is structured similarly to the one used by standard Cascadeur models, but its structure is a bit more complex, and some of the joint names are different.
The following tables list the main joints in the Cascadeur skeleton and their counterparts in Daz Genesis8 skeleton.
| Cascadeur | Daz Studio |
| pelvis | hip |
| stomach | abdomenLower |
| chest | chestLower |
| neck | neckLower |
| head | head |
| clavicle_r | rCollar |
| arm_r | rShldrBend |
| forearm_r | rForearmBend |
| hand_r | rHand |
| thigh_r | rThighBend |
| calf_r | rShin |
| foot_r | rFoot |
| toe_r | rToe |
If a joint has two or more counterparts in the Daz Studio skeleton, we recommend to rig all of these joints with one set of prototypes. See Rigging Complex Skeletons.
Additional Meshes
Models in Daz are often made up of several 3d meshes: one for the character's body and a few others for the hair, clothes, and accessories. These additional objects have their own sets of joints.
Some of the more complex hair meshes have additional joint sets even when you enable the settings described above.
For them to work properly, you’ll need to parent them to the head joint(s):
1. Select the joint to which the mesh itself is attached.
Usually, it is the joint on the end of the chain.
2. Enable Only box controller on the Rigging Tool panel.
3. Create a box controller for the selected joint.
4. Select the newly created box controller.
5. In the Outliner, drag it on top of the other box controller: the one for the main head joint.
Now, the box controller, and with it, the hair mesh, is parented to the head of the character and can be animated with it.
For the spine, we recommend creating about three Rigid Bodies. Further increasing their number might overcomplicate the rig.
Facial controls
At the moment, Cascadeur does not support morphs and doesn't have the tools for creating the facial rig. Moreover, the "Export to DAZ" script that's used for correctly exporting the animation made in Cascadeur to DAZ, doesn't export the animation on facial joints.
But if you really need to, you can create rig elements for them.

It is not recommended to create Rigid Bodies for these small joints (doing so will needlessly increase the complexity of the rig). A better option is to rig them using only Box Controllers.
See Secondary Elements to learn how to do this.
Finalizing the Rig
Once everything is set, click Generate rig:
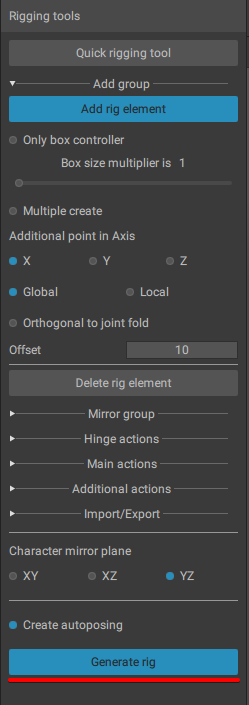
Then wait a bit, and your character should be fully rigged and ready for animation.
Export to Daz Studio
Once you’ve finished animating your model, you’ll probably want to send it back to Daz Studio for rendering.
To learn how this can be done, see the dedicated page.