Basics of Rigging
Although Cascadeur has the powerful Quick Rigging Tool for automatically rigging characters, sometimes you might encounter situations where you’ll need to adjust its output, or manually rig parts of the character the tool won’t recognize. Furthermore, to better use that tool, understanding how rigs are created can be beneficial.
Because of that, this page describes the process of manually rigging a character.
What you need
1. Import your character into the scene.
See here to learn how to do this.
2. Make sure the character has a skeleton (i.e. a set of connected Joints used to deform the character mesh).
The easiest way to do this is to enable the Joint Mode in the Viewport:
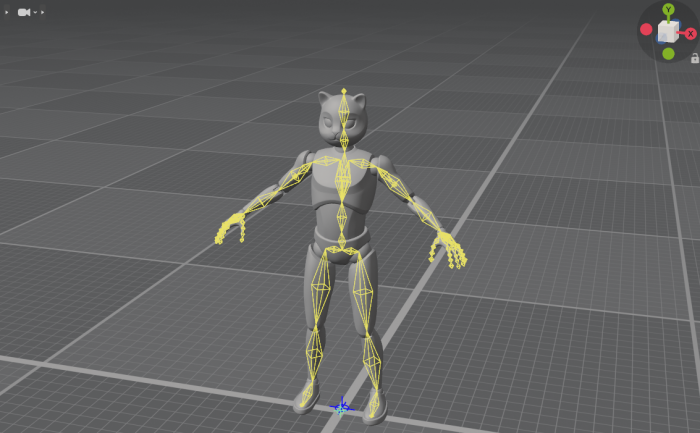
A character with a skeleton should look something like this.
3. Make sure the model is actually skinned to the mesh and moves along with it.
This can be done by selecting a Joint and rotating it.
Some characters include two rigs: one for creating poses and another - linked to the first - to actually deform the model (it is sometimes called terms like ‘deform rig’).
When you export such a character, you’ll need to make sure that you export that second rig.
See also: Scene Preparation, to learn more about preparing characters for rigging.
Once all criteria are met, you’re ready to start rigging.
To begin
4. Enable rig mode by clicking the Rig Mode button on the Toolbar:

Once in the Rig Mode
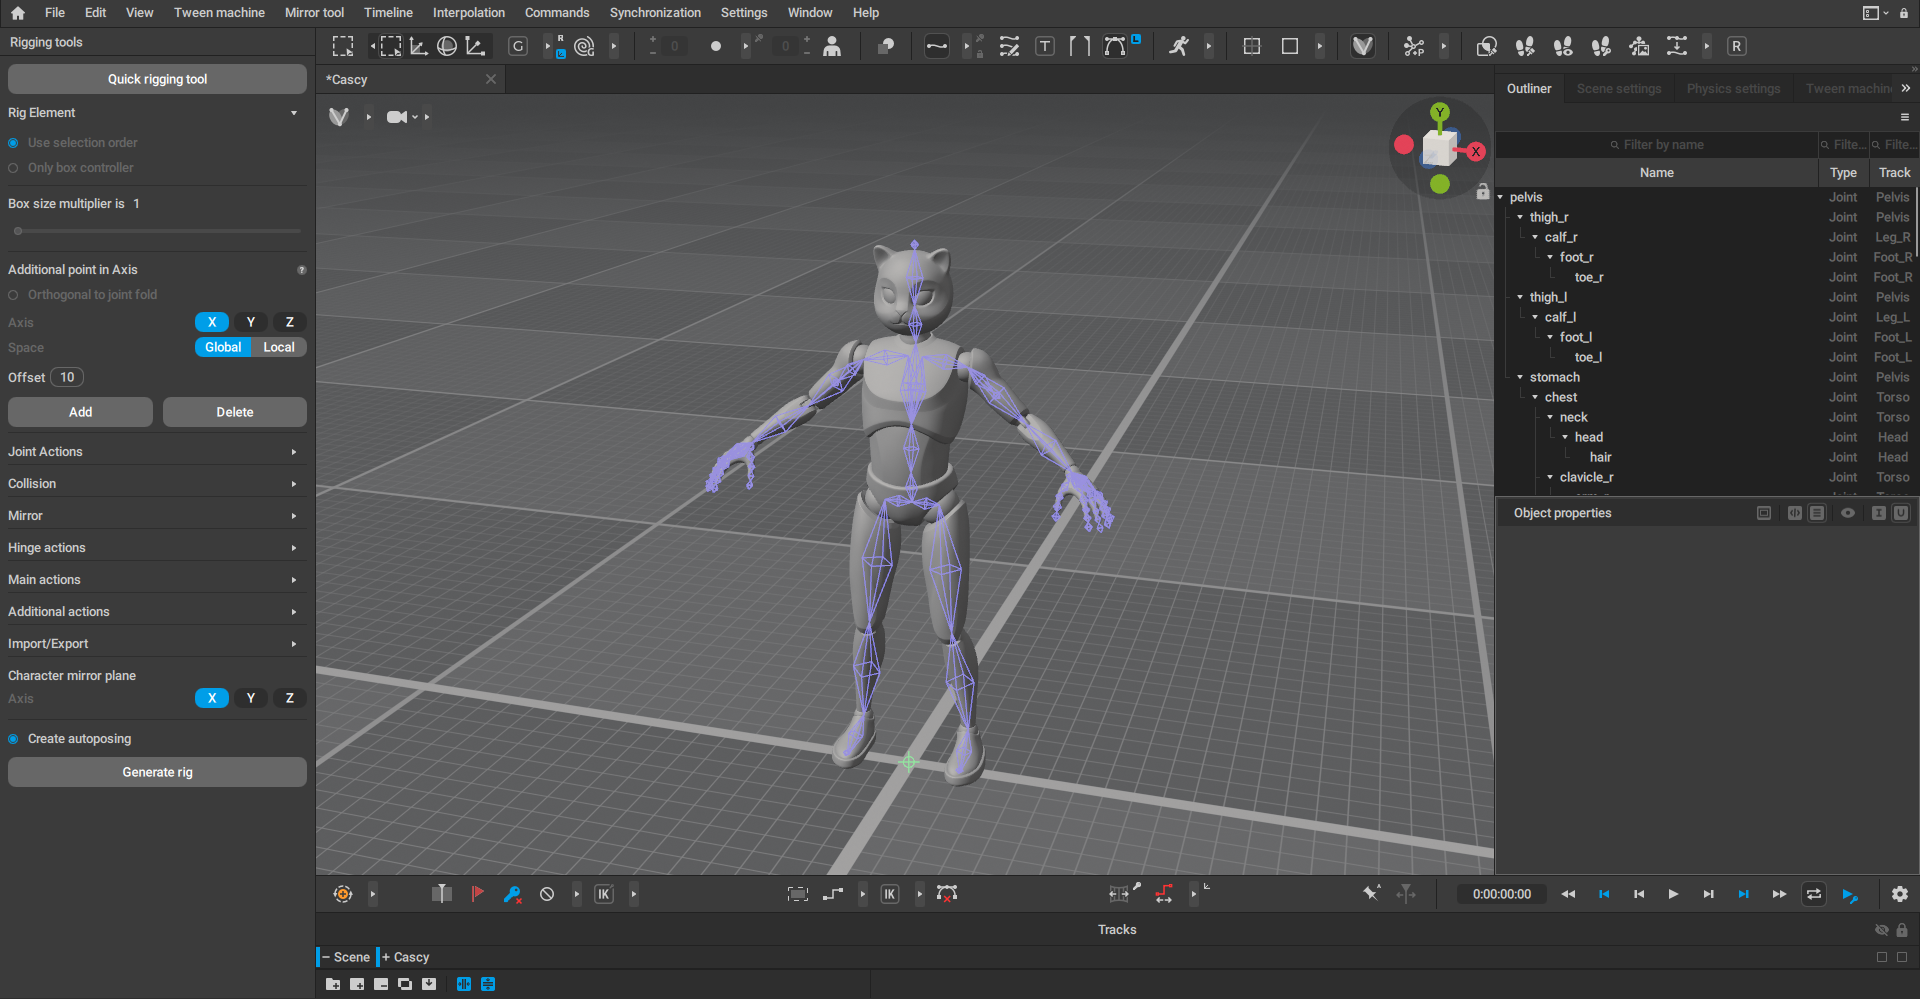
5. Find the first Joint in the hierarchy.
There’s always such a Joint; for humanoid characters, it’s located at the pelvis.
The easiest way to find it is through the Outliner:
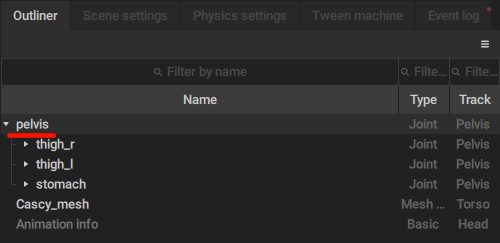
In this example, the Joint you need (called pelvis) is the first in the hierarchy.
However, for some characters this might not be the case.
Some characters have a Root joint (used to move the model as a whole), or a transform object (to which the skeleton is attached) at the top of their hierarchies. In such cases, the joint you need would be a child to this object.
6. Select this Joint
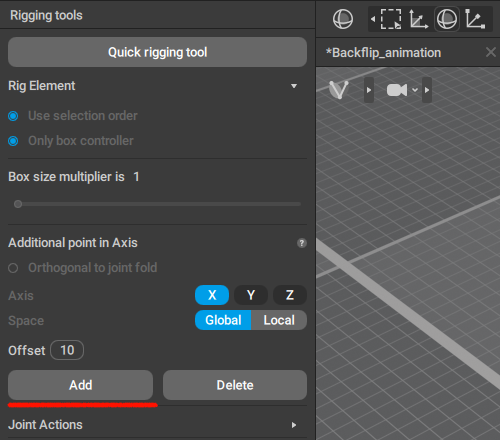
7. On the Rigging tools panel, set an axis for the Additional Point of the rig element:
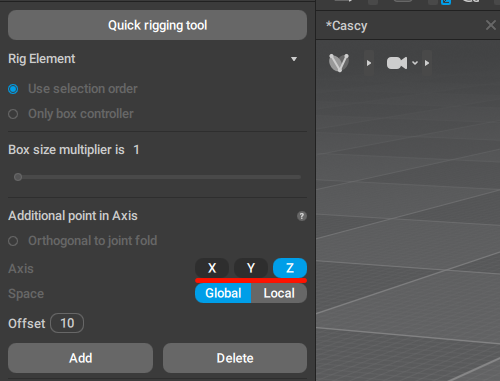
Note
Additional Points can be placed in both Global and Local modes.
In the Global mode the coordinate axes are always the same; in the Local mode they depend on the Joint’s spatial orientation.
To see the axes in the Local mode, enable Local mode on the Manipulators panel in the Toolbar.
This will determine how the rig element is oriented in space.
For the humanoid character, it should be +Z (i.e. facing forward) for the spine and legs, and +Y (upward) for the arms.
Note
To change the direction to the opposite one, set a negative value to the Offset.
You can use sample characters as references.
8. On the same panel, click the Add button:
9. This will create a set of rig objects attached to the Joint:
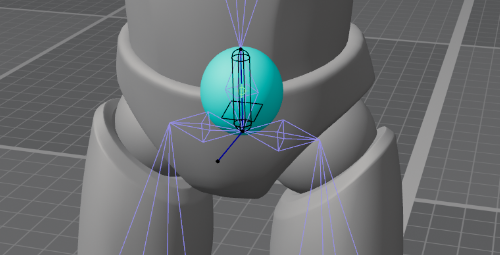
You can learn more about these rig objects on the Rig Elements page.
Your goal is
10. To create such rig object sets for the entirety of the character’s skeleton (or most of it).
Almost every skeleton can be separated into a number of chains: spine, limbs, tail.
The best way to rig is to go by these chains: selecting Joints one by one and creating rig elements for them, like this:
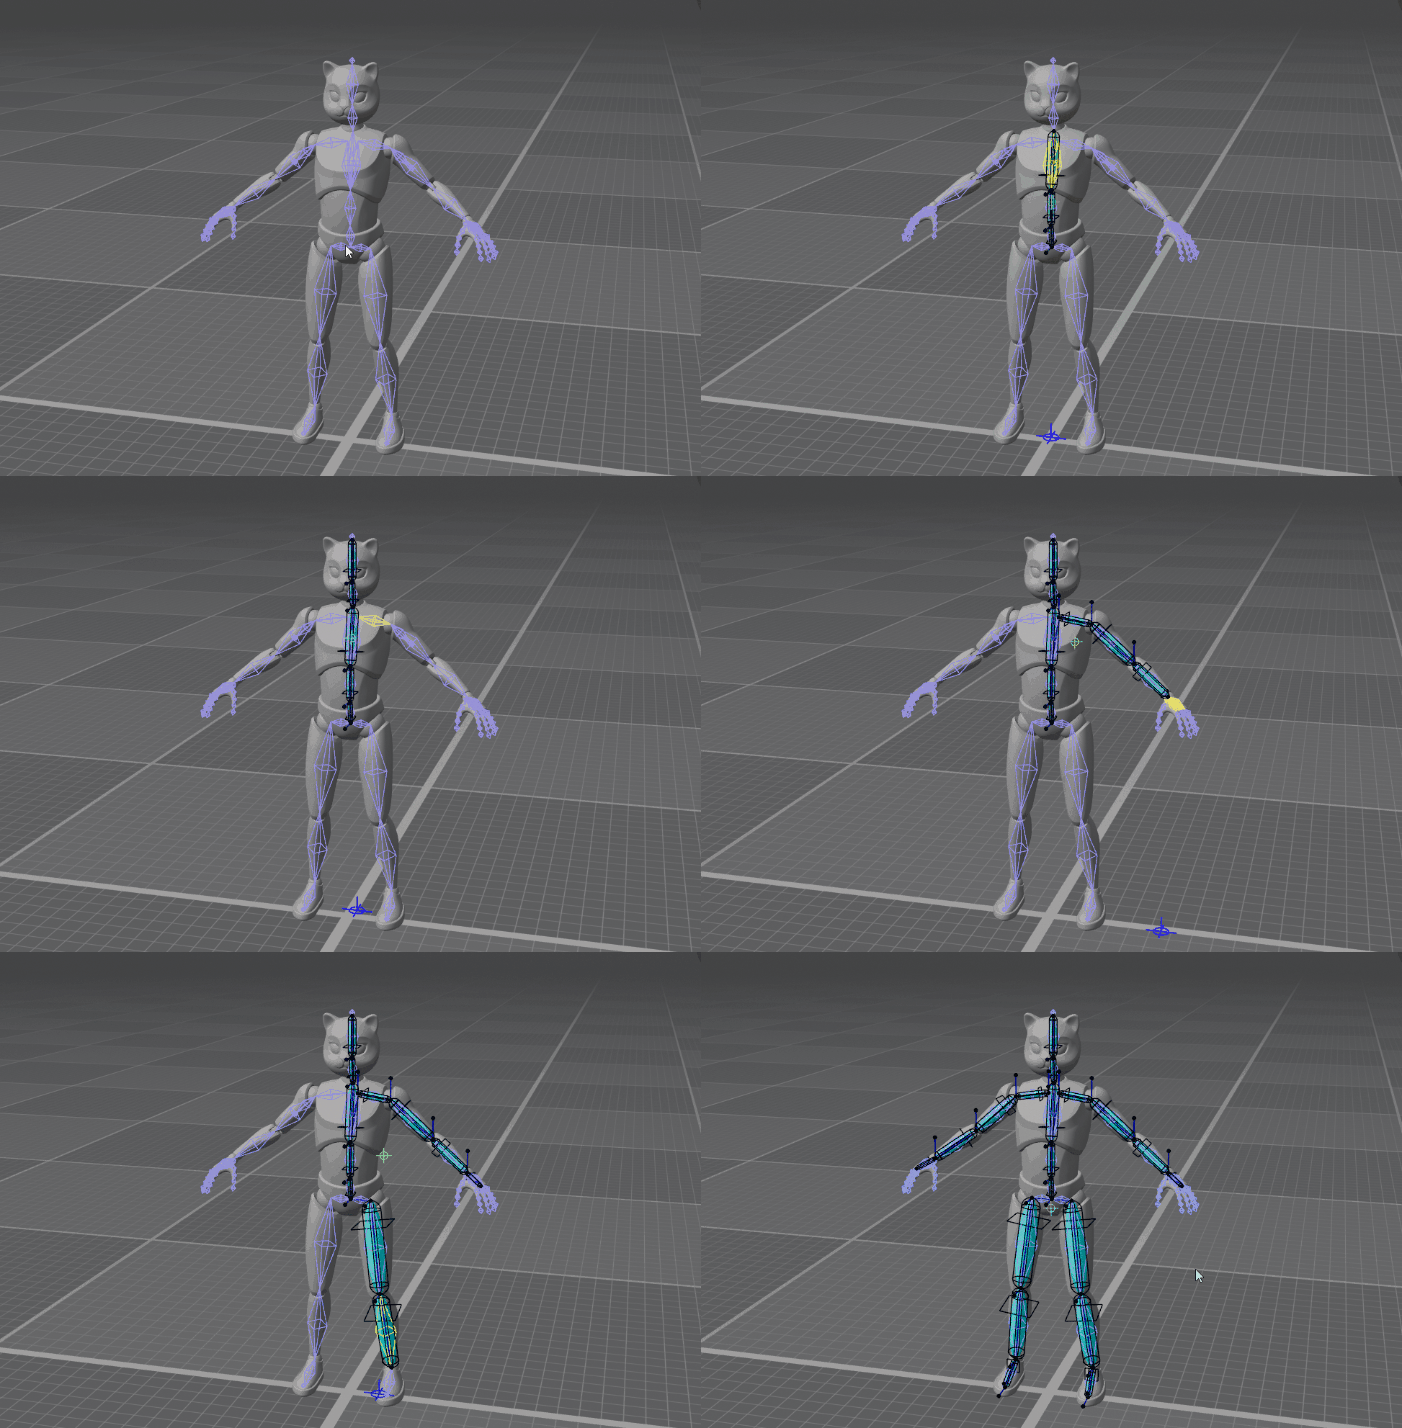
There are ways to speed things up. Here, for example, we create rig elements for the character’s left arm and leg, and then use Mirror tools to copy them to the right.
However:
When there are lots of Joints in a chain, you might not need to rig each and every one of them: this will make the rig overly complex and slow.
For example, for an arm, there is no reason to have more than three rig elements (for the arm, the forearm, and for the hand). So when there’s more (this might happen when the skeleton includes so-called twist bones for controlling rotations), you can create one rig element for two or more Joints.
See the Rigging Multiple Joints page to learn how to do this.
Also keep in mind:
If a joint has several children, you should also select one of them to set the direction of a rig element:
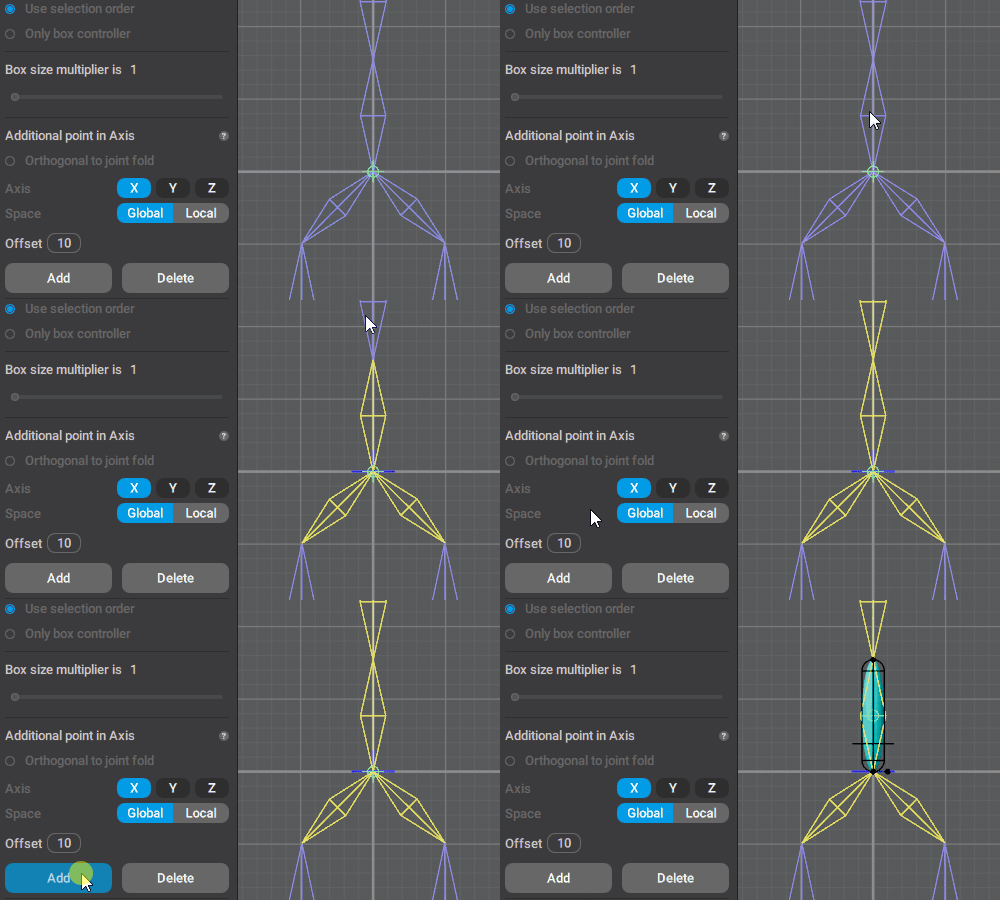
If you select none of them, you'll get an error:
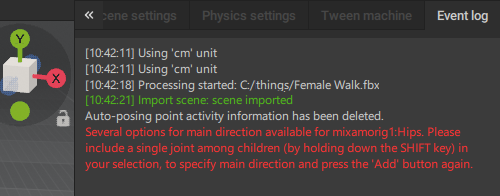
And if you select several at once, rig elements would be placed incorrectly (because the algorithm won’t be able to correctly interpret such a selection).
For small parts
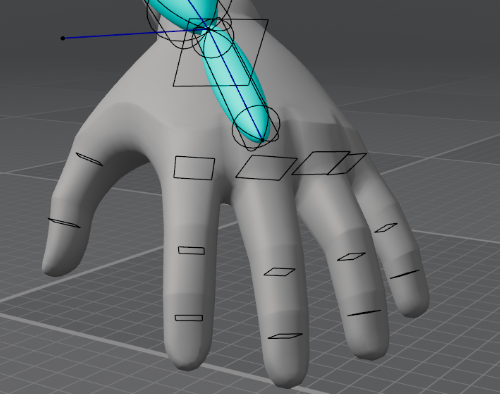
11. Most character models include secondary parts that in real life would have low masses:
• Fingers.
• Hair clusters.
• Parts of the clothing.
• Twist bones.
• Other kinds of small props.
For parts like these, you don’t need full sets of rig elements - this would overcomplicate the rig without giving you any additional control.
On the other hand, you still need a way to animate them.
So the good way to rig them is by using only Box Controllers. For this, enable the Only box controllers option:
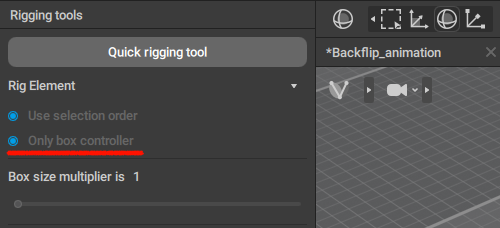
This way, the rig will end up less complex - but you’ll still be able to adjust every part of it.
For knees/elbows/toes
12. If your character has knees, elbows or toes, you’ll need to create Hinge Connections for them.
See the Hinge Connections page to learn how to do it.
Another thing to consider:
The limb Direction Controller should face in the opposite direction to the bending angle:
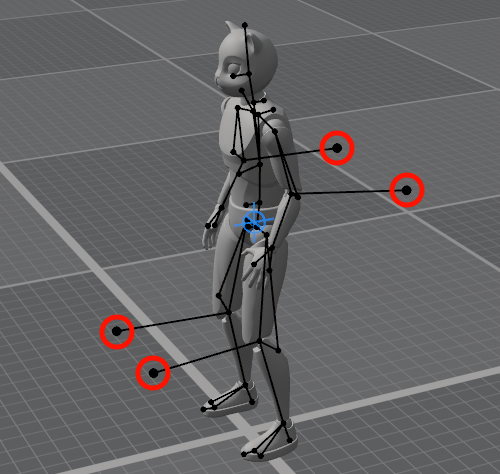
When this is not the case, there are two solutions:
12.1. If this is caused by the Joints being misaligned, you can try to manually adjust them and then re-generate the rig elements.
12.2. If this is caused by some other reason, you can select the rig element and try turning on/off the Direction controller is right parameter in the Hinge settings group:
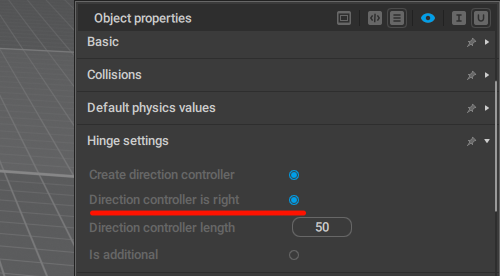
Also keep in mind that toes don't need Direction Controllers, so disable the Create direction controller option for them.
Adjustments
13. After you create a rig element, you might want to make some adjustments for it to better fit the character:
Additional Controllers
Setting Additional Controllers the right way is important for creating a properly functioning rig. See here to learn about this.
Box Controllers
Their sizes, positions and rotations can be adjusted using Manipulators. A good practice is to adjust Boxes so they would be over the mesh and not inside it.
Collision Shapes
You also might want to change the sizes of the Collision Shapes (capsule object attached to every rig element) so they would better fit the shape of your character.
Working with Collision Shapes is described here.
Direction Controllers
A good practice is to adjust their length to fit with the character’s height
Rigid Bodies
Finally, you can adjust Rigid Bodies: their dimensions and masses.
This is done by selecting a Rigid body and changing parameters in the Physics settings section:
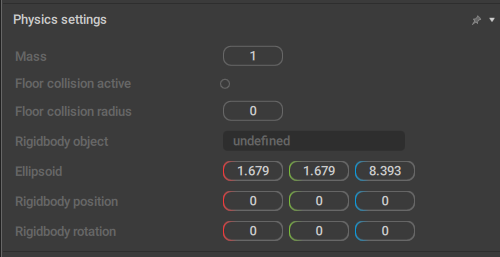
The parameters are:
Mass
As the name suggests, it sets the mass of the Rigid Body.
By default, a newly created Rigid Body has a mass of 1 - but it doesn’t have to be so.
When you are rigging a realistic character, you want its body parts to have weights similar to ones they have in real life. For humanoid characters, you can check the Standard Masses page (link to it).
Changing masses also affects the position of the Center of Mass.
Ellipsoid
Sets the sizes (across the X, Y and Z coordinate axes) of the Rigid Body.
These values only affect the body’s appearance. They have no impact on how physics simulations work with it.
Rigidbody position
Sets the coordinates of the Rigid Body in relation to the rig element it is attached to.
In some cases, this can be used to adjust how the mass is distributed through the character’s body.
Rigidbody rotation
Same as above, but for the rotation.
Mirroring
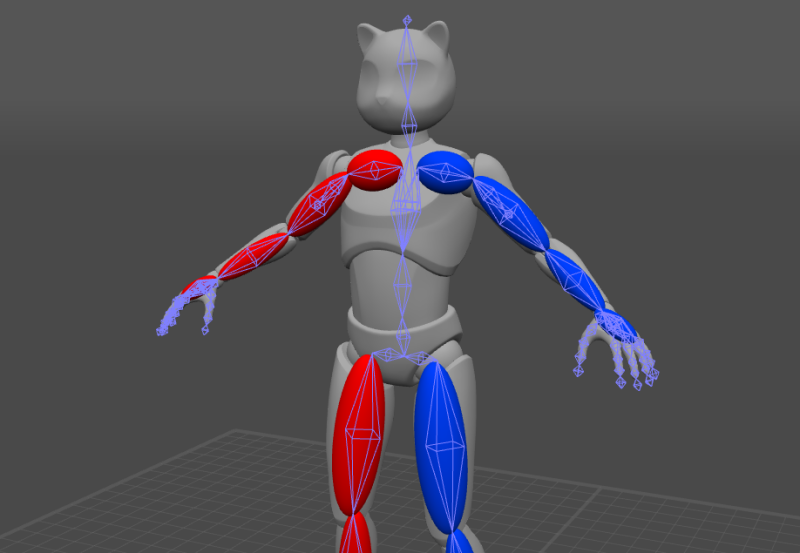
Most character models have some level of symmetry. A humanoid would have left and right arm and leg, a quadruped - a left and right paws, and so on.
For rigging, this means that you can only rig one side of the character and then mirror rig elements to be applied to the other side.
See the Mirroring page to learn more about it.
AutoPosing
If you want to use AutoPosing with a manually rigged character, you’ll also need to manually set up its controllers.
See here to learn how to do this.
Also keep in mind that AutoPosing for fingers only works when there's five fingers with three Joints in each.
When all is set
Click the Generate rig button:
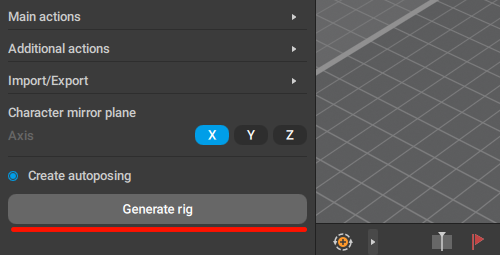
Alternatively, you can simply close the Rig Mode by clicking the Rig Mode button on the Toolbar.
Either way, you’ll only need to wait a bit as the program finalizes the rig.
And once everything is done, your character will be ready for animation.