Interpolation
- Home
- Tools
- Timeline Tools
- Interpolation
Interpolation is a method of calculating character poses in the frames between two keyframes to create smoother motion.
Interpolation Intervals
Interpolation is applied to groups of sequential frames known as Interpolation Intervals.
An interpolation interval is always limited by two key frames: one marking the beginning of the interval and another at the end of it.
To create an interpolation interval:
1. Select several frames on the Timeline.
2. Choose a type of interpolation from the menu.
The in-between frames will be generated automatically
Each interval on the Timeline can use a particular type of interpolation:
Note how different types of interpolation affect the trajectory of the object.
Types of Interpolation
A type of interpolation can be described as a rule used to create in-between frames on an interval. Keyframes set start and end positions, but how the object moves between these positions is defined by the type of interpolation.
Cascadeur supports several types of interpolation:
Step Interpolation (default)
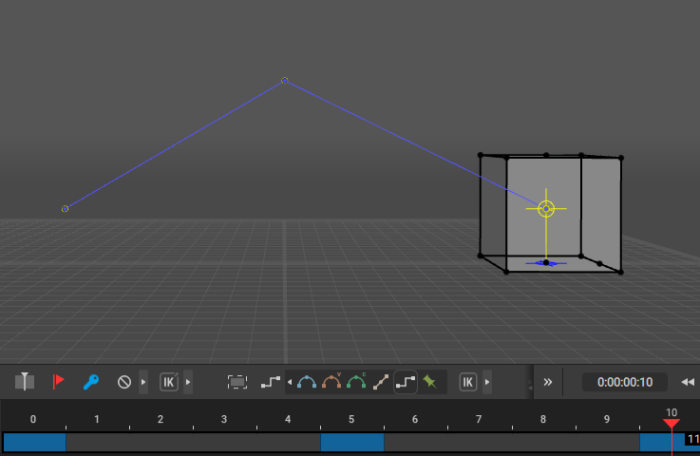
In-between values are not calculated, animated objects only change their positions and poses in keyframes.
Frames with Step interpolation are colored white on the timeline
Linear Interpolation
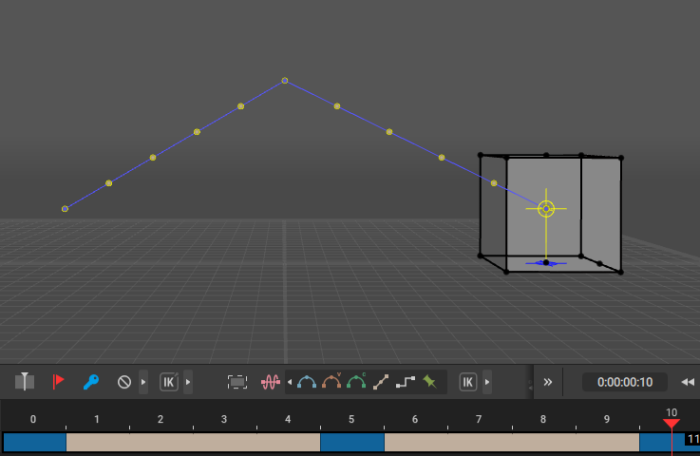
Objects move between the specified the keyframes with constant speed.
Frames with Linear Interpolation are colored beige on the timeline.
Bezier Interpolation
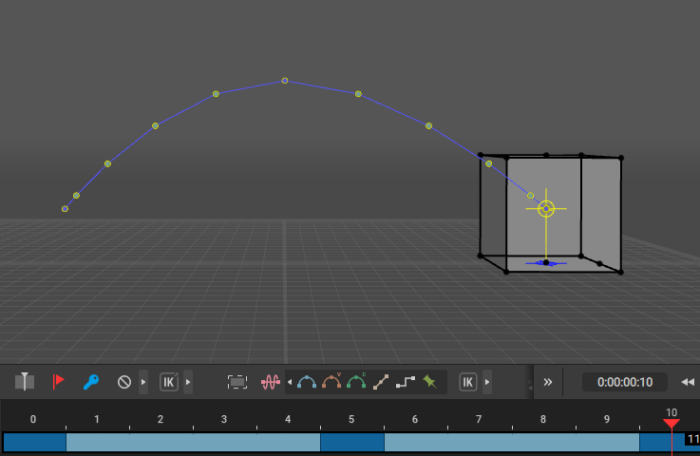
Objects move along a curve defined by their positions in the key frames, accelerating at the beginning of the trajectory and decelerating near the end of it.
When this type of interpolation is selected on multiple intervals, character movements on previous intervals can influence subsequent ones, producing an effect similar to moving by intertia. This can make movements look more realistic, but in case this effect is not desired, use Bezier viscous interpolation type instead.
Frames with Bezier Interpolation are colored with a light blue shade.
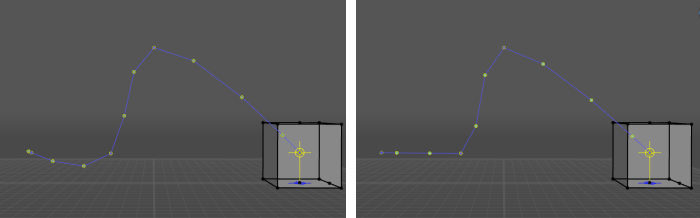
Bezier viscous Interpolation

A difference between Bezier (left) and Bezier Viscous (right) interpolation.
When Bezier Viscous is used, interpolation frames are placed closer to the nearest keyframes (represented as dark green points), which in some cases results in a differently shaped trajectory.
This type works in the same way as the Bezier interpolation, but previous movements influence subsequent ones to a lesser degree.
Bezier clamped Interpolation
Bezier (left) and Bezier clamped (right) types of interpolation
Objects move linearly (like under Linear interpolation), but with acceleration and deceleration (like under Bezier). Any angles in the trajectories are heavily smoothed.
Frames with Bezier clamped interpolation are colored teal on the Timeline.
This type of interpolation should be used for:
- Ground-level movements
- Fulcrum Points
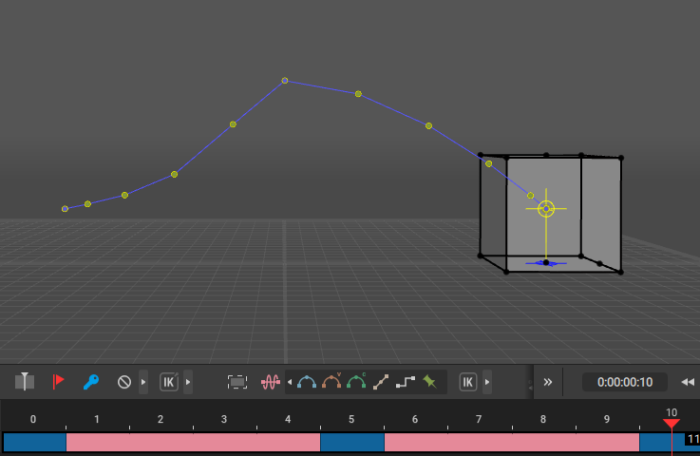
Fixed Interpolation

An example of using Fixed interpolation to adjust individual frames.
When this type of interpolation is used, every frame of the interval stores a complete pose (normally, only keyframes store poses).
This means you can adjust every frame individually, without affecting other frames, and without creating additional keys.
Frames with Fixed Interpolation are colored green.
Inbetweening
This is technically not a type of interpolation, but a tool that takes selected keyframes and automatically generates complex animation between them. It produces Fixed interpolation.
For a more thorough overview, see the Inbetweening page.
Mixed Interpolation
This type of interpolation is used for Folders that contain several Animation Tracks with different types of interpolation.
Frames with Mixed interpolation are colored light pink:
Copying Interpolation
You can also use the Copy/Paste Timeline Interval functions to copy interpolation intervals.
To do this:
1. Select Keyframes on the Timeline.
2. Select Copy Timeline Interval from the Edit menu.
3. On the Timeline, select an interval on which you want to paste the copied frames.
4. Select Paste Timeline Interval from the Edit menu.
Note
This option would overwrite any animation data (keyframes or interpolations) on the selected fragment.
Interpolation and Kinematics
Cascadeur supports various types of kinematics for interpolation, and you can use any of these on any interval.
To switch between kinematics:
1. Select a frame (or several frames) on the Interval.
2. On the Timeline, set the type of kinematics using the switch near the Interpolation selector:

There are three available options:
Inverse Kinematics (IK) transfers the influence from bottom to top. Positions and spatial orientations of the parent segments are calculated on the basis of the positions and orientations of their children.
Forward Kinematics (FK) works the other way around: transfers the influence from the top of the hierarchical chain to the bottom. Any change in the position of a parent segment affects the positions of every child segment in the hierarchy.
Global Rotation (GR) produces arch-like interpolation for limbs - arms and legs of a humanoid character, paws of a quadruped etc. Unlike the regular Forward Kinematics, this interpolation does not inherit rotation from parent objects (like clavicles for the arms).
Intervals with Forward Kinematics or Global Rotation are marked on the Timeline:

Inverse Kinematics is not marked as it is the default state.
Note
If tracks on this interval have different types of interpolation, Mixed mode will be used.
You can also set kinematics for Keyframes.
To do this:
1. Select a Keyframe.
2. Set the kinematics using the switch near the key icon:

It has the same three options: Inverse Kinematics, Forward Kinematics and Global Rotation.
As with intervals, Keyframes with GR or FK are marked on the Timeline:

To learn more about using various types of kinematics, see Kinematics in Cascadeur.