Adding Props
- Home
- Rig
- Advanced Rigging
- Adding Objects
- Adding Props
Sometimes you might need to supply a pre-existing character rig with additional parts: tools, weapons or other objects. These objects are often referred to as props. For props to correctly interact with the character body, they have to be integrated into the rig itself. This page describes how it can be done.
Importing Props
You should start with importing the props into the scene.
To do this:
1. Select Import Fbx/Dae → Add model from the File menu.
2. Select a file (in FBX or Collada format) containing the prop.
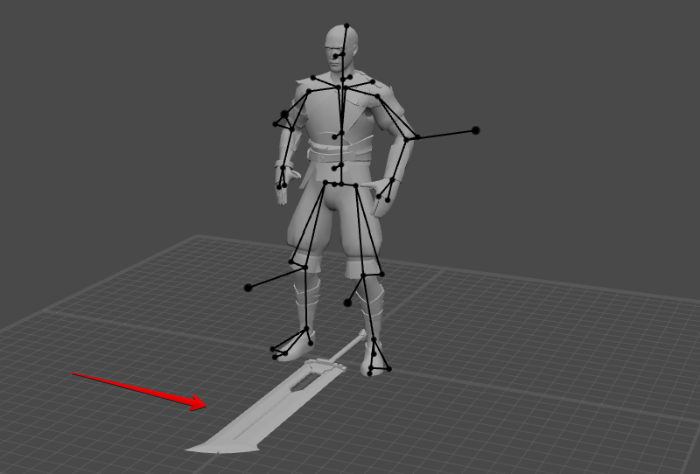
3. After this, the prop should appear in the scene:
(optional) Adding Joints
We recommend to use props that are already rigged and skinned to one or several Joints. Otherwise, you won’t be able to properly animate it.
However, if a prop is not intended to be animated (for example, being a single rigid object), you can try to attach the prop mesh to one of the character joints directly in Cascadeur. To do this:
1. Select the mesh.
2. Select Add → Joint from the Commands menu.
This will create a new Joint.
3. Go to the Outliner window.
4. Hold down the Left Mouse Button.
5. Drag the mesh object on top of the joint iou've created.
Doing this will parent the mesh to the joint.
Keep in mind that at the moment Cascadeur does not support skinning. Therefore, this method can only be used for props that do not have to bend or otherwise deform.
Note
If the prop in question is just a mesh and you don’t intend for it to be animated in any way, you can simply attach it to an appropriate joint as described above and ignore the following steps.
Attaching Props (without rigging)
Now that the prop(s) is in the scene, we’ll need to attach it to the character.
How exactly this should be done depends on the kind of prop you are using.
The most ‘basic’ kind of a prop would be a simple mesh object without any Joints associated with it. A prop like this can’t be integrated into the character’s skeleton, and it won’t affect the way the character moves (because it has no mass), but it can still be attached to one of the character Joints, and move along with it.
To do this:
1. Select the mesh.
2. Go to the Outliner window.
3. Hold down the Left Mouse Button.
4. Drag the mesh object on top of one of the joints in the character skeleton.
Doing this will parent the mesh to the joint.
Now, the mesh you’d imported should move along with the corresponding joint.
If this is what you need, then the prop has been successfully attached.
Approach like this, however, does have some downsides: such props cannot be rigged, so they won't have any weight and won't influence the way the character moves.
If your objects are intended to be heavy, we’d recommend using a different method.
Attaching Props (with rigging)
First thing to consider is that since you’ve imported the prop from an external file, it is not a part of the character’s joint hierarchy.
1. Select the joint associated with the prop:
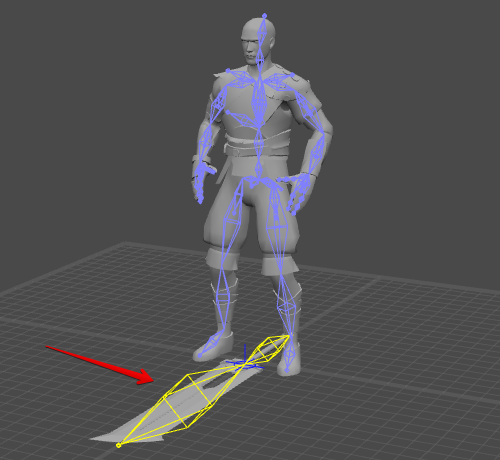
If there are more than one joint, select the one at the start of the chain.
2. As you select the joint in the Viewport, it will also be selected in the Outliner:
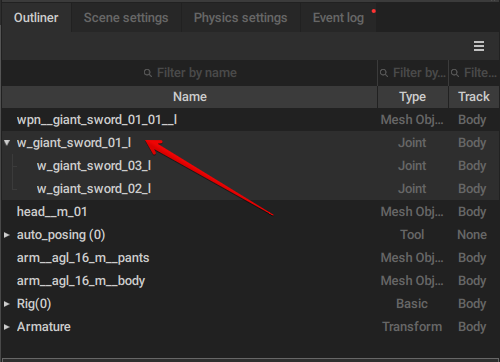
3. In the Outliner, use the Left Mouse Button to drag the joint on top of another joint:
In this example, we attach the prop to ‘weapon_r’: a joint specifically intended for attaching props.
Joints like this are found in every standard Cascadeur character.
However, using them is not strictly required: a prop can be just as well attached to any other joint.
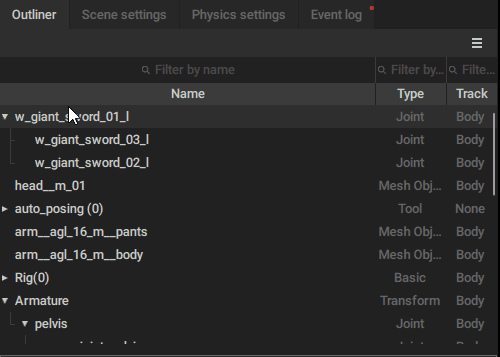
After this, the prop will be parented to this joint.
Which joint should be selected as the parent depends on the body part to which you’d like to attach the prop. For example, if the prop is supposed to be held in a hand, use a joint associated with that hand.
Rig Info
Once the prop is attached to the character, it can be rigged so it could properly interact with the character’s body. Before doing this, however, you’ll need to add the prop’s joints to the Rig Info. Otherwise, Cascadeur rigging tools won’t recognize them.
1. Select every joint in the prop.
2. Go to the Outliner panel and find the Rig Info object.
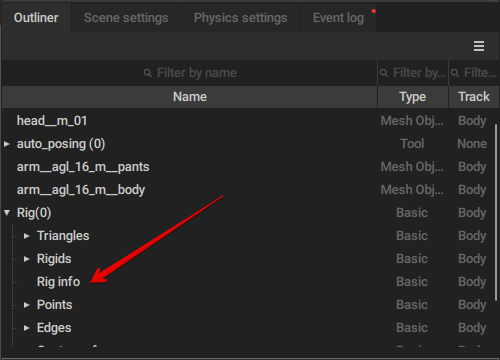
3. Hold the Shift key and add the Rig Info to the selection.
4. Select Rig Info → Add joints from the Commands menu:

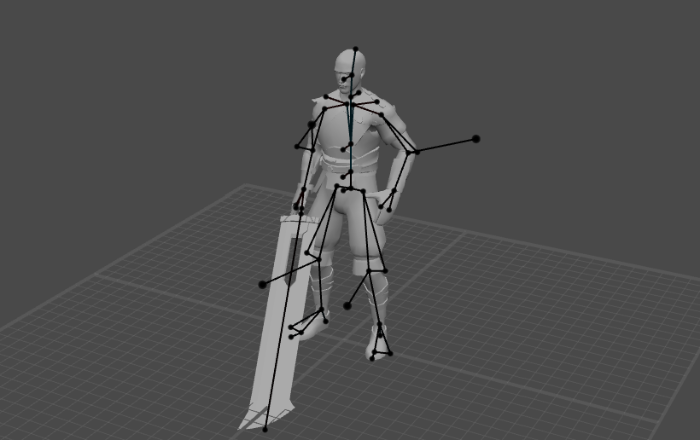
Rigging & Final Touches
Now everything is ready for the rigging.
See Rigging Props - Setting Up Prototypes to learn how to create prototype objects for the joints in the prop.
After prototypes are set, you’ll need to add a Center of Mass
See Rigging Props - Centers of Mass to learn about this stage.
Once this is done, you can re-generate the rig by clicking the Generate rig button:

The end result should be something like this:
This is how props can be added to Cascadeur characters.