Keyframes
- Home
- Tools
- Timeline Tools
- Keyframes
Keyframes (or keys) store character poses and positions. Changes made to a pose in a regular frame will not be saved, so you need to create a keyframe every time you want to adjust a character.

Keyframes are found on the Timeline.
By default, they are repesented as blue-colored rectangles.
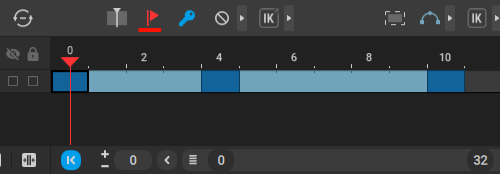
This color can change when a keyframe is only present on some of the Animation Tracks in the folder. In such a case, this keyframe will be colored rose when the folder is closed:
See Animation Tracks to learn more about tracks and folders.
Working With Keyframes
Keyframe Controls
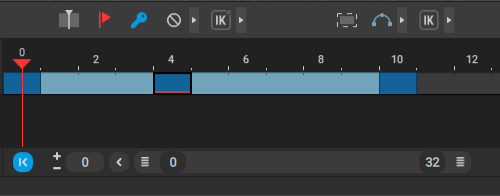
On the Timeline - at the upper left part of it - there is a set of buttons for working with keyframes:
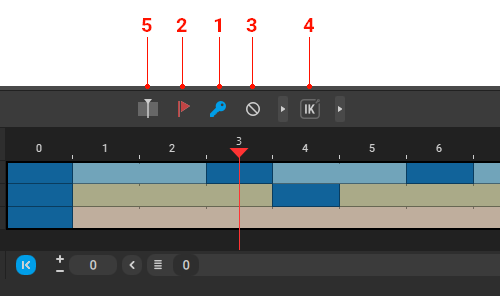
1. Add/remove keyframes.
2. Mark a keyframe with a Label (https://cascadeur.com/help/tools/timeline_tools/keyframes#keyframe_lable)
3. Settings for the AutoKey tool (https://cascadeur.com/help/tools/timeline_tools/keyframes#keyframes_autokey)
4. Sets the type of Kinematics to be used on Keyframes.
5. Sets how user-made changes should be applied: to the current frame only, or to every selected frame.
Creating Keyframes
To create a keyframe:
1. Select a frame on the Timeline.
2. Click the Add or remove key button (1) (or press the F key):
To create several keyframes at once:
1. Select several frames on the Timeline.
2. Set the Set kinematics on keys (5) button to on interval.
3. Click the Add or remove key button (1):
Alternatively, you can select several frames and press Alt + F on the keyboard.
Deleting Keyframes
To remove a keyframe:
1. Select it on the Timeline.
2. Click the Add or remove key button (1) (or press the F key):
Note
To remove several keyframes at once, set the Set kinematics on keys button to on interval. By default, it is set to on keys, which will only remove the current frame.
Alternatively, you can select the frames and press Alt + F on the keyboard.
Moving Keyframes
To move a keyframe:
1. Select it.
2. Hold the Mouse Wheel.
3. Drag the key to a new position:
Copying Keyframes
To copy a keyframe (or a group of keyframes):
1. Select it on the Timeline.
2. Hold Shift.
3. Drag the keyframe(s) to a new position while holding the Mouse Wheel.
You can also move and copy groups of frames. To do this, select a group and move or copy it as you would move or copy a single frame:

An interval between two keys can be made longer or shorter by adding (with the + key) or removing (the - key) frames:

You can also use the Copy/Paste Timeline Interval functions to copy Keyframes.
To do this:
1. Select Keyframes on the Timeline.
2. Select Copy Timeline Interval from the Edit menu.
3. On the Timeline, select an interval on which you want to paste the copied frames.
4. Select Paste Timeline Interval from the Edit menu.
Note
This option would overwrite any animation data (keyframes or interpolations) on the selected fragment.
AutoKey
Keyframes can be generated automatically when you adjust scene objects:
For this feature to work, turn on the Set key on change option. It can be found near the keyframe button on the Timeline:
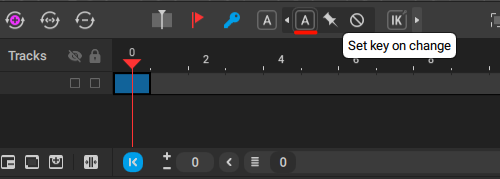
To disable AutoKey, click the A symbol again.
Labels
A label is an element of Timeline used to mark keyframes. Labeling keyframes has no impact on how they work, but can improve for visual convenience.
A keyframe marked by a label (red line).
A labeled keyframe is underlined with red.
To add/remove a label to a keyframe:
1. Select the frame.
2. Click the red flag button on the upper part of the timeline:
Built-in Labels
For complex animations, it might be convenient to use several differently-colored Labels - and you can do this.
If you right-click the Label button, you’ll open this menu:
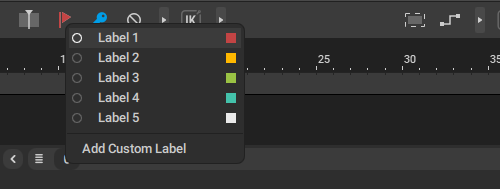
There are several (five) Labels - each with its own color - which you can select to use on the Timeline:
Selecting a particular Label sets it as a ‘default’ one, which also changes the color of the Label button.
Custom Labels
In the same menu, there is also the Add Custom Label option, which allows you to create your own labels.
If you click it, you’ll get the Name window, where you’ll need to set a name for your label:
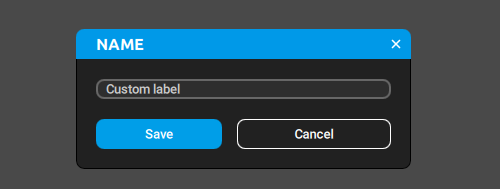
Then, click Save, and the new label will be created.
After this, it will be added to the list. There, it can be selected just like the built-in labels.

At the right side of the label’s name, there are three icons for further customizing it:
The pen icon allows you to change the label’s name.
The square-shaped palette icon allows you to change the color of the label.
The bucket icon allows you to delete the label.