Polishing
- Home
- Animation Pipeline
- Polishing
Now that the physics tools are applied, the main part of the animation process comes to an end. But this does not necessarily mean the work is done just yet.
Take a closer look at the animation you’ve ended up with and see if there are any problems with is.
Sometimes, applying physics is enough to make an animation perfectly fine and ready to be used in production. More often, however, you'll still be able to notice some imperfections. And though small, these imperfections might impact the overall impression of your work.
So once the animation is complete, it is important to carefully review it and check if there are any issues. And if issues and indeed there, now is the time to fix them.
On this page, we’ll take a look at the methods you can use to find and correct animation errors.
Slow Motion
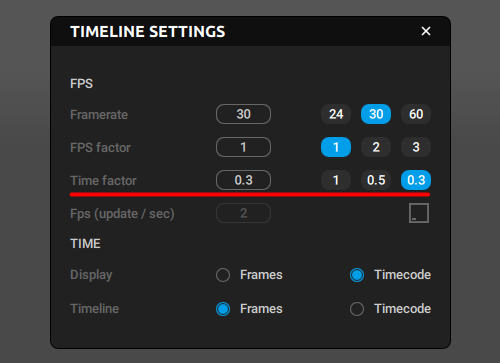
Smaller animation issues might become more noticeable when the motion itself is slowed down. Because of this, we recommend setting the Time Factor to 0.3 and viewing the animation in this slower mode.
Don’t forget to set Time Factor back to 1 after you’re done reviewing your animation.
Animation Cleanup
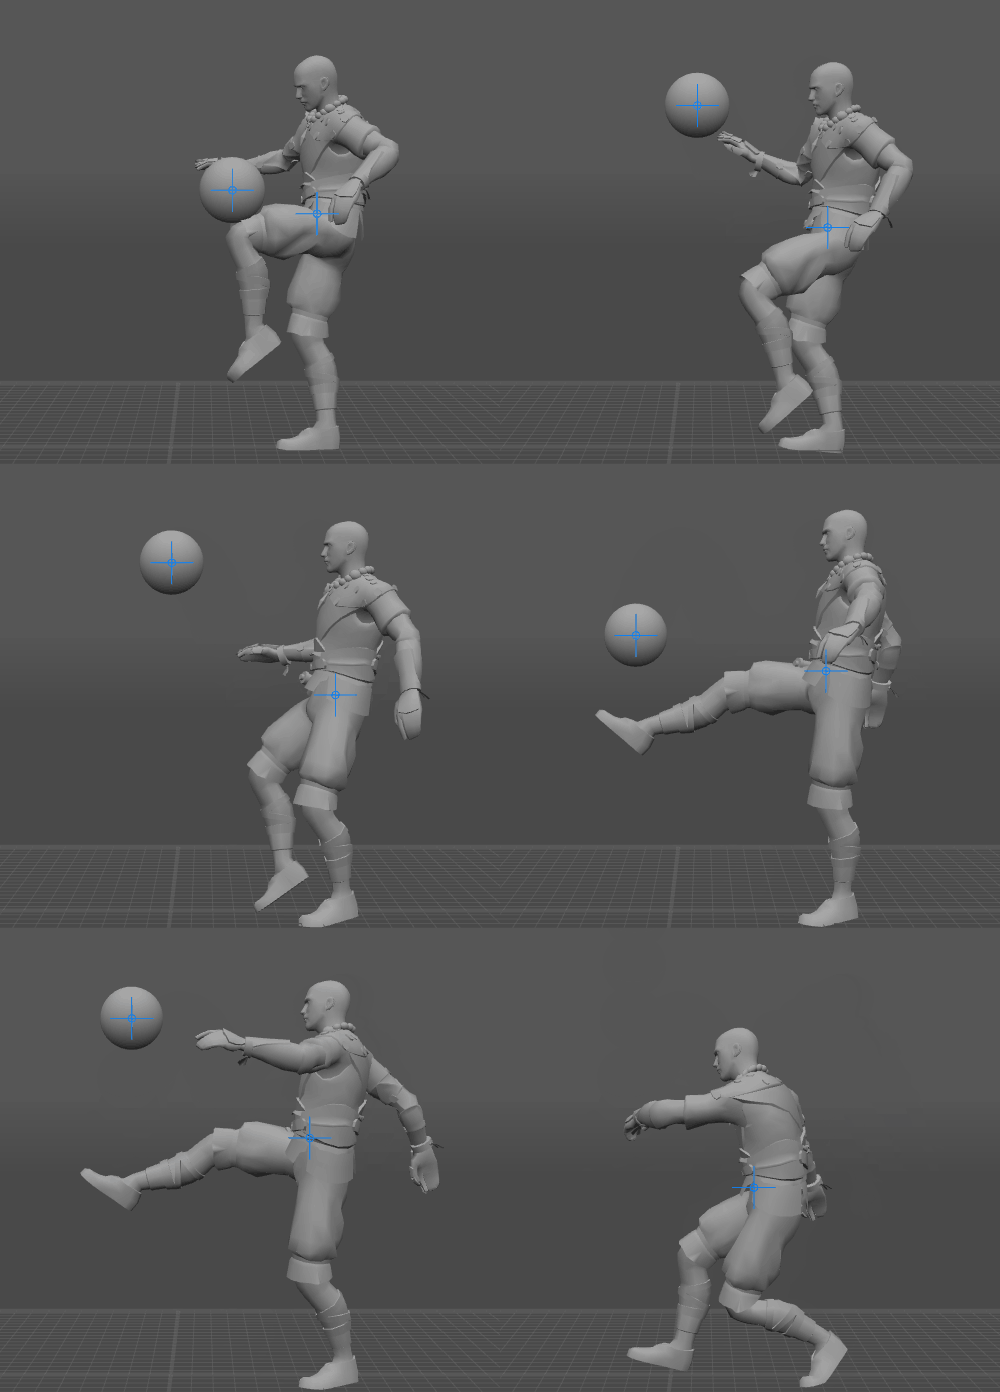
Here is an example scene shown in slow motion. As you can see, it displays a number of issues:
- The legs are sliding on the ground.
- The left arm is moving unevenly.
- The head moves in a weird manner.
Below, we’ll be going over these issues and taking a look on the ways of fixing them.
Removing Jittering
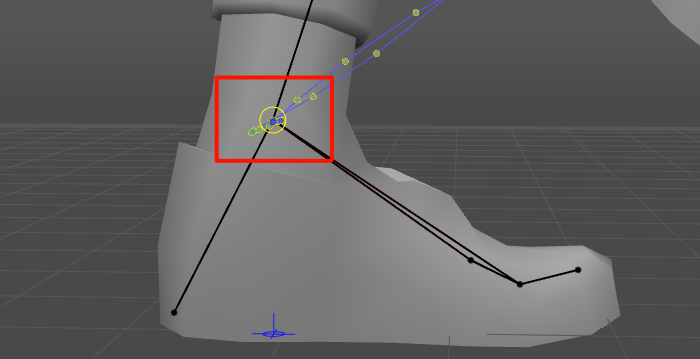
If you notice jittering in you character’s moves, this might be because the trajectories of said moves have loops:
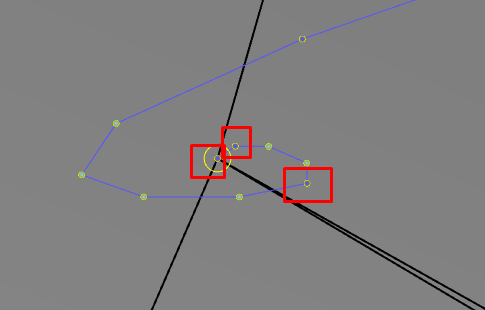
Things like these do sometimes occur after you duplicate or move keyframes, or otherwise retime the animation.
To get rid of the loop on the image above, we need to move every marked point to the same place.
1. Copy the position of the foot
Copying should be performed in the Global mode.
2. Paste this position to every key where the foot should not move.
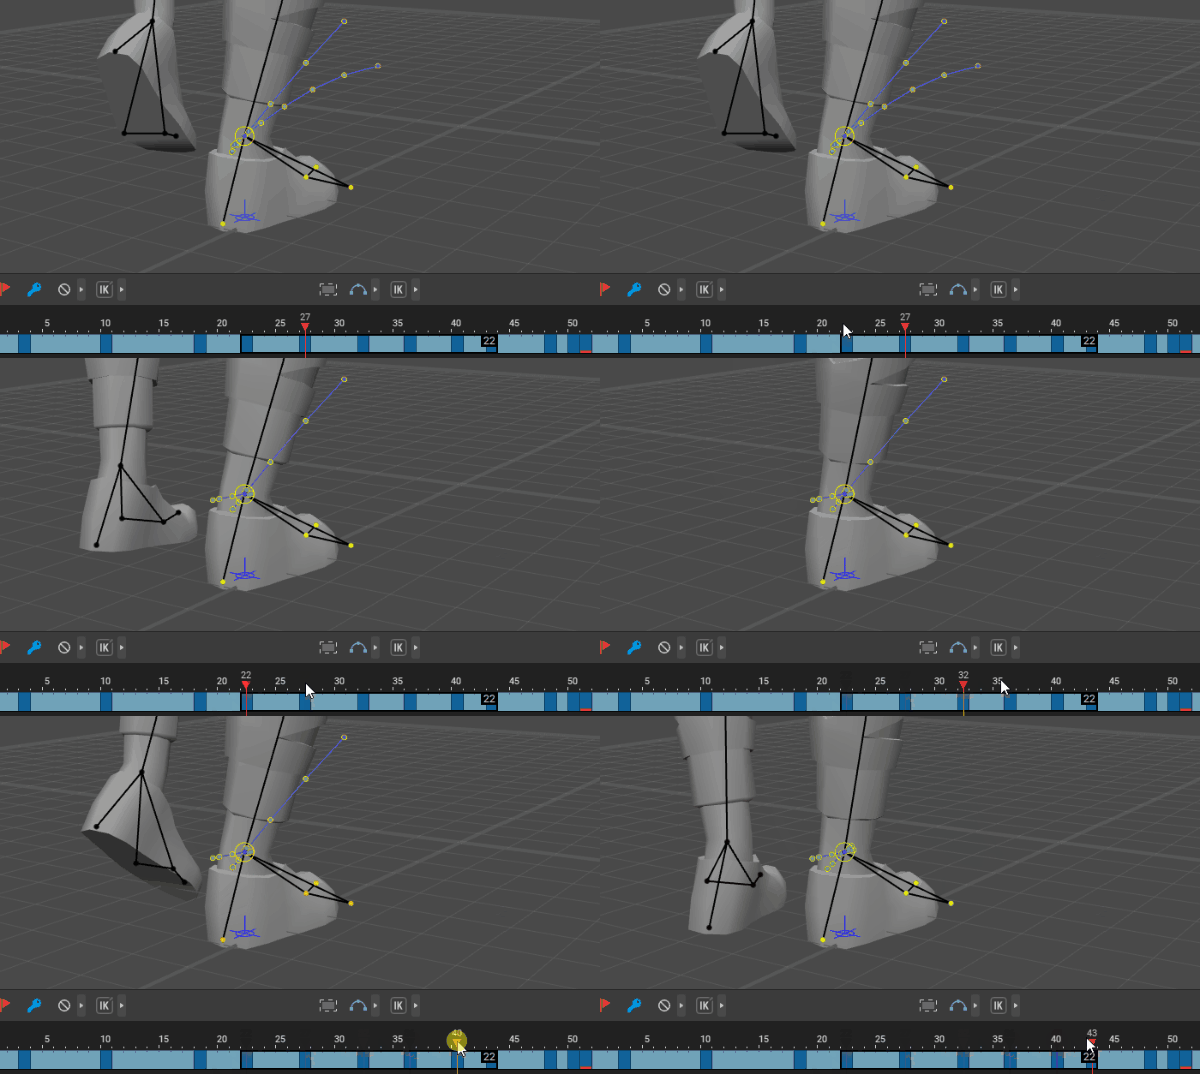
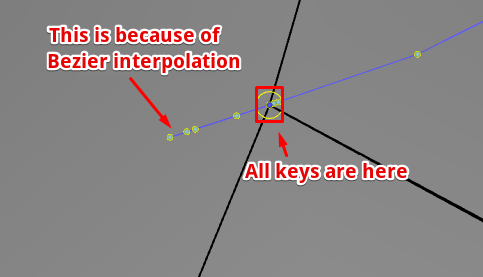
Now the keyframe positions do coincide, but the foot still slides. This is because we’re using Bezier interpolation which produces arc-like motions:
Removing Sliding
Sliding can be fixed using following methods methods:
Method 1. First, you can try to set Bezier clamped interpolation for your character’s legs.
For this to work, the legs should be placed on a dedicated Animation Track.
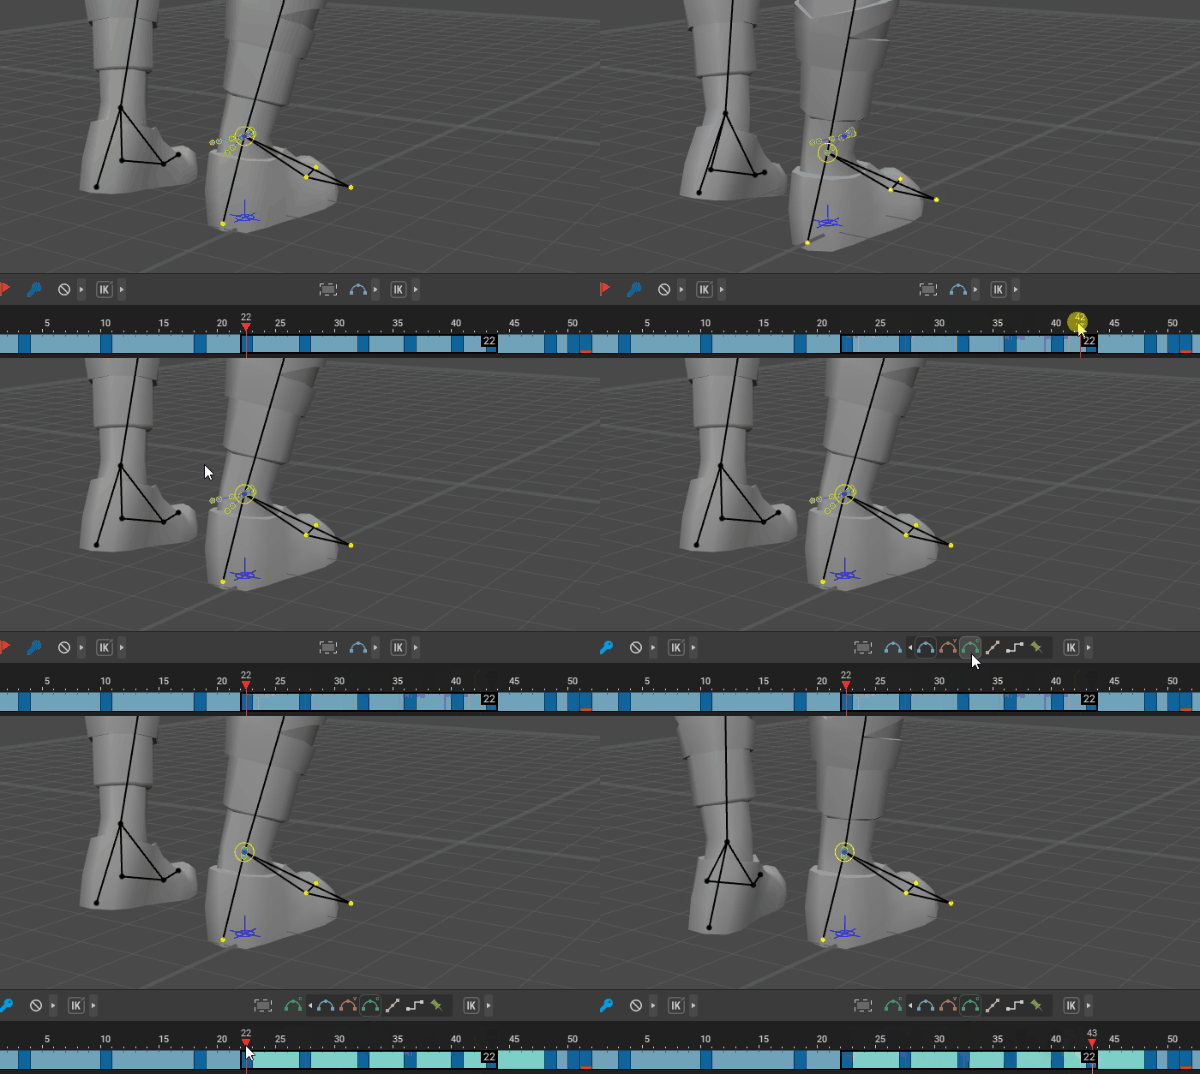
Method 2. Another method is to create additional keyframes to accentuate the positions of the feet.
Keys can be set specifically for the feet (if they are placed on a separate Track), or for the character as a whole.
Method 3. Finally, you can use Fixed interpolation:
1. Select the interval that displays the sliding effect.
2. Set the type of interpolation to Fixed.
3. Select the feet in the Viewport.
4. Within the selected interval, find a frame with the feet in the position you’d like them to have.
5. Set the current frame pointer to that frame.
6. Copy (Ctrl + C) the position of the feet.
7. Paste (Ctrl + Alt + V) this position to every frame in the interval.
Using this method is only advised when the animation is otherwise complete, as Fixed interpolation makes it difficult to work with.
Editing Trajectories
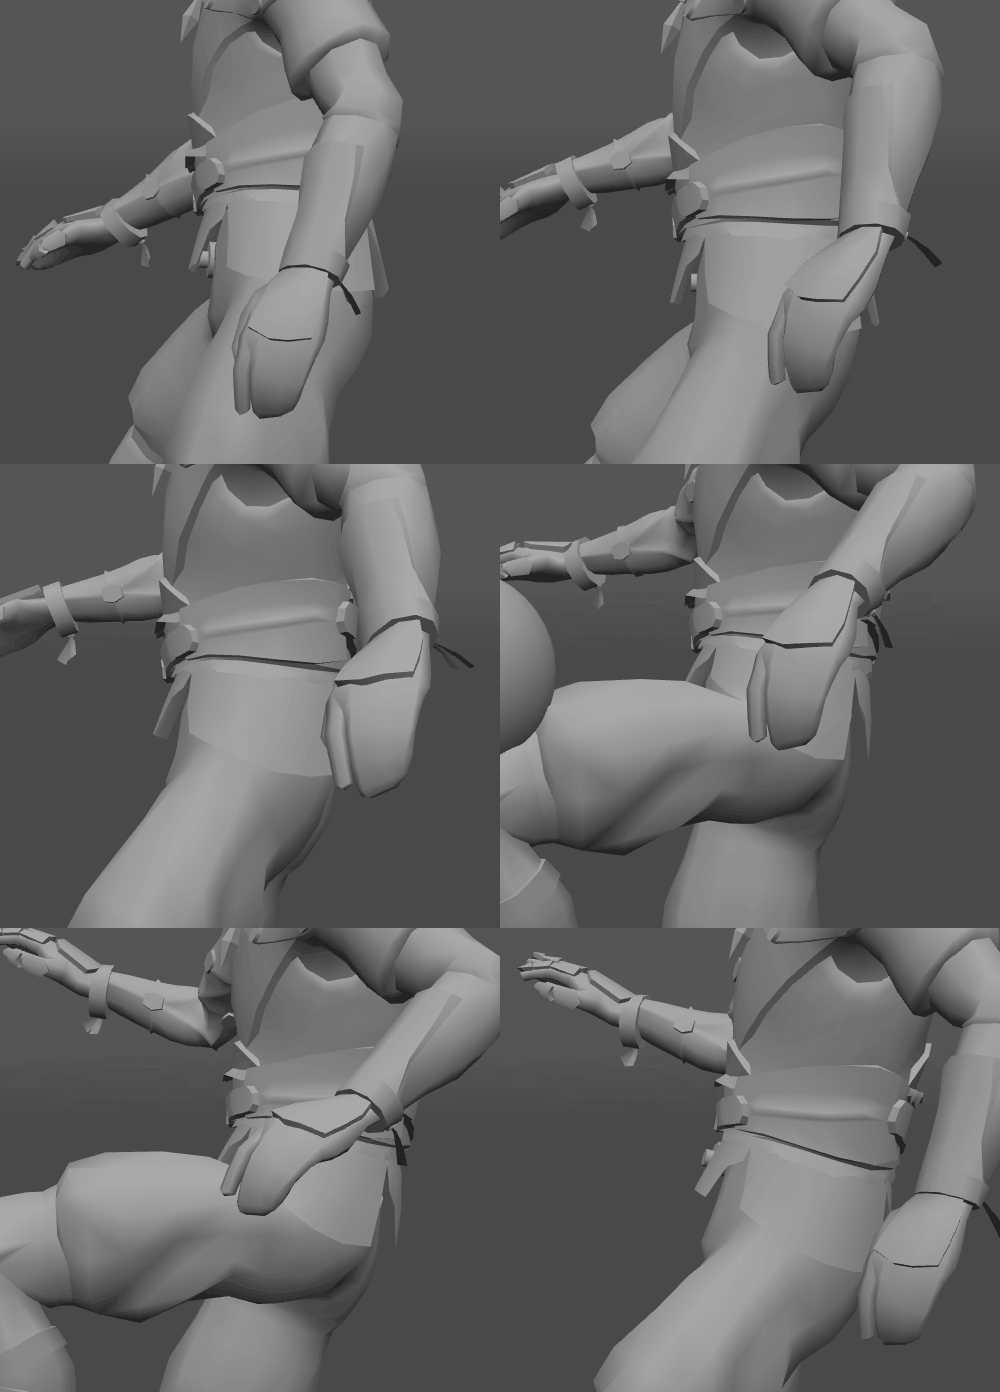
Sometimes, animation problems can be understood by looking on their trajectories:
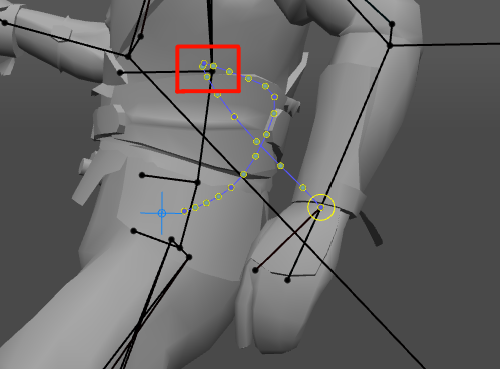
Here, we can see that there’s an interval with very high density of frames/points, whereas the neighbouring intervals are much more sparsely populated.
This is the reason for the uneven motion the arm displays.
To fix this issue, we need to distribute the points more evenly across the trajectory. This can be done by using one of the following methods:
1. First, you can select the arm itself and manually adjust its position in key frames:
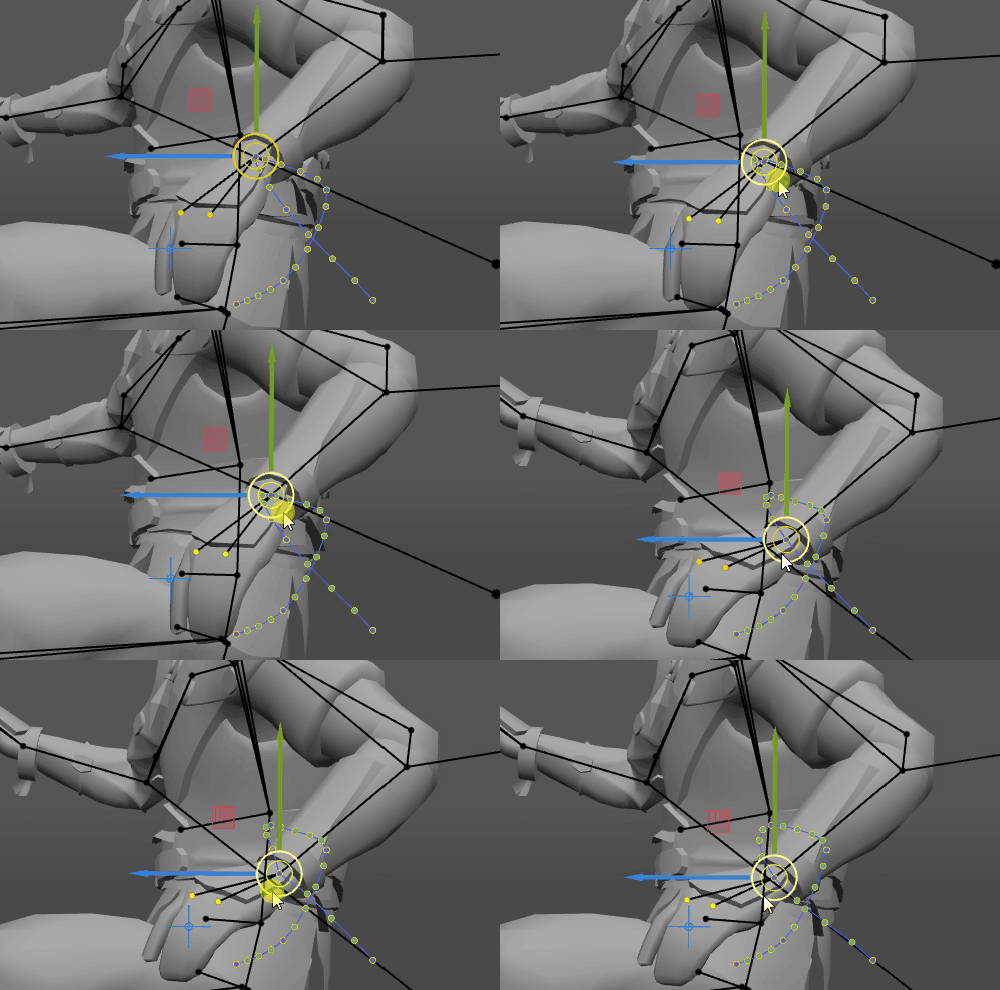
As you edit the controllers’ positions, the entire trajectory will change accordingly. Use this to monitor how the characteristics of the motion change.
2. Another way is to edit the trajectory itself:
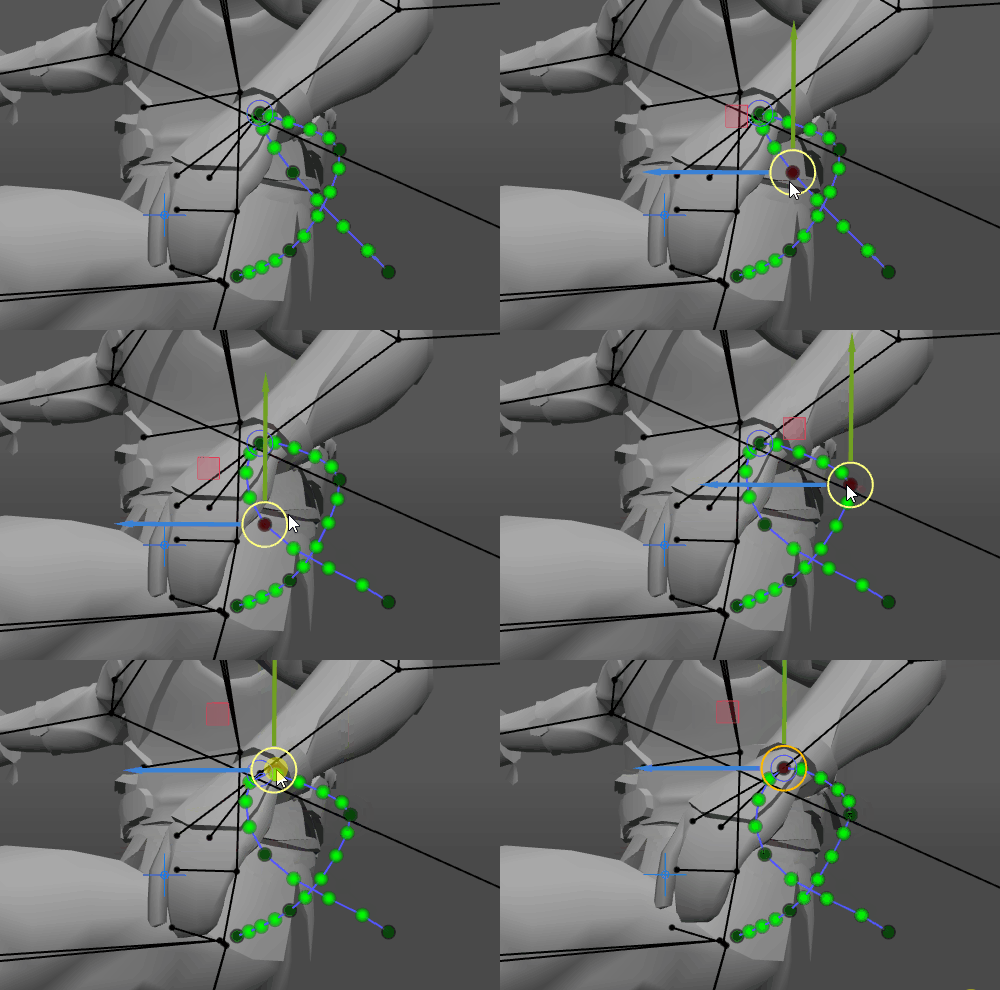
For this, the Trajectory Edit Mode should be enabled.
3. Finally, we can use the Tween Machine to achieve the same effect:
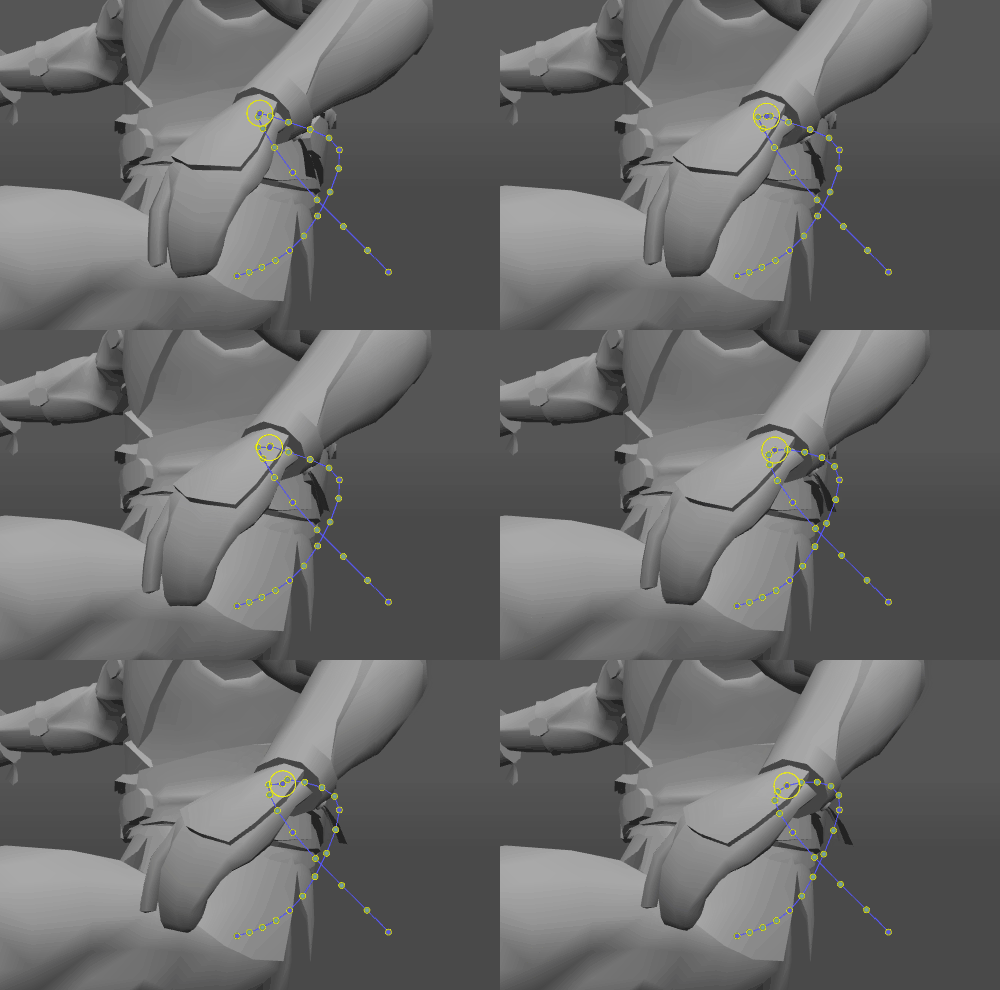
Here, we are using the Attract to previous position filter.
It should be noted that filters are only available through hotkeys. The list of available filters with their hotkeys can be found here.
Rotation Trajectories
Sometimes, regular trajectories might not be enough to discover animation issues.
For example, the head of our character is controlled by two points. And the trajectories of these points don’t really show anything special:
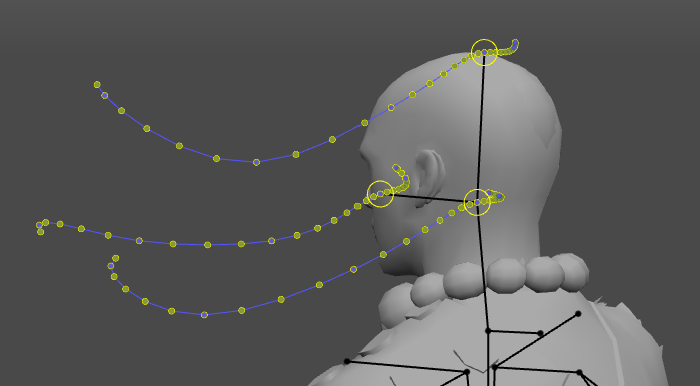
However, regular trajectories only show objects’ positions. If we look at their rotations instead, we might be able to discover what is wrong.
Rotation trajectories are specifically intended for cases like this.
To enable rotation trajectories:
1. Enable regular trajectories (see here how to do this).
2. Switch to the Rotation trajectory mode:

Now, the trajectory will show object rotations.
Don’t forget to switch the trajectory between coordinate axes so you could review and improve all three components of the rotation:
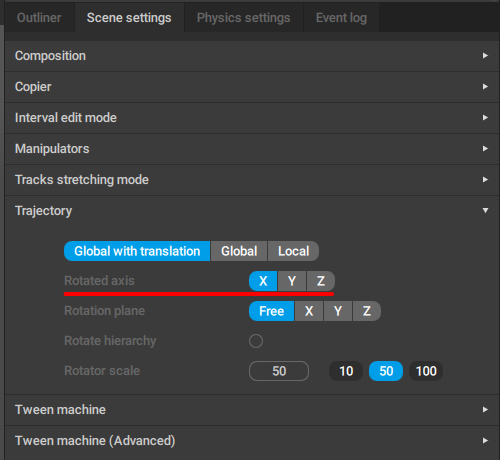
This is how our character’s head rotates across different coordinate axes:
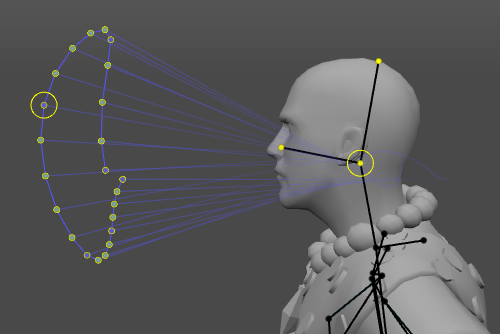
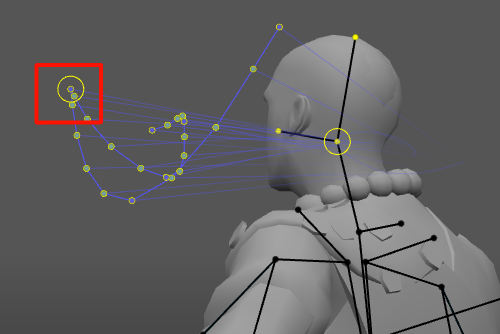
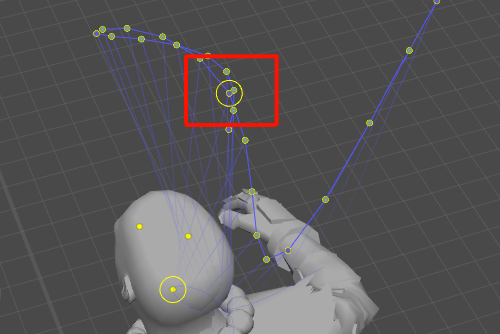
As you can see, these rotations display some noticeable distortions.
To fix them, we need to remove loops and make the trajectories more even. Just as with regular trajectories, this can be done by:
1. Selecting controllers and adjusting their rotations:
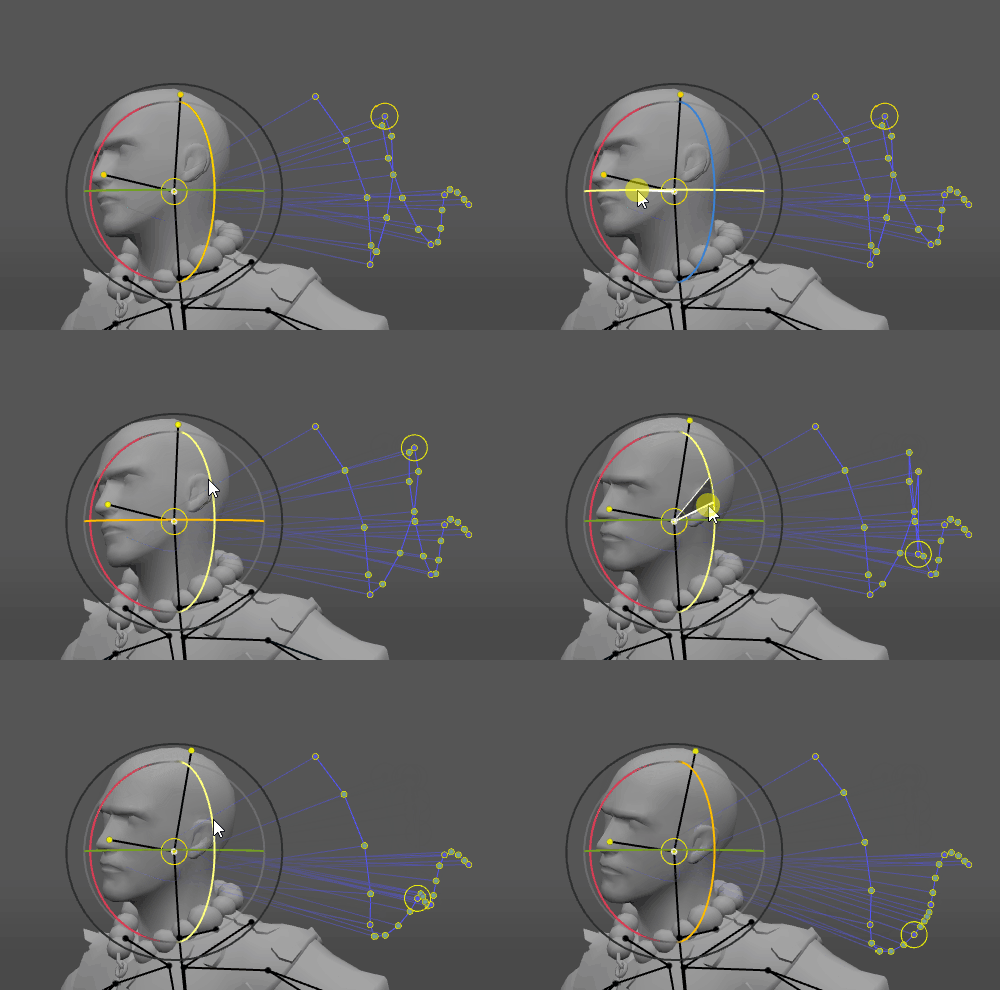
2. Editing the trajectories themselves.
This requires Trajectory Edit Mode (see above) to be enabled.
The Ground Problem
Sometimes when you animate complex movements, you might end up with your character's legs phasing through the ground plane.
This effect frequently occurs in jumping and falling animations, especially in landing parts. It can be fixed by using the same methods as described in the Removing Jittering and Removing Sliding sections.
Preparing Animation for Export
By default, the animation is baked before export, meaning every frame is converted into a keyframe:

This is done to make sure the animation will look the same regardless of the 3d software or game engine it is used in.
In the case you want to keep your original keyframes and interpolations, baking can be disabled:
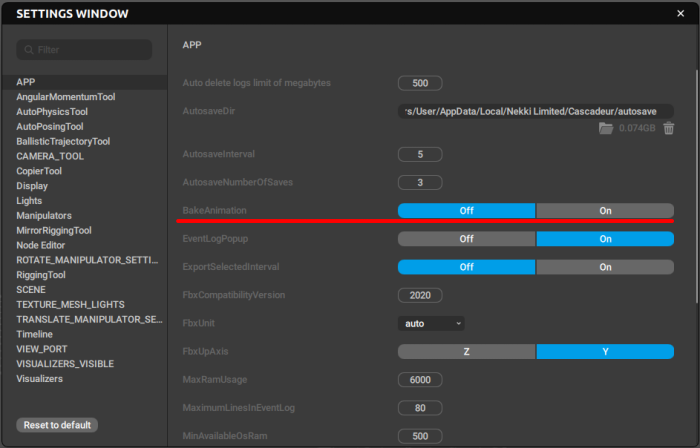
1. Open the Settings window.
2. Open the APP tab.
3. Set Bake Animation to Off:
