Point Controllers
- Home
- Rig
- Rig Structure
- Rig Elements
- Point Controllers
The main rig elements used for working with characters are Point Controllers. In the Viewport window, they are represented as black dots which you can select and move by using Manipulators.
Warning
There are no rotation values for Point Controllers.
However, if you select more than one Point, you can use the Rotate manipulator to move one of the Points across the other, effectively ‘rotating’ it.
Each point controller corresponds to a part of the character model. By changing positions of these controllers, you can adjust the pose of the character.
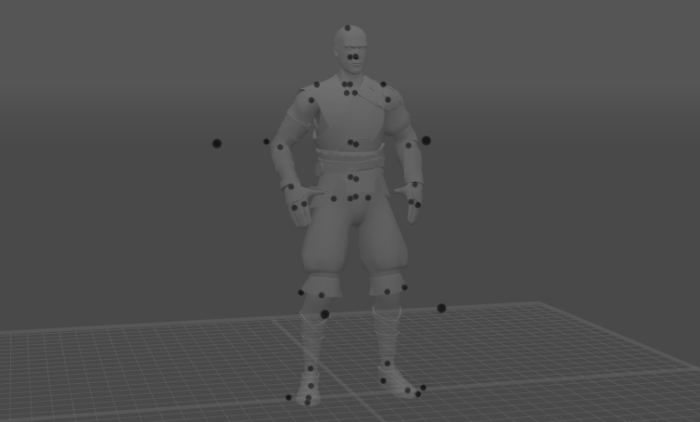
Point Controller elements of a character rig (shown as the silhouette of the character)
To make Point Controllers visible, enable Point controller mode by pressing the corresponding button on the Timeline.
Point Controller Types
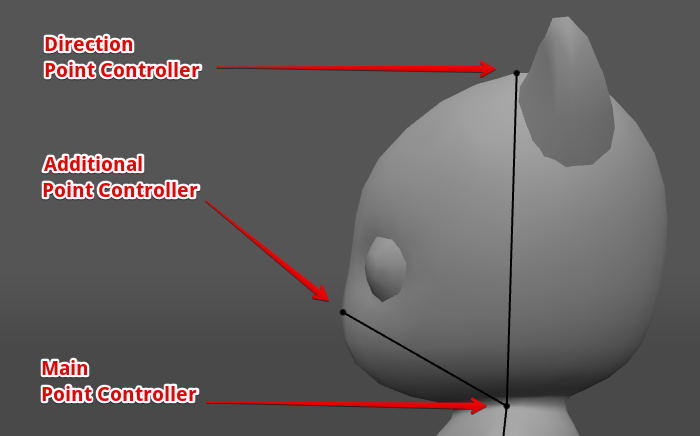
Usually, a joint or a rigid body is associated with three point controllers:
Main Point Controller is placed at the start of the joint
Main Direction Point Controller is placed at the point where the main joint connects with the child joint (if there is one), or at the end of the main joint.
It is used for controlling the direction the joint is facing
Additional Point Controller is usually placed at the side of the two other controllers.
It can be used for adjusting the rotation of the joint.
Fixing Point Controllers
Point controllers can be fixed at their positions by pressing R key.
To learn more about fixing controllers, see the dedicated chapter.
Forward and Inverse Kinematics
When you edit a pose in Cascadeur, you don't have to switch between forward and inverse kinematics, as both these modes are supported simultaneously.
For example, you can select point controllers on a palm and use them to drag the whole hand - or you can select every point in the hand and move the hand right from the shoulder.
Сharacter rig is physics-based, so if you, for example, drag character’s hand, it will drag the whole body after it.
Stretching and Squeezing
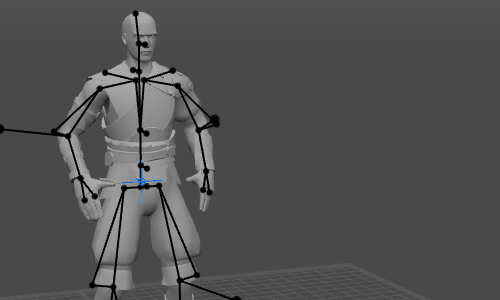
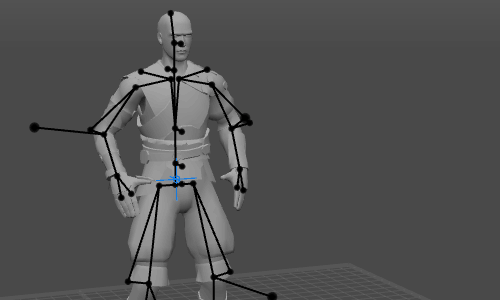
Point controllers are placed at fixed distances between each other. As the program calculates character motion, it tries to keep these distances unchanged, but this is not always attainable. In case distances between point controllers are distorted, edges between them change their colors.
Stretched edges are marked red, while squeezed are marked blue.
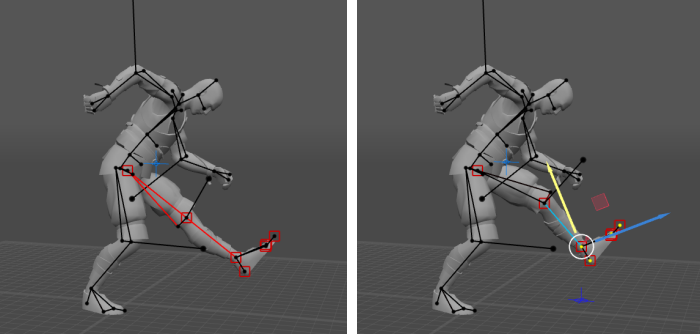
An example of point edges stretched (left) and squeezed (right)
By pressing the F5 key you can reset these lengths to their default values, returning character proportions to normal.
Point Controller Settings
A specific set of parameters is available for the Point Controllers in the Outliner window.
Extended Hierarchy

Enable parent
If this option is enabled, the object is used for hierarchical selection.
Enable additional parent
If this is enabled, the additional parent (if it is present) of the selected object is used for hierarchical selection.
Additional parent
The name of the additional parent of the selected object (if present).
Point color

Use custom color
If this is enabled, you can set a custom color for the Point Controller.
Point color
Sets a custom color for the Point. Works only when Use custom color is enabled.
Point ik fk settings

Ik/fk behavior
Sets the type of kinematics for the Point Controller.
IK means Inverse Kinematics is used.
FK means Forward Kinematics is used.
From timeline means the type of kinematics is derived from the current frame on the Timeline (and thus can change through the sequence).
By default, the IK option is used.
Enforce fk in interpolation
If this is enabled, Forward Kinematics is always used for the Point on interpolation intervals.
Keyframes, though, can still use different kinds of kinematics.
Disabled by default.
Collision in relaxation
If this is enabled, the algorithm would take collisions into account when calculating the relaxation phase for the Point.
Also disabled by default.
Point transform

Position
The three values that define the position of the Point Controllers (along the XYZ coordinate axes) in the scene.
Twist
Sets the default rotation (in radians) for some body parts, such as shoulders and knees.
Swing
Sets the default bending angle (in radians) for some body parts, such as elbows and ankles.
Note
In Cascadeur rigs, Twist and Swing are generally not used together.
Normally, a Point would have either a Twist, or a Swing parameter.