Scene Settings
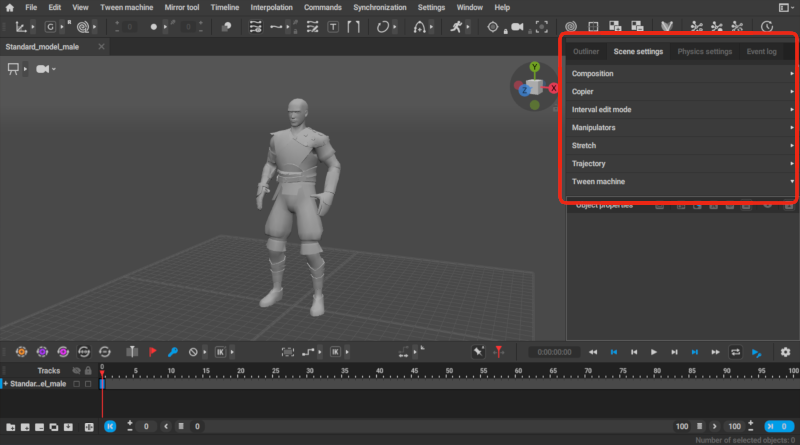
This tab contains various parameters that define the behavior of a scene and various instruments used to edit it. It is located at the right of the Viewport window
Settings are saved when the program is shut down and restored at the next run.
The tab includes several drop-down panels:
Animation Unbaking

Contains settings for the Animation Unbaking feature.
Collision Penetration Cleaning

Contains parameters for the Collision Penetration Cleaning tool.
Composition

Contains settings for the Composition tool.
Copier

Contains settings for the Copy Tools
Mode
This parameter sets the coordinate system used to copy objects.
Three values are available: Global (world coordinate system is used), Local (object coordinate system is used) and Relative (object coordinates in relation to a pivot point are used)
Rotate
This option allows for choosing what coordinate axes should be taken into account when object rotation is copied
User can select one of the axes (X, Y or Z) or use all three (the Whole option)
Position
This setting defines what coordinate axes should be used for copying the position of an object.
User can select one or several of the axes (X, Y or Z), or use all three (the XYZ option)
Scale
This setting defines coordinate axes that should be used for copying the scale of an object
Like with Position parameter, each axis can be selected individually
Factor
This parameter defines the influence used for pasting the previously copied animation.
The value ranges from 0 to 100.
100 means the copied animation completely overwrites the original, while 0 means that the copied animation is ignored and the original is kept without changes.
Pivot
This parameter defines how the transform data is copied and pasted in reation to the current Pivot Mode setting.
Fixed means the transform data is copied and pasted relative to the pivot on the current frame.
Moving means the transform data is copied and pasted relative to the pivot in all selected frames.
To use the Pivot Mode correctly, you should also turn on the Relative to pivot setting. Otherwise, the copied data will always be relative to the object itself and not the pivot.
Reset
Restores all the settings on the tab to their default values.
Environment

This section contains parameters for the environment lighting.
Equirectangular Map
Sets a texture for the environment lighting.
Environment Rotation
Sets the rotation for the environment texture. Can be used to adjust its position, and with it, the look of the scene.
Light Color
Sets the color of the environment lighting. The color is used when there is no texture (?).
Light Intensity
Sets the strength of the lighting.
Light Direction
Sets the direction of the environment light (the ‘main’ light source in the scene).
FPS
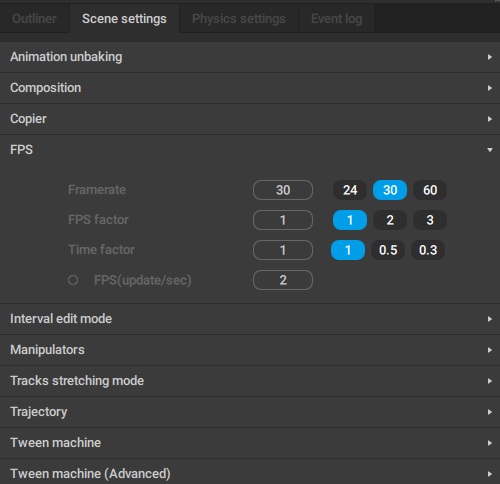
Contains a number of settings that control how animation is played.
The same set of parameters can be found on the Timeline Settings panel.
Framerate
Defines the number of frames per second. Higher values result in more smooth and fluid motions.
The value can be set manually or selected from one of three presets: 24, 30 and 60 frames per second.
FPS factor
This parameter is used for making animations more fluid by increasing the number of frames used to interpolate key frames.
This parameter does not affect the speed of animation, only its smoothness. This can be seen as multiplying FPS parameter and the number of every key frame by the FPS Factor value.
The value of this parameter can be selected from three pre-defined numbers (1, 2 or 3), or set manually.
Time factor
This parameter controls the scale of the animation. If, for example, its value is equal to 0.5, the animation will be two times slower than normal.
The value can be set manually or selected from a preset. Available presets are 1.0, 0.5 and 0.3 with 1.0 being the default value.
FPS(update/sec)
This parameter defines how often the FPS indicator is updated.
Its default value is 2 (two updates per second).
Fulcrum Motion Cleaning

Contains settings for the Fulcrum Motion Cleaning feature.
Inbetweening

Contains settings for the Inbetweening feature.
Interval Edit Mode
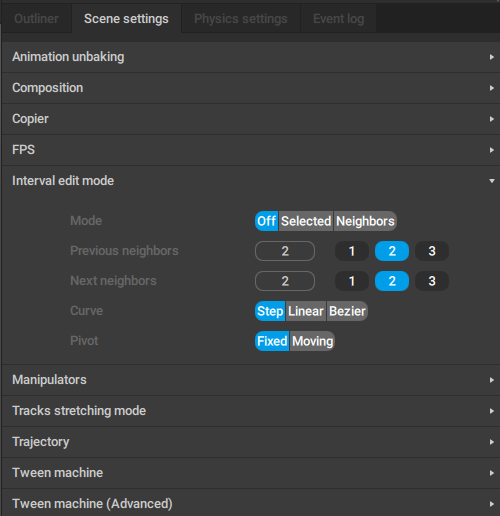
Contains settings for the Interval Edit Mode.
Manipulators
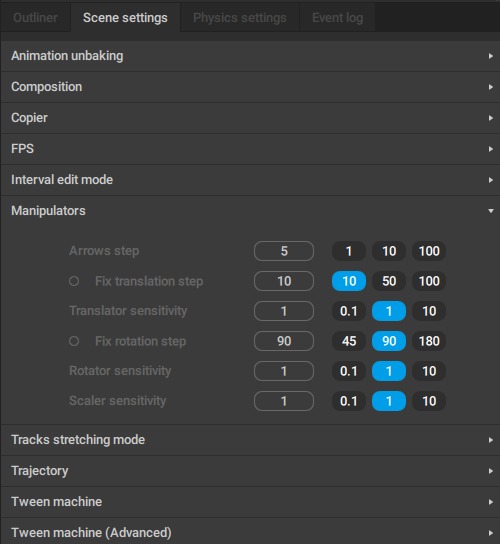
This tab contains settings for Manipulators
Arrows step
This parameter sets the distance at which the selected controllers are moved when you press arrow keys.
The value of this parameter can be set manually or selected from the three preset options: 1, 10 and 100. The default value is 5.
Fix translation step
If this switch is enabled, an object can only be moved (using the Translate manipulator) by a distance that is divisible by the value specified in the field near the switch.
The value can be set manually, or it can be selected from on of the presets: 10, 50 and 100.
Translator sensitivity
Defines how fast an object is translated when the user selects one of the parts of the Translate manipulator (by left-clicking it) and moves mouse pointer while holding down the mouse wheel.
Translator sensitivity can be set manually or selected from three presets: 0.1, 1 and 10 with default value being 1.
Fix rotation step
If this switch is enabled, an object can only be rotated (using the Rotate manipulator) by an angle divisible by the value specified in the field near the switch.
The angle can be set manually or by selecting a preset, of which there are three: 45, 90 and 180.
Rotator sensitivity
This parameter defines the speed of rotation when the user selects one of the parts of the Rotate manipulator (by left-clicking it) and moves mouse pointer while holding down the mouse wheel.
Rotator sensitivity can be set manually or selected from three presets: 0.1, 1 and 10. The default value is 1.
Scaler sensitivity
Defines how fast objects are scaled when the user selects one of the parts of the Scale manipulator (by left-clicking it) and moves mouse pointer while holding down the mouse wheel.
Like other similar parameters, this one can be set manually, or selected from three presets: 0.1, 1 (the default value) and 10.
By default, it is set to 1.
Mirror

This setting is used to set up additional affixes for mirroring rig elements when creating a character rig.
Regular mirroring tool (avaialbe in the Rigging Tools and the Quick Rigging Tool) only supports one pair of affixes. When different parts of the character use different affixes, this setting can be used to store them all.
Additional affixes
The field to put additional affixes to.
Affixes for the left and right side should be separated by a colon. Pairs of affixes shold be separated by a semicolon.
For example, if the character’s hands have names like L0_hand and R0_hand while feet are named L1_foot and R1_foot, you should write L0:R0; L1:R1 to this field for the Mirror Tool to recognize both pairs.
Root Motion

Contains parameters for customizing Root Motion.
Track Stretching Mode
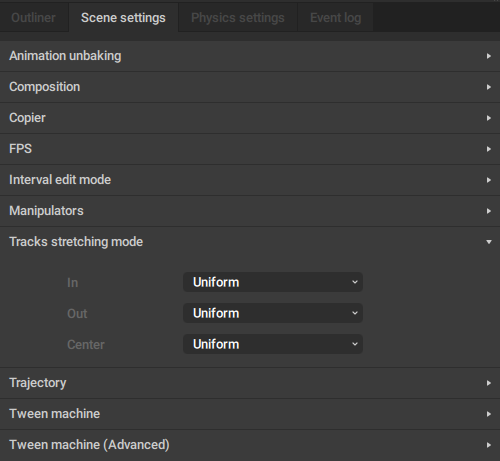
This tab contains settings for the Track Stretching Mode.
Trajectory

This tab contains settings for Trajectories.
Units

This tab contains settings that define what kind of measurements are used in the scene.
Length
This parameter defines how length is measured in Cascadeur scenes.
By default, it is set to centimeters, meaning that one Cascadeur unit is equal to one centimeter.
Default Settings
Settings can be set to default by selecting Reset all to factory settings from the Settings menu.
