Interval Edit Mode
- Home
- Tools
- Animation Tools
- Interval Edit Mode
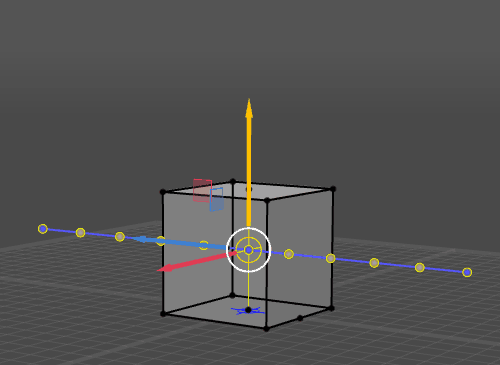
By default, all adjustments you make to the scene objects only affect the current frame.
This, however, can be changed by enabling Interval Edit Mode on the Timeline:

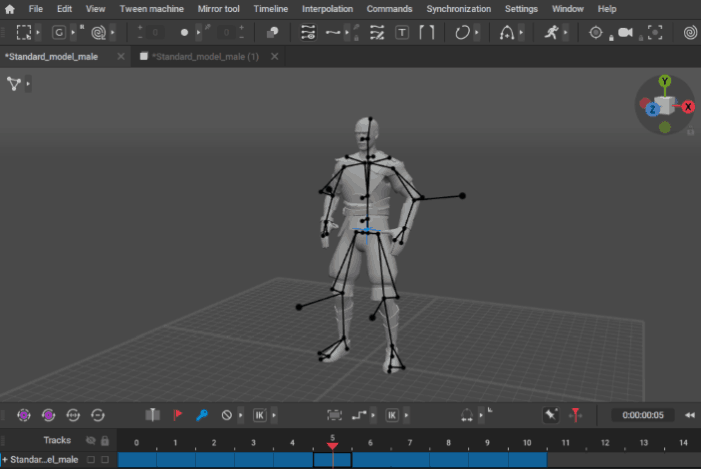
When this mode is selected, adjustments made to the objects are applied to every position of these objects on the selected interval:
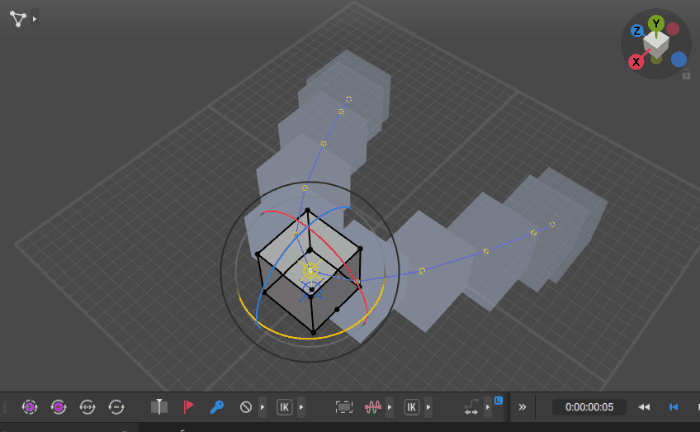
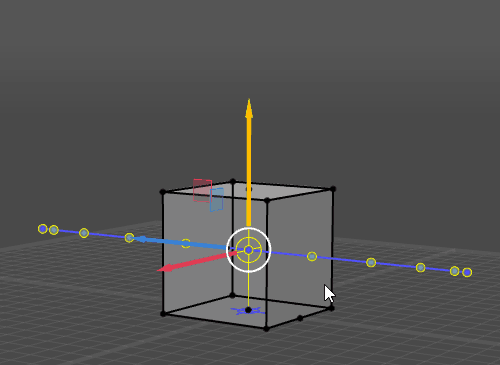
Interval Edit Mode with the Step Curve setting.
When this mode is used, the Viewport window is marked with a red border.
To disable Interval Edit Mode, simply disable the corresponding button.
Fixing Interpolation on Change
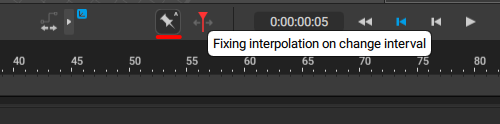
If this feature is enabled, interpolation is changed to Fixed when the animation is changed (including being snapped to Auto Physics simulation). This happens because transformation is applied to every frame, not just to keyframes.
If you want to avoid this, disable the Fixing interpolation on change button on the Timeline.
This way, transformations will be applied to keyframes only.
Settings
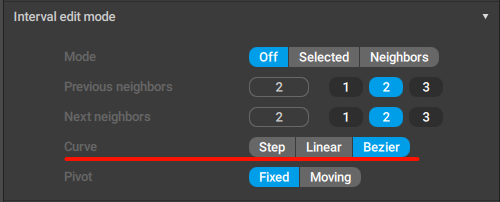
Settings for the Interval Edit Mode can be found on the Scene Settings panel, on the Interval Edit Mode tab:
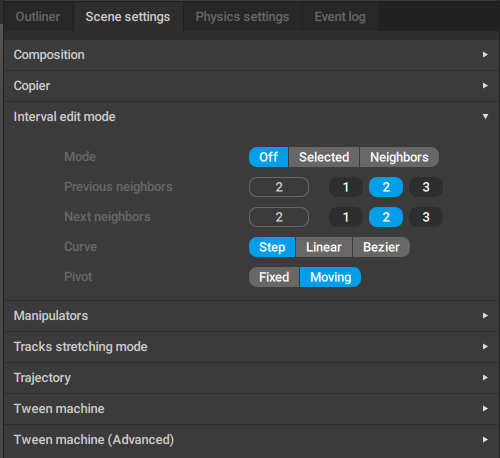
Mode
Defines the interval to which Interval Edit Mode is applied:
Off means Interval Edit Mode is disabled (any changes you make only work with the current frame).
Selected means the tool is applied to every selected frame.
Neighbors means the tool is applied to the current frame and to several neighboring frames.
How exactly the nearby frames are affected is defined by the Curve setting (see below).
The number of neighborig frame can be set with the two next options:
Previous neighbors
The number of neighboring frames that precede the current frame.
Next neighbors
The number of neighboting frames that follow the current frame.
Curve
This option sets how the trajectory is affected during editing. Three modes are available:
Step
The default setting. If this is selected, the trajectory moves as a single entity and doesn’t deform in any way.
Linear
If this option is selected, the trajectory deforms in a linear fashion.
Bezier
If this option is used, the trajectory is deformed using Bezier spline.
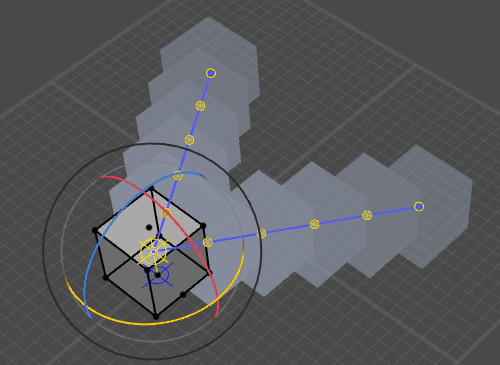
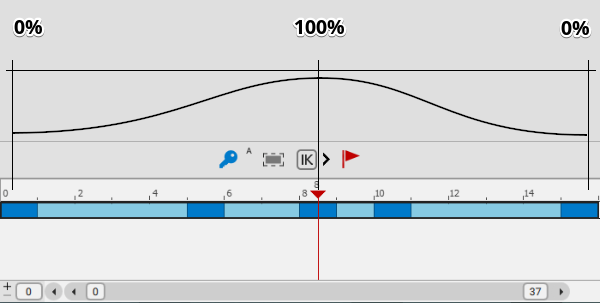
These settings affect rotation as well:

Rotation in the Interval Edit Mode with the Linear setting enabled.
Modes can be selected on the Timeline as well:
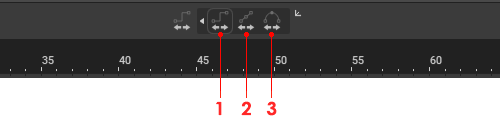
(1) Step interpolation.
(2) Linear interpolation.
(3) Bezier interpolation.
Pivot
This setting defines how exactly adjustments are applied to the interval.
There are two available options:
Fixed

In this mode, manipulators are applied to every frame on the selected interval in relation to a pivot, i.e. to the position of the selected object in the current frame.
This mode is selected by default.
Moving
When this mode is selected, adjustments are applied to the positions of the objects in relation to their positions on the corresponding frame. Moving an object in one frame will move it in every other frame of the interval.
Animation Blending
Interval Edit Mode can be used with Copy Tools for blending animations:
1. Copy a pose or an animation.
2. Enable Interval Edit Mode.
3. On the Scene Settings panel, go to the Interval Edit Mode tab and set Curve to either Linear or Bezier.
4. Select the interval on which you’d like to paste the copied animation.
5. Set the Current Frame indicator to some frame on the interval.
This frame will act as the “center” for the animation you’ll blend with the existing one. To this frame, the animation will be applied with full effect; for other frames, the effect will be weaker.
How animation is blended using Interval Edit Mode.
6. Use Paste into interval from the Edit menu to apply the copied animation to the existing one.
The pose/animation will be copied to the selected interval with a varying degree of influence:
- For the “center” frame the full influence (100% by default) will be used
- For the neighboring frames the effect will grow weaker with the distance from the center.
- At the borders of the interval the influence will decrease to zero.
Interval Edit Mode and Tween Machine
he same method can be used with the Tween Machine:
1. Select an interval.
2. Set the Current Frame indicator to the frame you’d like to use as a “center”.
3. Enable Interval Edit Mode.
4. On the Scene Settings panel, go to the Interval Edit Mode tab and set Curve to either Linear or Bezier.
5. Use the slider on the Tween Machine tab to adjust all selected frames at the same time:
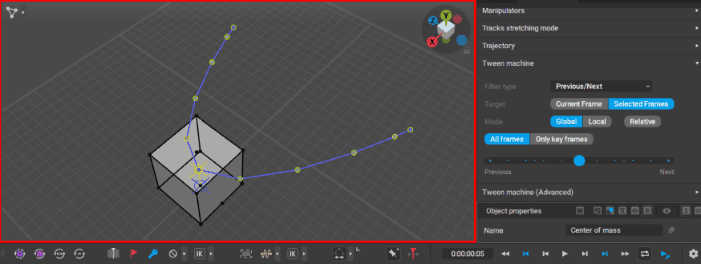
The effect will be different depending on the value of the Curve parameter (found under the Interval Edit Mode tab on the Scene Settings panel):
- If the parameter is set to Step, the adjustments you make are applied to every selected frame at full effect. This result would be no different from using Tween Machine the regular way.
- If it is set to either Linear or Bezier, the adjustment are applied at full effect to the “center” frame (marked by the Current frame indicator), and grows weaker with the distance from that frame.
How exactly it decreases depends once again on the Curve setting:
- Linear means uniform decrease from the center to the borders.
- Bezier means slower decrease near the center and faster near the borders.