Camera Tools
Cameras are used for viewing the scene from a specific angle.
Camera Types
There are two kinds of camera objects in Cascadeur: regular Camera and Camera with aim.
Camera
A basic variant of a Camera object. Defines a point from which the scene can be viewed.
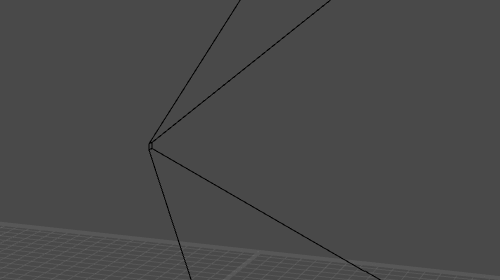
To add this object to a scene, select Add → Camera → Camera from the Commands menu:

If you need the camera to match the angle of the current Viewport, use the Create camera from active viewport:

Camera with aim
An extended version of the regular Camera object. Works in a similar way, but includes several additional controls to make work with this type of camera more convenient.
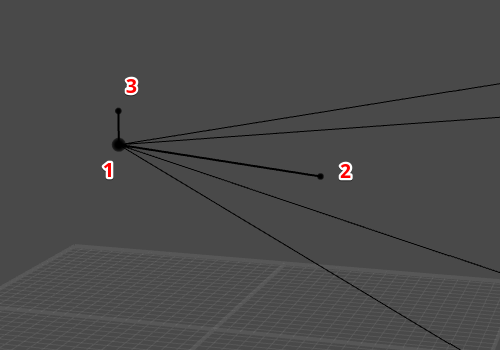
(1) camera object
Defines the camera’s point of view.
(2) camera target point
Controls the camera’s direction.
(3) camera additional point
Controls the camera’s rotation and spatial orientation.
To add this object to a scene, select Add → Camera → Camera with aim from the Commands menu:

Just like a regular Camera, Camera with aim includes a full set of camera-related parameters.
Custom Camera
The third available camera type is a Custom Camera. It has orthographic projection.
To add this object, select Add → Camera → Custom Camera from the Commands menu:

Camera Settings
Settings for a selected Camera are available in the Outliner window, on the Camera tab:

Horizontal aov
Sets the horizontal area of view for the camera.
Measured in degrees.
Field of view
Sets the vertical angle (the ‘height’) of the camera’s view area.
Also measured in degrees.
Focal length
Sets the camera's focal length (impacts the field of view).
Sensor width and Sensor height
Set dimensions (in millimeters) for the virtual camera sensor.
These parameters can be used to control the proportions of the image captured by the camera. If you have one of them, you can calculate the other based on the aspect ratio:

Near clipping
Sets the near clipping distance:: if the distance between an object (or a part of it) and the camera is less than this value, it won't be rendered.
Far clipping
Sets the far clipping distance: if the distance between an object (or a part of it) and the camera is greater than this value, it won't be rendered.
The second set of parameters is available in the Camera group of settings:

Note
This group might not be visible by default.
If this is the case, you’ll need to enable the Show hidden behaviors button on the header of the Object Properties panel.
Horizontal aov
Sets the horizontal angle (the ‘width’) of the camera’s view area.
Measured in degrees.
Field of view
Sets the vertical angle (the ‘height’) of the camera’s view area.
Also measured in degrees.
Rotation offset
Additional camera rotation. This parameter includes three Euler angles that can be used to change camera direction without changing its transform rotation.
Aspect ratio height and Aspect ratio width
These parameters define the proportions of the image captured by the camera.
Show images
If this is enabled, textures attached to the Camera are visible when the scene is viewed through this camera.
See here for more information.
Near clipping
Sets the near clipping distance: if the distance between an object (or a part of it) and the camera is less than this value, it won't be rendered.
Far clipping
Sets the far clipping distance: if the distance between an object (or a part of it) and the camera is greater than this value, it won't be rendered.
Focal length
Sets the distance to the camera's focal point (impacts the field of view).
Custom Camera objects have a different set of parameters:

Aspect ratio height and Aspect ratio width
Define the proportions of the image captured by the camera.
Show images
If this is enabled, textures attached to the Camera are visible when the scene is viewed through this camera.
See here for more information.
Finally, a Camera with aim includes an additional group of settings called Aiming:

Post offset rot
(TODO)
Pre offset rot
(TODO)
Is aiming
(TODO)
Enabled by default.
Viewing the Scene
To view the scene through a camera:
1. Select the camera
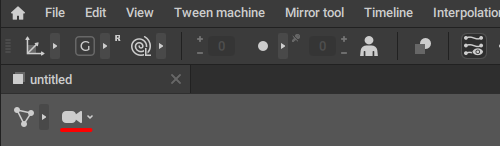
2. Click the Align to Camera button.
It can be found in the Viewport window:
Camera Controls
Camera behavior can be set using the buttons on the dedicated panel at the upper left corner of the Viewport:

(1) Track object with camera
If this button is enabled, the camera will follow the selected object.
The lock sign near this button is the Switch camera mode to selection option. If it is enabled, the camera will follow a selected part of an object (a controller or a mesh)
(2) Align to camera
Press this button to align the current view to a currently selected camera.
The lock sign near this button is the Camera unlocked option. If it is enabled, Viewport window that is aligned to the camera cannot be controlled (via View Cube or other means) and would always view the scene through that camera.
This option is disabled by default.
(3) Center camera
This button focuses the camera on a currently selected object. The hotkey for it is  .
.
When the scene is viewed through a Camera, it can be translated, zommed and so on, much like with the regular Viewport window.
Controls for this mode can be customized on the Viewport Input Settings panel (available though the Settings menu).
Animated Cameras
Cameras can be animated like any other objects: by creating keyframes and setting interpolation intervals between them.
Camera Textures
There is also an option to add a texture to a camera object:

This feature can be useful when you need to use a video sequence as a backdrop to your animation (for example, to make the animation in sync with the motion on that video).
Using it is described on the Meshes page, under the Camera Textures section.
Exporting Cameras
Just like any other object, Cameras can be exported into the FBX and Collada formats.
Exporting scenes is described on the Export page.
However:
As of now, Collada format does not support camera animation. If you need to export camera animation, use FBX instead.