Root Constraint
- Home
- Tools
- Animation Tools
- Root Constraint
In Cascadeur, root joints are not linked to the rig (as described on the Where to Start page). Because of this, if you try to move the rig, the root will remain in the same place:
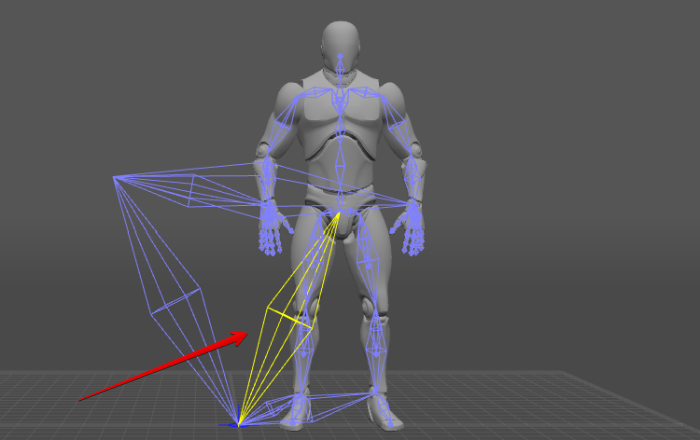
So if you are creating an animation that involves root motion, you should use Root Constraint to bind the root to one of the other Joints.
1. Switch to the Rig Mode.

2. Select the root joint.
3. Select the Prototype Rigid Body associated with the joint you’d like to bind the root to. Usually, it is a Pelvis Rigid Body, but this may vary depending on the skeleton.
In the image below, the root joint and the RigElement_pelvis have been selected.

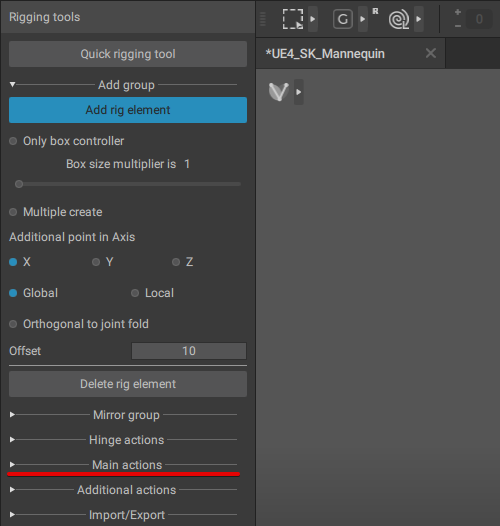
4. Go to the Rigging Tools panel.
5. Open the Main actions panel:
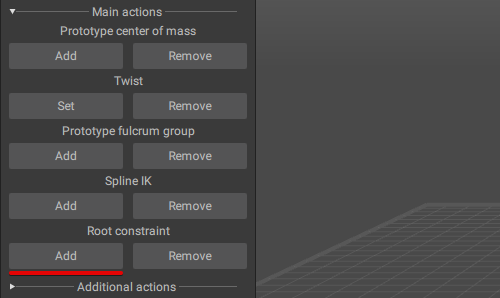
6. In the Root constraint section, click Add:
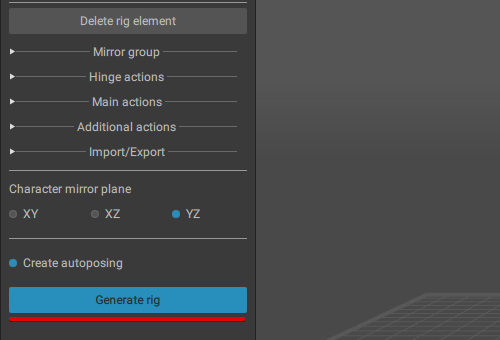
7. Finalize the rig by clicking the Generate rig button:
Now, the root will move along with the rigid body you’ve bound it to.
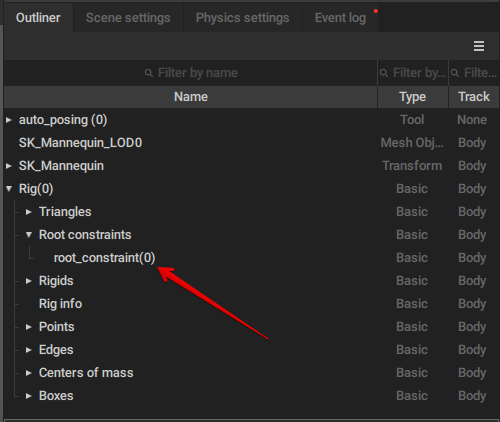
Also, a Root constraint object will be added to the scene. It can be selected in the Outliner:
Selecting this object will give you access to the root constraint options:

Constraint active
If this is enabled, the root is binded to the joint you selected.
Follow on y axis
If this option is enabled, the root joint would copy the Y coordinate of the joint it's constrained to. If it isn't, the Y coordinate would be ignored.
Follow rotation
If this option is enabled, the root joint would copy the rotation of the joint it's constrained to. If it isn't, rotation would be ignored.
Root position offset
Used for shifting the position of the root.
The default value for this parameter is set automatically as the rig is generated. It depends on the difference between the positions of the root and the joint it is attached to.
After the rig is finalized, the offset can be adjusted manually.