Animation Cycles
- Home
- Tools
- Timeline Tools
- Animation Cycles
Sometimes you might need to create a looping animation.
This can be done in a convenient way: by using Animation Cycles.
Interface
Cycles are controlled by a set of buttons on the Timeline:
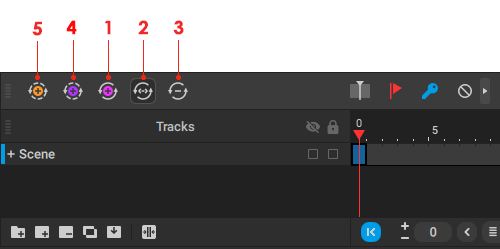
(1) Create cycle
Clicking this button creates a cycle out of the currently selected interval.
(2) Cycle resizing
If this is enabled, you can manually adjust the length of the cycle after it is created.
Enabled by default
(3) Remove cycles
Click this button to remove cycles on the selected part of the Timeline.
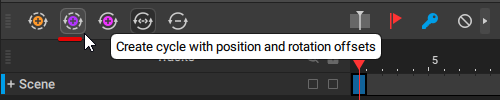
(4) Create cycle with position and rotation offset
Creates a cycle that takes into account the character’s overall translation and rotation; this means that with every cycle the character’s position would change. Can be used for creating scenes with the character walking or running.
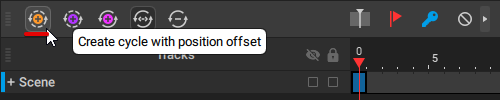
(5) Create cycle with position offset
Same as above, but only the character’s translation is taken into account; rotation is ignored.
Creating Cycles
To create a cycle:
1. Select an interval on the Timeline.
This interval should include at least one keyframe.
2. Next, you’ll need to create a cycle out of the selected frames.
There are a total of three options for creating cycles. Which one to use depends on the kind of animation you are working on.
If you need a regular cycle, where the motion is simply repeated, click the Create cycle button on the Timeline:

If instead you need a cycle that would take into account shifts in the character’s positions, click the Create cycle with position and rotation offsets button instead:
Finally, if you need a cycle that only takes into account the character’s translation and not rotation, click the Create cycle with position offset button:
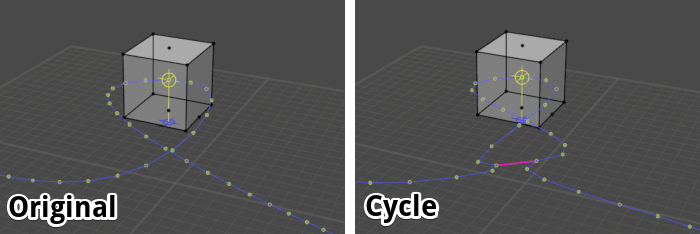
3. The frames you’ve selected will be marked as a cycle. On the Timeline, a cycle is represented with a border.
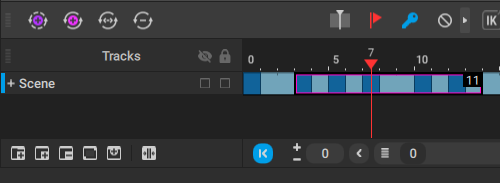
The color of this border represents the type of the cycle:
- Bright purple for regular cycles
- Darker purple for cycles with position and rotation offsets
- Orange for cycles with only position offset.
Also, the first and the last frames of the cycle are combined into one, producing a circular motion. This often leads to changes in the trajectory:
4. Now you can expand this cycle to a longer interval.
To do this, drag the borders of the cycle area to include frames to which the cycle should be applied:
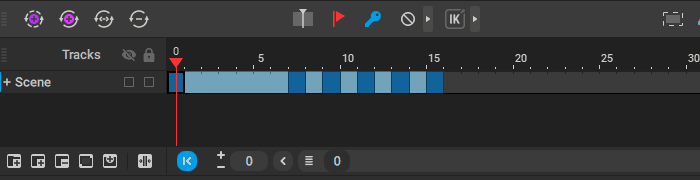
Keep in mind that doing this won't change the length of the cycle itself.
After this, the animation in the cycle will be applied to the whole selected interval. The exact effect, however, can be different, depending on the kind of cycle you’ve created.
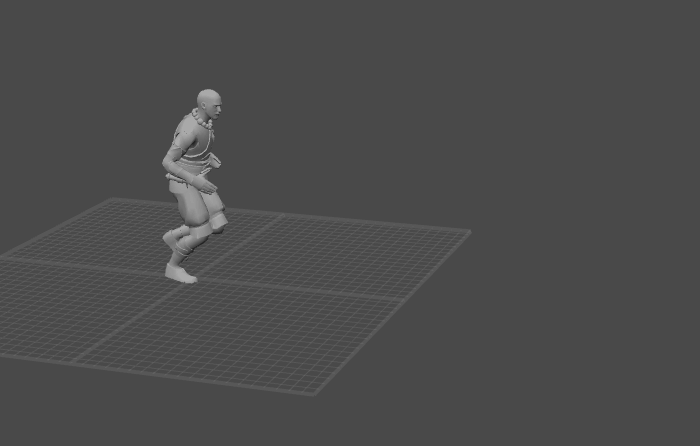
With a regular cycle, animation is simply repeated time after time:
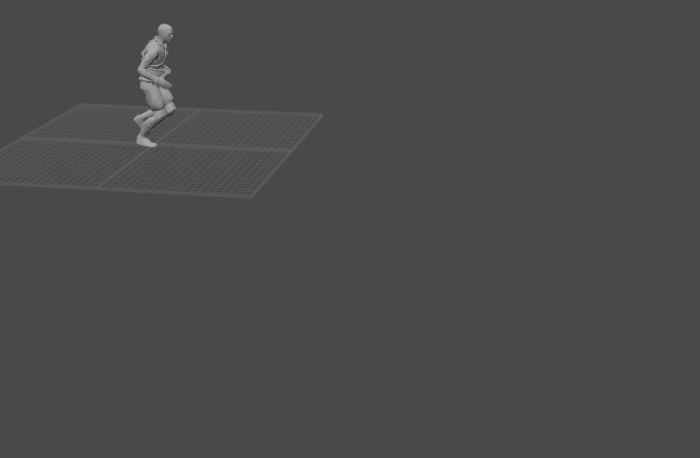
For a cycle with position and rotation offset, both the character’s translation and rotation are taken into account to shift the overall position with each cycle:
Finally, with a cycle with only the translation offset is taken into account while rotation is only applied within the cycle and doesn’t contribute to the overall trajectory:

Working With Cycles
Cycles can be edited: you can freely add or remove keyframes, move them around and edit character poses on the active part of the cycle.
The inactive part of the cycle will reflect any changes made to the active part.
Track Stretching Mode does not work with cycles.
Currently, cycles cannot be copied. A copied cycle reverts back to a regular interval.
And finally, if you need to remove a cycle, simply select its frames on the Timeline and click the Remove cycle button.