Track Stretching Mode
- Home
- Tools
- Timeline Tools
- Track Stretching Mode

Timeline in the Track Stretching Mode
This mode is used for adjusting Interpolation Intervals. When an interval is edited in this mode, every selected keyframe moves to keep its position in relation to the length of the interval. This way you can edit the length of a movement while keeping the timeline’s structure.
Using Track Stretching Mode
To use Track Stretching Mode:
1. Select an interval on the Timeline.
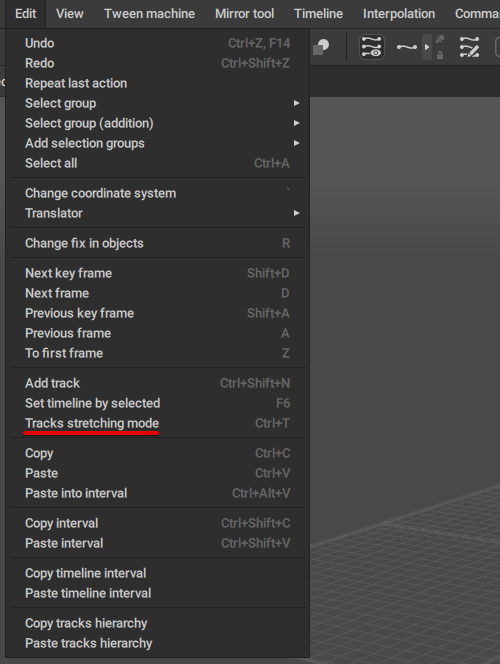
2. Enable Tracks stretching mode.
To do this, you can either select Tracks stretching mode from the Edit menu (or press Ctrl + T):

...or you can click the Stretching mode button on the Timeline:

3. The interval you've selected will now be marked with a yellow frame.
4. What you should do next depends on how you'd like to adjust the selected interval.
To change the length of the whole interval, drag its last frame:

To change the length of a part of the interval, select a frame on the interval and drag it:

Keep in mind that this won’t change the overall length of the interval.
Note
Type of interpolation on the adjusted interval will be changed to Fixed.
To exit Track Stretching Mode without making adjustments to the selected interval, simply click  anywhere in the program window.
Note
Intervals can also be adjusted using the Resize Interval comman in the Timeline menu.
There is also the Save data in key frames option:

When it is enabled, the algorithm won;t change animation data on keyframes.
It's good for cases where you only have a few sparsely-placed keyframes, and don’t want them to change. For dense key data, it’s better to turn it off.
Enabled by default.
Settings
Track Stretching Mode can also be adjusted using a dedicated set of parameters on the Scene Settings panel:

In
This parameter controls how the beginning part of the animation is stretched. There are three option available:
Uniform means the beginning part of the animation is interpolated evenly. This is the default value.
Slow means interpolation starts slow and then fastens.
Fast means interpolation starts fast, but then slows down.
Out
This parameter controls how the ending part of the animation is interpolated.
There are the same three options available (Uniform, Fast and Slow); they work exactly how they do in the previous parameter.
Center
This parameter controls how the central part of the animation is interpolated.
It too has the same three options.
When all three options are set to Uniform, this results in the animation being evenly stretched (like this feature worked in the previous versions of the software).
Using other values in various combinations produces different effects.
The In parameter affects the beginning part of the animation:

Here, the gray sphere has In set to Uniform. Red, to Slow. Blue, to Fast.
On the Timeline, it’s easy to see how different settings affect the placement of the keyframes on the stretched Tracks:

Left: the original set of Animation Tracks on the Timeline; Right: the same Tracks after stretching.
The Center parameter by itself has minimal influence on the resulting trajectory:

Changes - or rather lack thereof - are apparent on the Timeline as well:

Finally, the Out parameter affects the latter half of the animation:

This is visible on the Timeline as well:

Keep in mind that these parameters do not affect the overall length of the animation - only how keyframes are distributed within it.