Scene Linking Tool
- Home
- Tools
- Animation Tools
- Scene Linking Tool
Warning
This feature is only available in the Pro and higher versions.
Working with multiple characters within a single scene can be cumbersome and inconvenient. Furthermore, complex scenes might be taxing on the system.
To bypass both these problems, there is an option to link two or more scenes together.
Creating Scene Links
To create a linked scene:
1. Right-click the scene tab
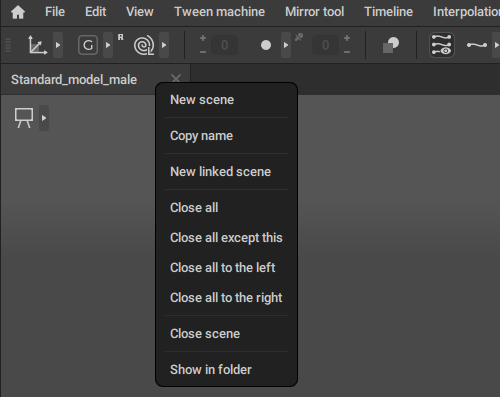
2. Select New linked scene from the menu.
This will create an empty scene.
Any character or object you add to this new scene will also be shown in the original scene:
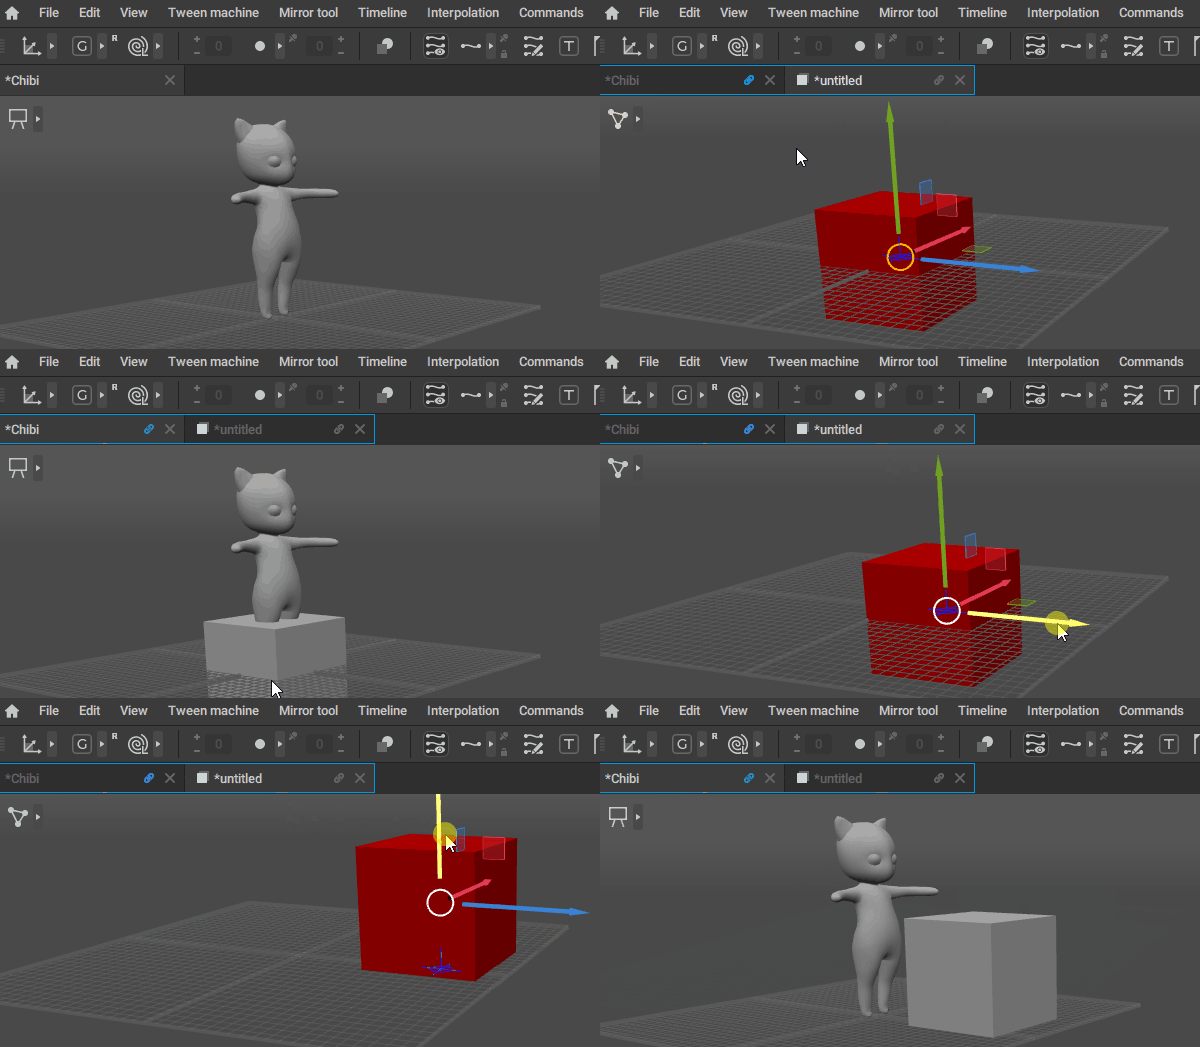
Animation in the linked scenes will also be synced frame-by-frame.
When animation is played in one scene, it will be played in the other as well.
Several linked scenes with one character in each scene work significantly faster than one scene with the same number of characters.
If you encounter slowdowns and other performance issues, using scene links might be the way to solve these problems.
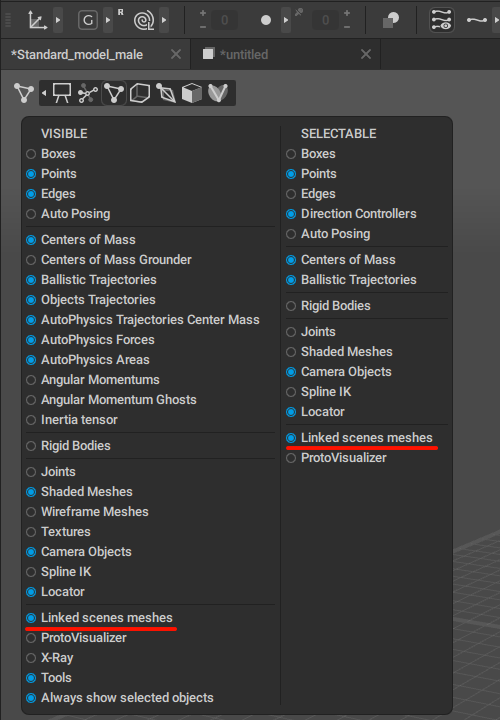
It should be noted, however, that meshes from the linked scenes will only be visible in the main scene if the Linked scene meshes setting is enabled in the Visible and Selectable menus:
Linking Existing Scenes
If you have two (or more) scenes opened, you can link one to the other by:
1. Right-clicking the tab.
2. Selecting Link scene from the menu:

After this, the scene will become linked to the scene that is currently open.
The same can be done by left-clicking the tab while holding Alt.
Link Interface
A scene that has links is marked with a blue chain-link symbol:

Meanwhile, a scene linked to another scene is marked with the same symbol, but with different color:

A scene and its links are connected by a blue frame:

Closing linked scenes
A linked scene can be closed by clicking the cross symbol (like a regular scene).
When a regular scene is closed, every scene linked to it is closed as well.
Unlinking scenes
A linked scene can also be unlinked:
1. Right-click the linked scene tab.
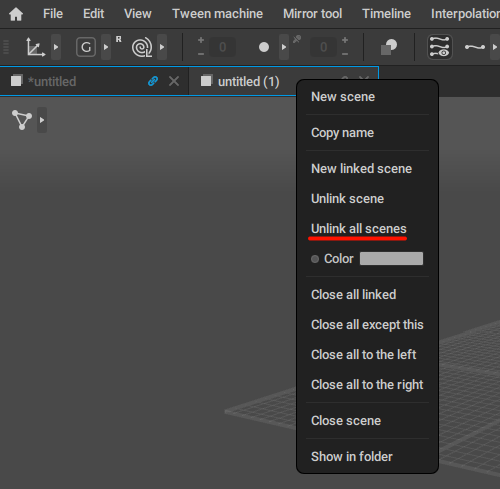
2. Select Unlink scene from the menu:
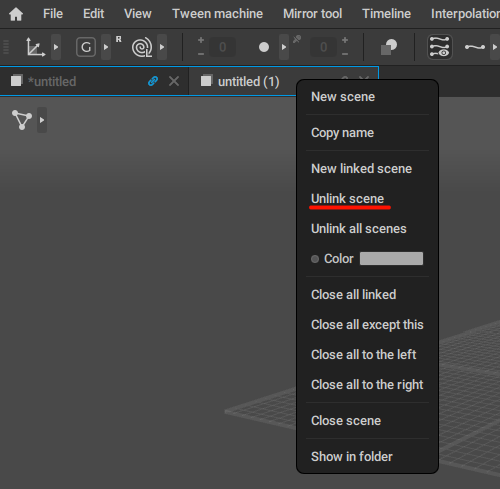
This will turn the linked scene into a regular one.
You can also use the Unlink all scenes option from the same menu to unlink every linked scene:
Linked scenes can also be unlinked by clicking the chain icon at the right side of the tab:

Clicking the gray icon ot the linked scene tab would unlink this scene.
Clicking the blue icon on the main scene tab would unlink all scenes linked to it.
Scene links are saved with the scene files.
If you open a scene that has other scenes linked to it, these other scenes will be opened as well.
Linking Settings
By right-clicking the linked scene tab, you gain access to the set of settings for the linked scene:

Color
Changes the color of all visible meshes in the Linked scene. After switching to the Linked scene, its meshes will render the original color/texture.
Applies translation offset to all meshes in the Linked scene by the specified vector. The offset is applied from the center of the scene.
After switching to the Linked scene, the mirrored offset will be applied to the meshes and the viewport camera in the original scene.
For example, if you apply the Offset vector of [100.0, -50.0, 0.0] to the Linked scene and switch to it, the original scene will be offset by the mirrored vector of [-100.0, 50.0, 0.0].
Rotation Offset
Applies rotation offset to all meshes in the Linked scene by the specified rotation vector. The offset is applied from the center of the scene.
After switching to the Linked scene, the mirrored rotation offset will be applied to the meshes and the viewport camera in the original scene.
For example, if you apply the Rotation Offset vector of [0.0, 180.0, 0.0] to the Linked scene and switch to it, the Original scene will be offset by the mirrored vector of [0.0, -180.0, 0.0].
Frame Shift
Applies frame offset to the timeline in the linked scene by a specified number. A positive number applies a 'skip' to the N frame, while a negative number applies a 'delay' that plays the animation after N frames have passed on the original scene’s timeline.
After switching to the linked scene, the timeline cursor in it will be put on the frame equal to the Frame Shift value.
For example, if you input 10 in the Frame Shift value, the animation in the Linked scene will start at frame 10 of the Linked scene’s timeline.
If you input -10, the animation in the Linked scene will not start until frame 10 in the Original scene’s timeline.
Interval
These two values set the specific interval of the linked scene’s Timeline that will be played when the animation is played in the main scene.
If both values are set to 0 (which is their default value), the entirety of the animation is played.
Loop
If this is enabled, the animation in the linked scene is looped.
Import and Export
Allows you to, respectively, save the settings for the linked scene to a file, or load them from such file.