Physics
- Home
- Animation Pipeline
- Physics
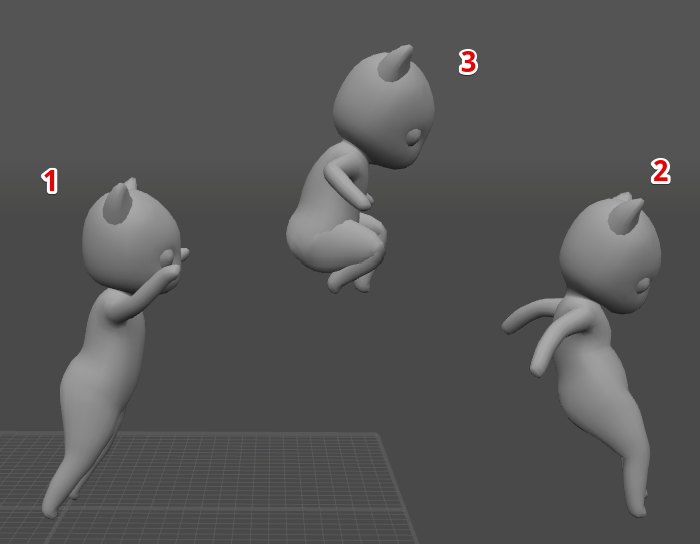
Now, you have a complete animation. However, if you look closely, you might notice that there’s still room for improvement. Some parts of the motion might look a bit off, others might lack weight and impact, or generally look not very convincing. This is especially noticeable when you’re trying to create realistic movements.
When a motion doesn’t feel convincing enough, that’s often because it is not realistic. Characters and objects don’t move quite like they would have in the real world. And the easiest way to improve this is to make them adhere to the laws of physics.
Cascadeur includes a number of tools for creating physically accurate movements. On this page, we’ll be taking a look at these tools and learn how to use them.
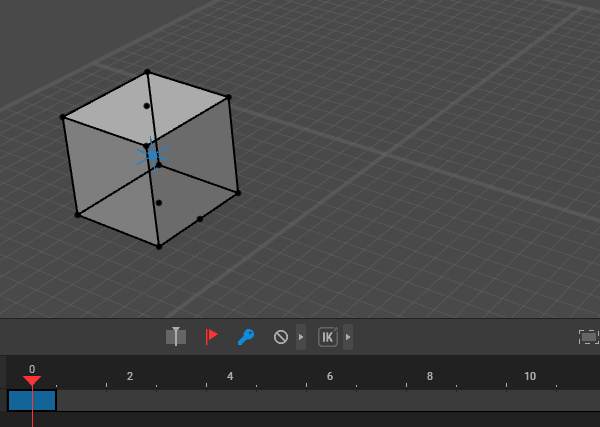
Center of Mass

A center of mass is a unique point that characterizes movement of an object (or a group of objects) as a whole. When a linear force is applied to the center of mass, it causes linear acceleration without angular acceleration.
Center of Mass Animation
A center of mass can be used for animating objects:
1. Select the Center of Mass
2. Create a keyframe for it
3. Move the current frame pointer to another frame
4. Create a second keyframe
5. Move or rotate the Center of Mass
This way you can animate objects as a whole.
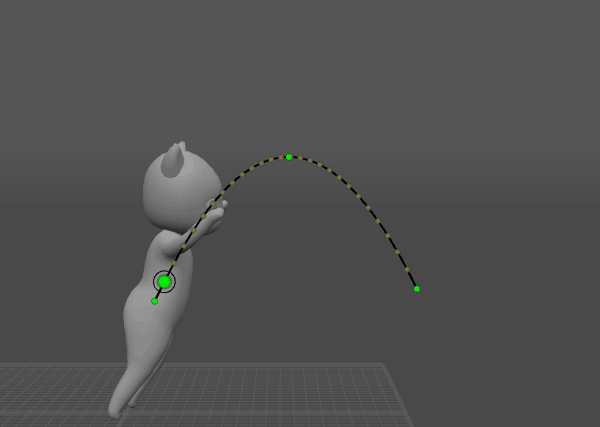
The projection of the Center of Mass is shown on the ground:
In some cases, a character might have more than once Center of Mass. Read about it here.
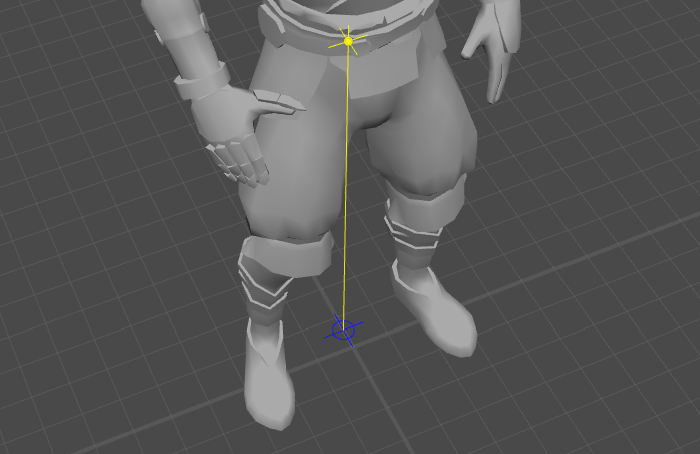
Pose Balance
Using the Center of Mass, it’s easy to determine if the pose your character is assuming is balanced or not.
If the character has only one fulcrum point, the Center of Mass should project on this point.
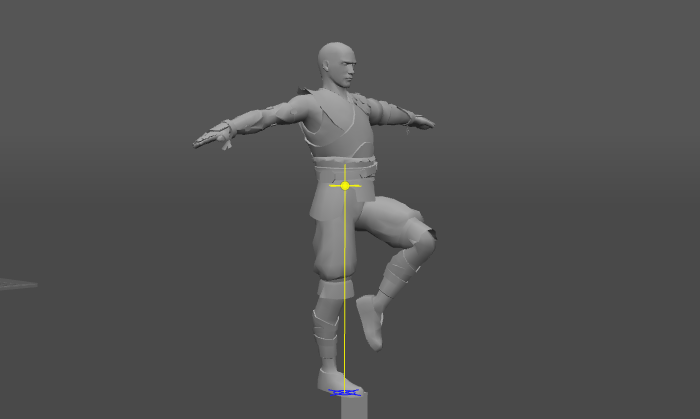
If there are several fulcrum points, the projection of the Center of Mass should be between these points.
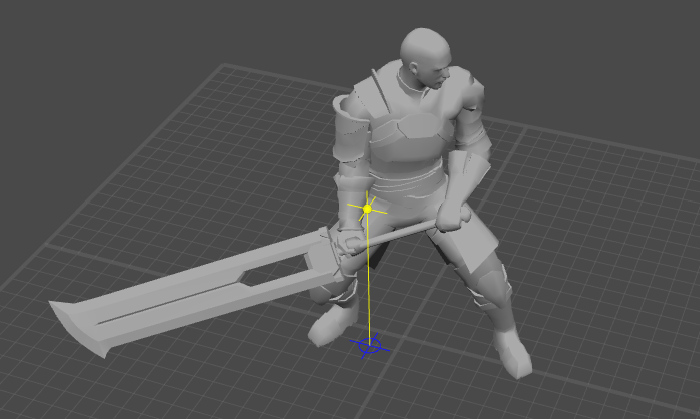
In every other case, the pose is not balanced. It’s fine when the character is in motion. But if the character is supposed to stand or be at rest, we’d suggest altering said poses to balance them.
For an example of balancing a pose, see our tutorial.
Ballistics
If your animation includes a character jumping or falling, there are tools for creating these exact kinds of movement.
First, you’ll need to define several frames:
(1) the first frame of the jump (character legs should still touch the ground)
(2) the landing frame
(3) (optional) some mid-air frames
After these preparations are complete:
1. Select the character’s Center of Mass.
On the Timeline:
2. Find the last frame before the character starts jumping (the character’s legs should still be on the ground).
3. Find the first frame after the character lands (the first frame where the legs touch the ground).
4. Select the interval between these two frames.
Now, we can add a ballistic trajectory:
5. Click Ballistic Trajectory:

This curve shows how your character will realistically move during the jump. By default, the distance of the jump is what defines its characteristics. They, however, can be adjusted in the following ways:
Move the midpoint to change the height of the jump:
Move the starting point to adjust the distance of the jump:

Move the end point to change the distance of the jump without altering the time it would take:

Once you’re satisfied with the characteristics of the jump, you can snap your character to the trajectory:
6. Select an interval with the ballistic trajectory
(or a frame on this interval)
7. Click Snap centers of mass to selected trajectory:

Ballistic Ghosts
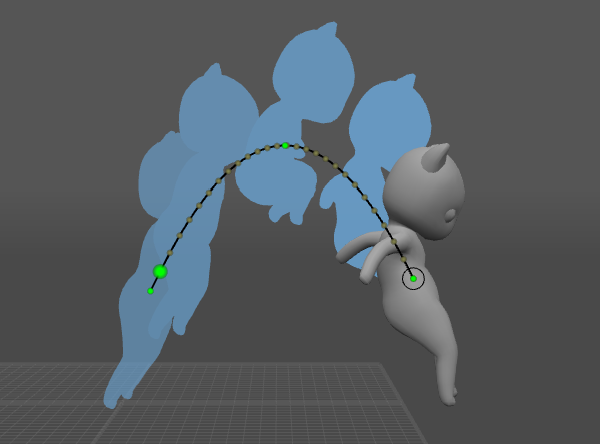
Ballistic ghosts show positions the character assumes during the jump.
To enable ballistic ghosts, click the Ballistic ghosts button:

If ballistic ghost silhouettes are colored purple, this means the character does not rotate in a physically accurate way in the corresponding frames:
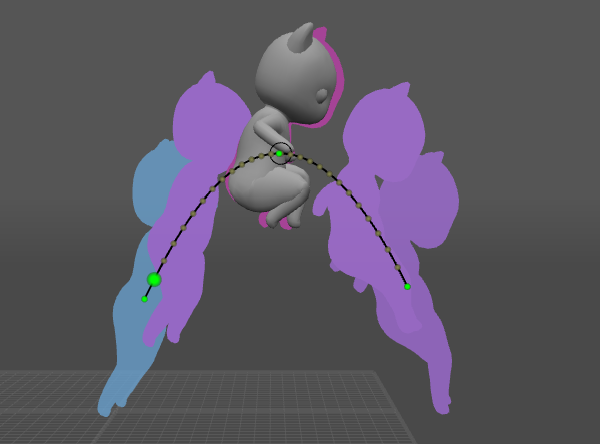
The red ghosts show physically accurate positions.
You can snap the character to these red ghosts by clicking the Snap to ballistic ghosts button:

But if you want to keep a certain pose:
1. Select the frame containing the pose
(this has to be a keyframe)
2. Click Set physics priority frame:

You can set as many physics priority frames as you want. But keep in mind that:
- Adding too many Physics priority frames will lead to decreased accuracy in each frame.
- If too many frames are marked, calculating a correct trajectory might not be possible
- Increasing the number of Physics priority frames will slow down the simulation, and with it, the program.
Angular Momentum
Animation might include rotations. In a realistic animation, these rotations should adhere to certain rules:
- Angular momentum should change smoothly. Acceleration and deceleration should take some time.
- In mid-air (when a character jumps or falls), angular momentum is constant.
Applying these rules to an animation can greatly improve the degree of realism it shows. Angular Momentum tool is designed specifically for monitoring object rotations - and improving them when necessary.
To enable Angular Momentum:
1. Right-click the Edit Mode switch.
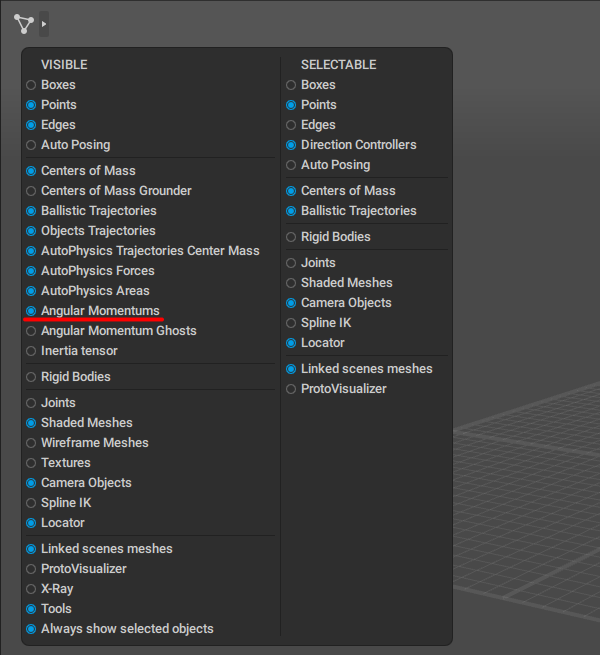
This will open the Visible menu.
2. Enable Angular Momentums:
You can also enable Angular Momentum Ghosts to visualize AM values on multiple frames:
1. Open Visible menu.
2. Enable Angular Momentum Ghosts.
3. On the Timeline, select the frames for which you want to enable the ghosts.
Note
For Angular Momentum Ghosts to work properly, they should also be enabled in the Settings Window.
Otherwise, they won't be visible in the Viewport.
To learn more about Angular Momentum settings, see here.
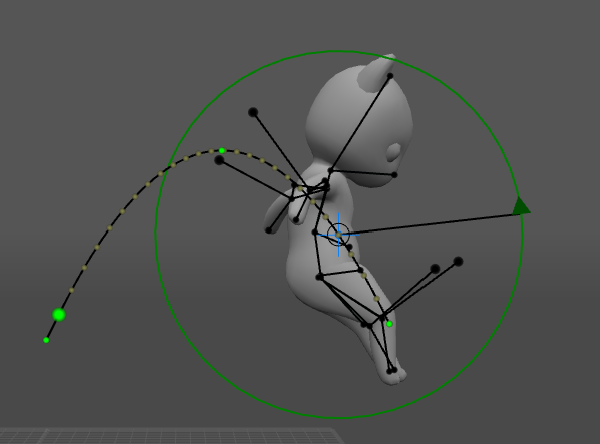
Angular Momentum shows object rotations on a current frame.
The green arrow shows the value of the angular momentum.
The diameter of the circle corresponds to the moment of inertia value (the circle gets bigger as this value increases and shrinks down with it decreasing, and vice versa). Greater value of the moment of inertia means slower rotation speed, and vice versa.
Moment of inertia can be influenced by changing the character's pose.
The red sector on the circle represents the character’s divergence from a physically correct position. The greater this divergence is, the bigger the red sector becomes.
The red sector can be removed by altering the character’s rotation.