Export to Unity
- Home
- Getting Started
- Export FBX/DAE
- Export to Unity
Import Model
To import a Cascadeur model to Unity:
1. Select Import New Asset… from the Assets menu
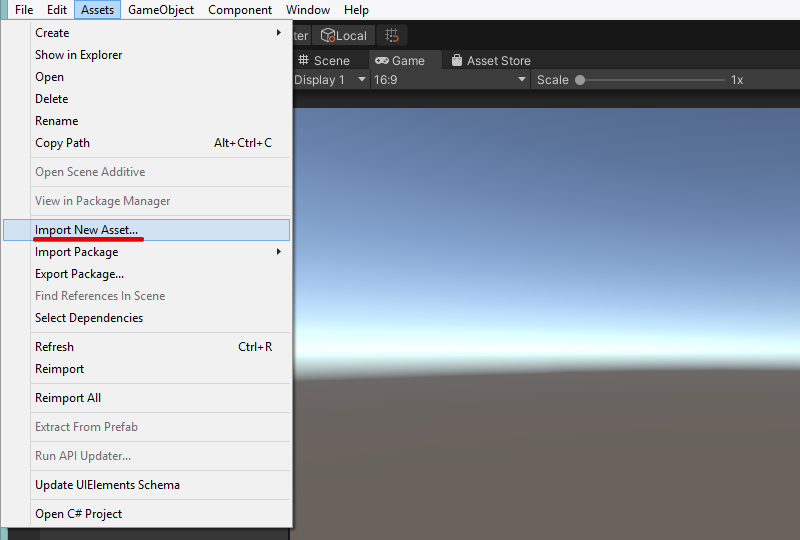
2. Select the file
Alternatively, you can drag the model file to the Assets folder or to the Project window.
3. Wait until the model is imported
By default, importing a model will also create an empty animation asset. If you don’t need it:
1. Go to the Animation tab
2. Uncheck Import Animation
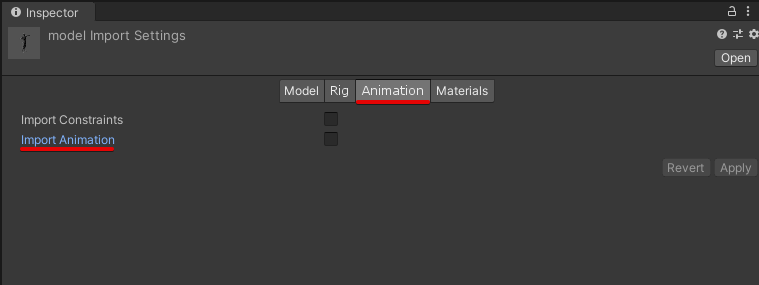
3. Click Apply
Import Model with Animation
If you try to import a file that contains a model and animation data for it,
1. Select Import New Asset… from the Assets menu

2. Select the file
(Both FBX and Collada formats are supported)
3. A new collection will be created:

This collection will include the model itself, the skeleton for it, a material, and an animation
Import Animation Clips
To import an animation clip:
1. Import the animation (Assets → Import New Asset…)
2. Select the animation asset
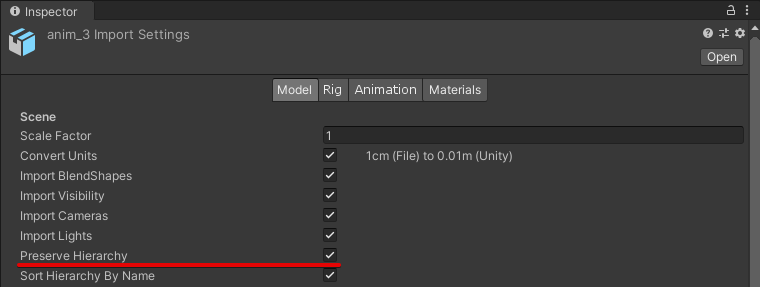
3. Open the Model tab:

4. Enable Preserve Hierarchy:
5. Click Apply:
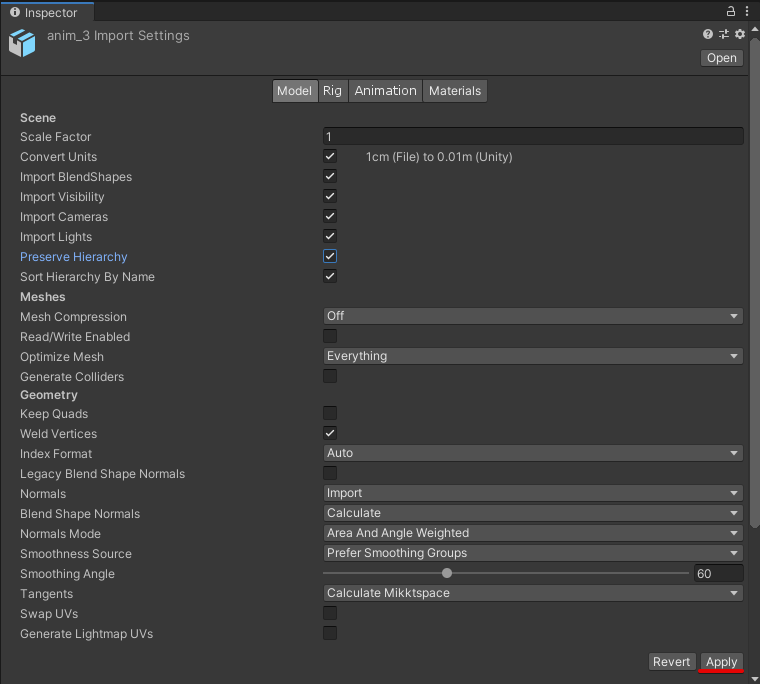
6. Now you can open the Animation tab and see if the animation works as it should
Alternatively, you can import an animated model and then make clips from this animation:
1. Import the model the usual way
2. Open the imported asset in the Inspector window:

3. Select the animation asset:

4. Open the Rig tab
5. Select Animation Type.
- Select Humanoid if you're plan to use the default Unity rig.
- For other cases, select Generic.
6. Set Avatar Definition for your animation.
- If you plan to use the skeleton from this model, select Create From This Model.
- If you plan to use a skeleton from a different model, select Copy From Other Avatar. In the Source field, select the avatar from that model.
7. Click Apply to save the changes.
8. Duplicate the animation (Edit → Duplicate). A separate animation asset will be created
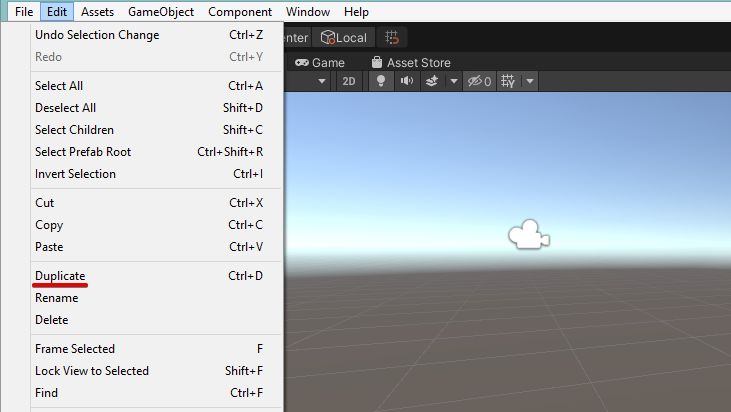
9. Now you can delete the imported model
It is not advised to use this process as the main method of importing animations, but in some cases, it can be used as well.