AutoPhysics
- Home
- Tools
- Physics Tools
- AutoPhysics
This is a set of tools that uses physics-based algorithms to analyzes the animation you’ve created and suggest a physically accurate version of it.
AutoPhysics Controls
AutoPhysics is controlled by a set of buttons on the Toolbar:
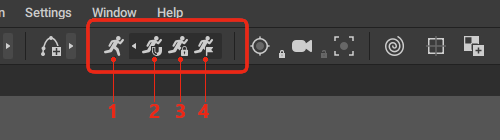
(1) AutoPhysics
Enables and disables AutoPhysics.
(2) Snap to AutoPhysics
Snaps the animation to the Auto Physics simulation.
Clicking this button will move and rotate the character so the animation will coincide (or become as close as possible) with the animation shown on the AutoPhysics ghost.
AutoPhysics simulation is applied along with its additional features to the animation. These features include:
• Compensation motion.
• Secondary motion.
• AM Smoothness.
(3) Freeze Auto Physics
If this is enabled, Auto Physics simulation does not update in real time.
When Auto Physics is frozen, the assistant is colored light blue.
The frozen simulation does not change when you edit the original animation. Changes are taken into account only when this option is disabled.
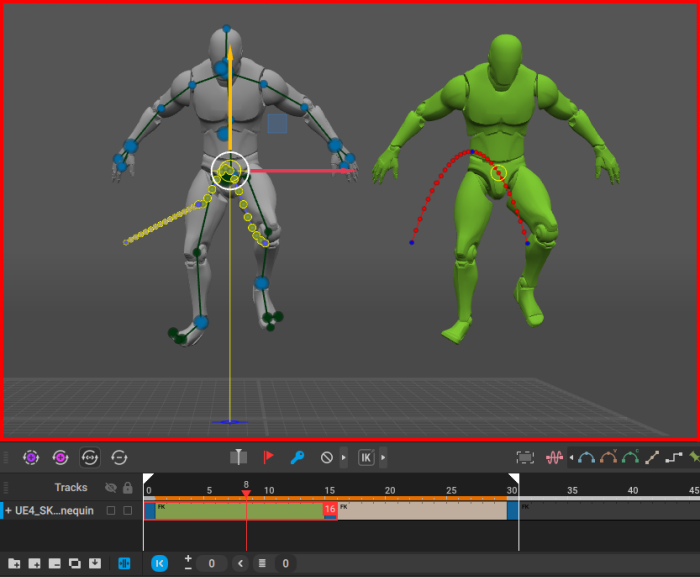
(4) Set priority frame
Sets the current frame as a priority frame. The pose on this frame will be kept intact, while poses on other frame might undergo a more significant altering because of it.
Multiple priority frames can be set at once, but increasung their number increases the impact on the performance, so it is recommended to only use this feature when necessary.
Enabling AutoPhysics
If the character has only one Center of Mass, simply click the AutoPhysics button on the Toolbar:

The tool will be activated and should work without issues.
But if the character has multiple centers of mass, the program would try to determine the 'main' center of mass, i.e. the one used by every Rigid Body in the scene.
If the program is unable to find it, you'll get this error message:

Then, you'll need to manually select one of the Centers of Mass as the 'main' one.
Which one to choose should depend on the kind of animation you’ve created. For example:
-If the character performs a jump holding a sword, the character’s and the sword’s composite center of mass should be used (1).
-If the character performs some action without a sword, the character’s center of mass should be used (2).
-If the character throws the sword, the sword’s center of mass should be used (3).
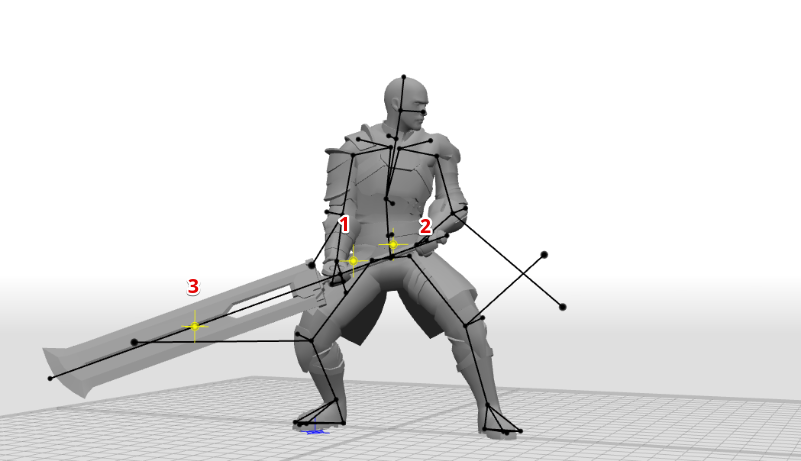
After selecting the Center of Mass you need, click the AutoPhysics button on the Toolbar.
Using AutoPhysics
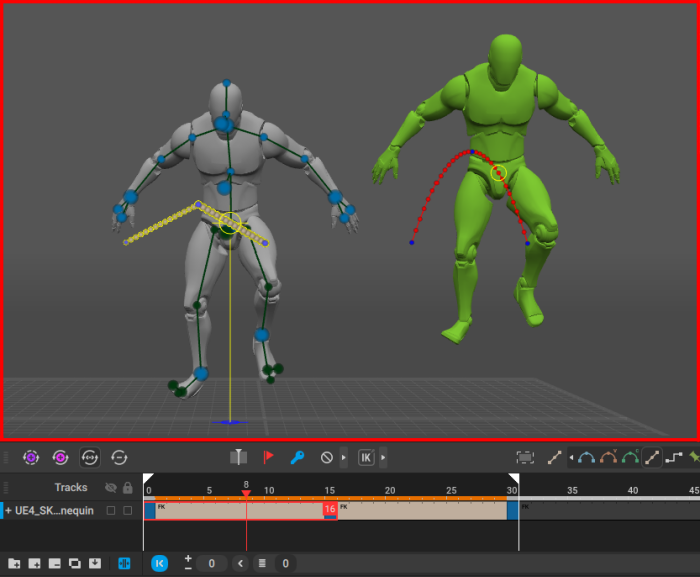
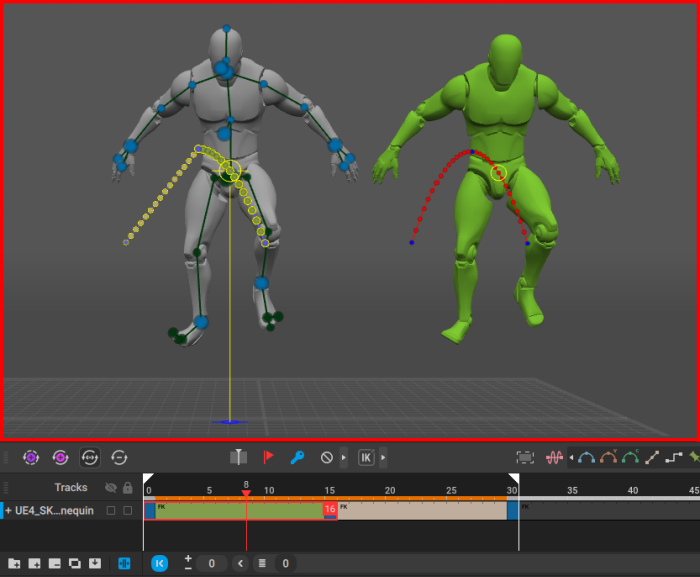
After enabling the tool you should see a differently colored copy of you character:
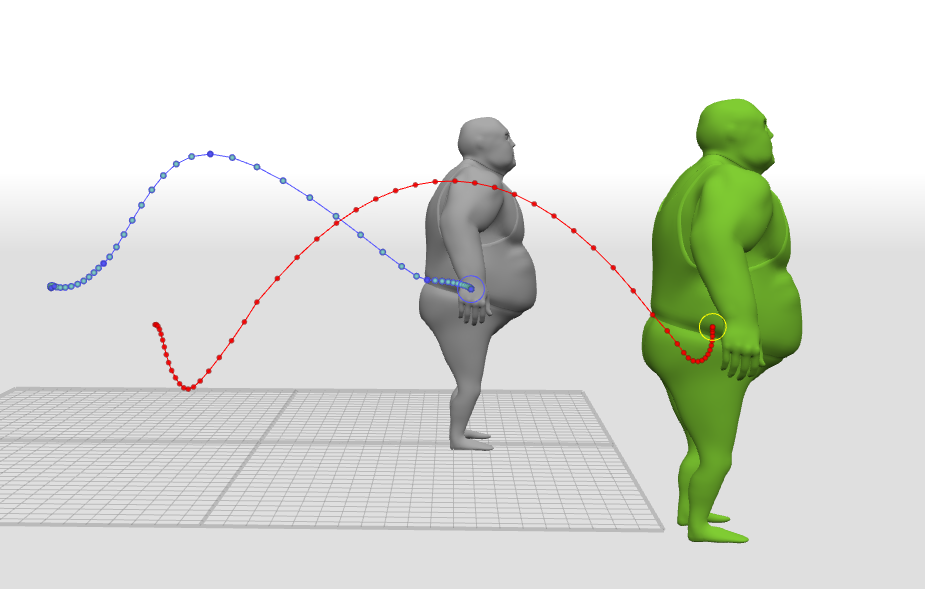
Take a note of the differences in the trajectories.
This is the Physical Assistant. It shows how your animation would look with AutoPhysics simulation applied.
The Physical Assistant can be colored differently on different frames:
Green color means that there’s nothing wrong with the original animation, outside of maybe some minor deviations.
Red means that a physically accurate solution is not possible under given circumstances. In a case like this, the animation can only be fixed by manually altering poses and/or timings.
Blue means that there were changes made to the initial animation that the simulation does not reflect. It should be recalculated by disabling Freeze AutoPhysics:

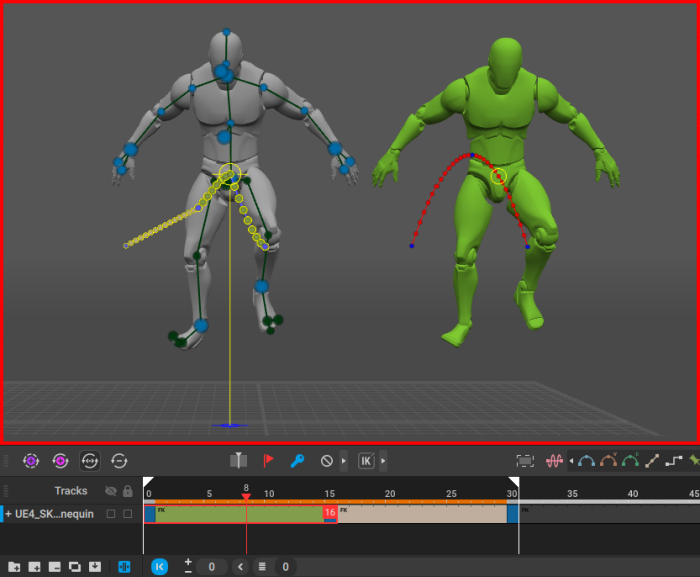
When AutoPhysics is enabled, a colored line is shown on top of the Timeline:
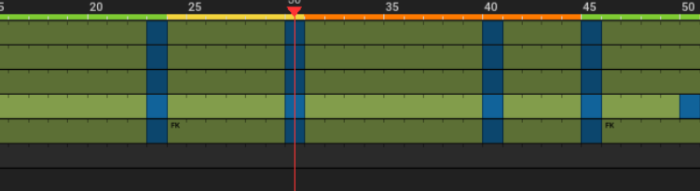
The color of this line signifies how AutoPhysics works on the corresponding frames:
Orange means there are no fulcrum points, and the character moves along a ballistic trajectory.
Yellow means there are few fulcrum points (such parts are sometimes referred to as weak intervals).
Green means there are many fulcrum points (these parts are known as strong intervals).
Gray means AutoPhysics is not used for these frames.
The way the ghost moves is the solution suggested for these deviations.
Applying AutoPhysics
If you are satisfied with the changes suggested by AutoPhysics simulation, you can apply them to the animation.
To do this, click the Snap to AutoPhysics button:

When you snap your animation to AutoPhyiscs, the program will ask you if you'd like to turn off additional features (secondary motion, AM smoothness etc):
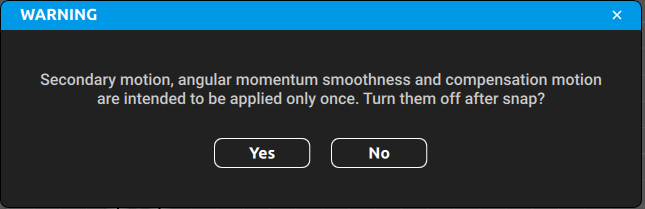
This is because these tools are intended to only be used once.
After this, you'll be asked if you'd like to reset parameters for these tools to their default states:
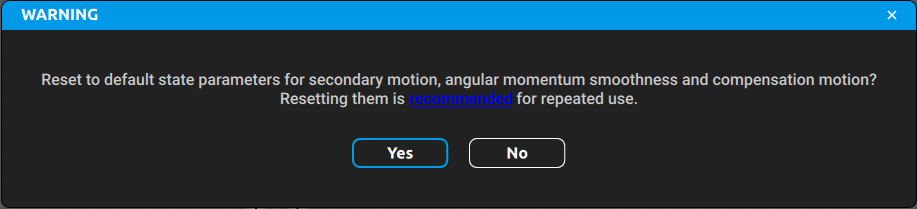
Choosing Yes will reset parameters associated with Point Controllers.
Snapping animation to AutoPhysics takes into account the Fixing interpolation on change interval button on the Timeline:
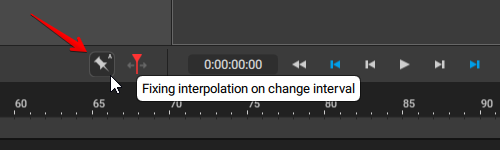
If this button is enabled, snapping would change the type of interpolation to Fixed.
If it is disabled, the type of interpolation won't change.
AutoPhysics can also be used along with Interval Edit Mode:
1. Enable Interval Edit Mode.
2. Select an interval on the Timeline.
3. Snap the animation.
Results would differ depending on the Interval Edit Mode settings:
The scene before snapping.
Snapping with the Curve setting set to Step.
Snapping with the Curve setting set to Linear.
Snapping with the Curve setting set to Bezier.