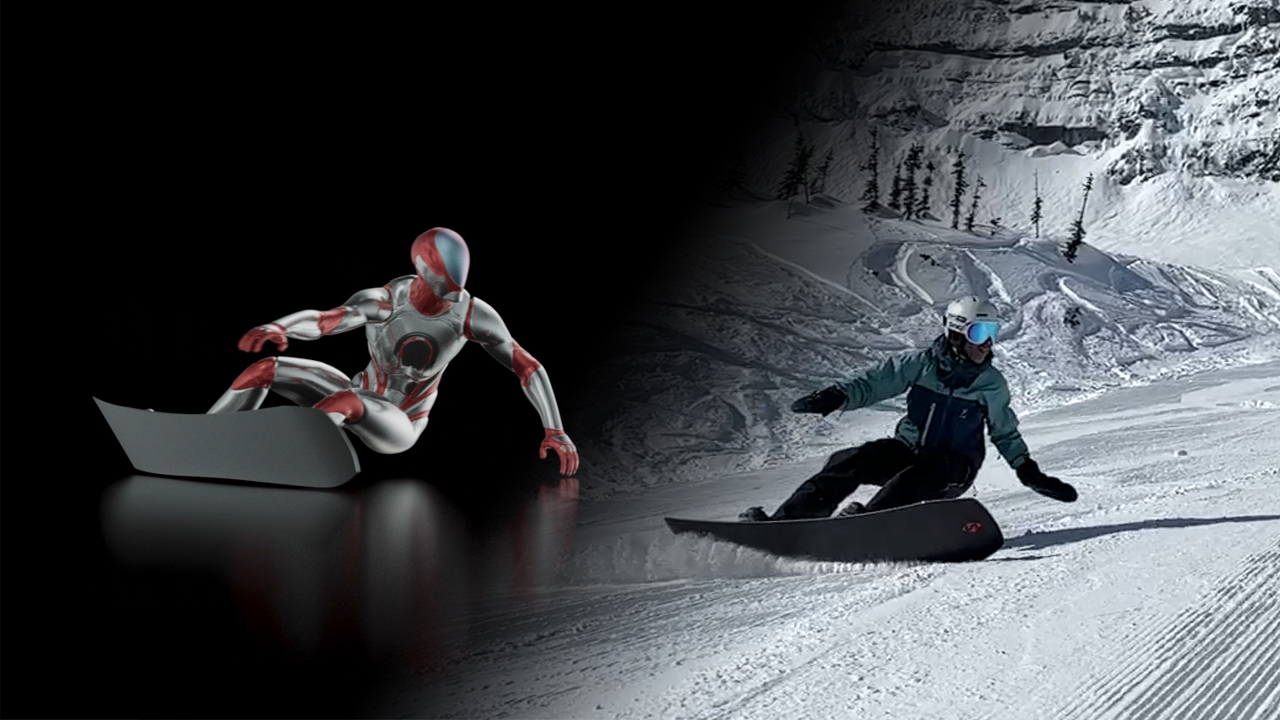
Use Case: Animating Snowboard Carving Techniques in Cascadeur
Contributed by instagram content creator @carver_arcalis
As a passionate snowboarder, most of my learning has come not from traditional lessons, but from watching YouTube videos and Instagram clips of great riders. Over time, I realized that watching isn't always enough, sometimes you need to see the mechanics, broken down and visualized, to truly understand what’s going on under the hood of a great turn.
That’s where Cascadeur came into play.
Why Animate Snowboarding?
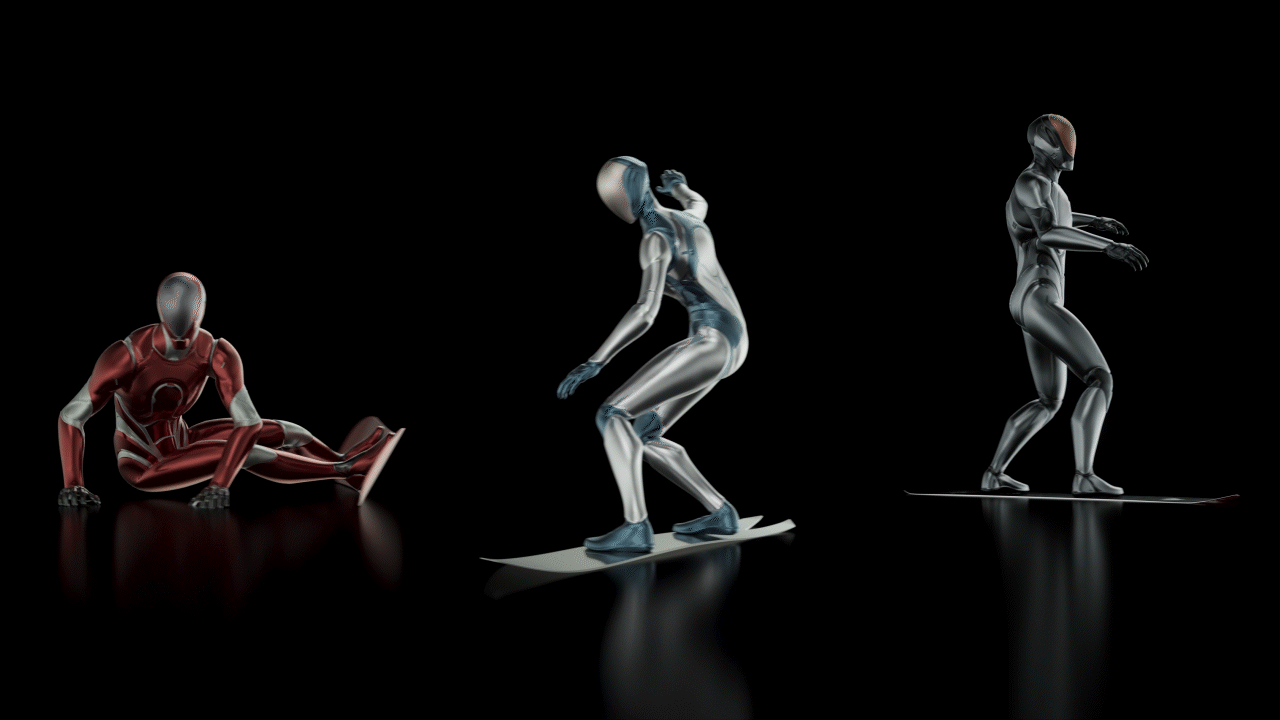
I started using Cascadeur to create clean, simple animations that could visually explain the technique behind carving, a style of snowboarding where edge control and body position are everything. Carving is subtle, and understanding how the rider’s center of mass moves, how pressure shifts between toe and heel edges, or how a board pivots through a turn isn’t always obvious in real-life footage.
With animation, I could isolate and emphasize those key mechanics in a way that even beginners could grasp. That educational value, combined with the fun of recreating stylish turns in CGI, got me hooked.
My Process
For each animation, I start by picking a real rider as a reference. Instagram and YouTube are full of amazing clips, and I often choose riders whose carving style I admire. Once I find the right footage, I do the following:
- Model the Snowboard in 3D
I recreate the snowboard in 3D and rig it specifically for carving. That means giving myself control over both edges, toeside and heelside, since those are the critical contact points with the snow during turns.
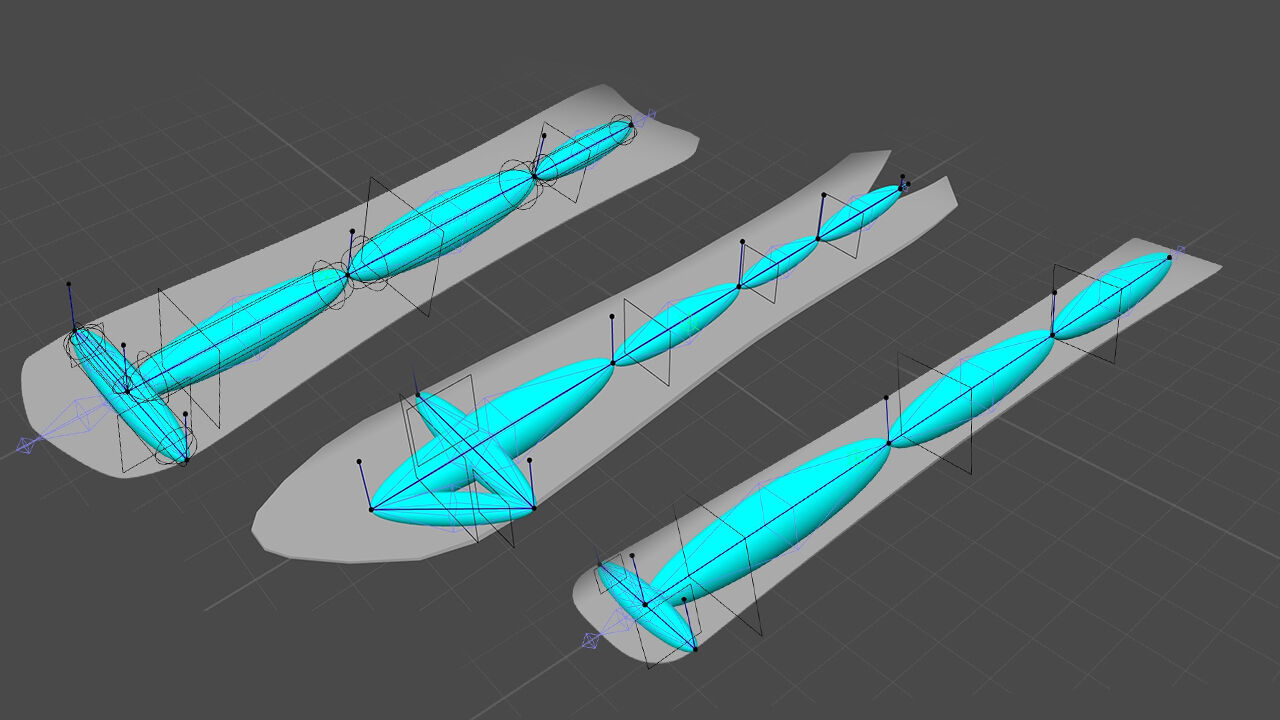
- Accurate Pivot Points
In carving, everything comes down to precision. The board needs to behave exactly as it would on snow, which means the pivots for the toe and heel edges have to be in the correct position, they’re the foundation that drives the board through a turn.
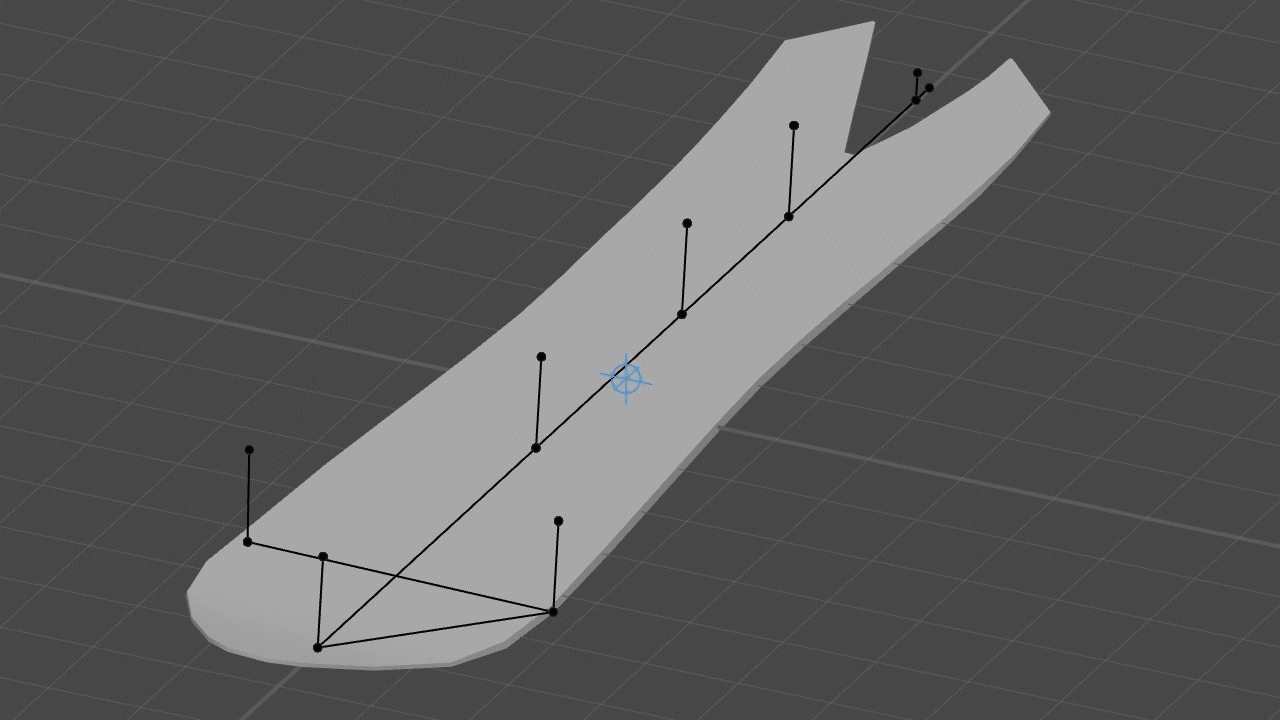
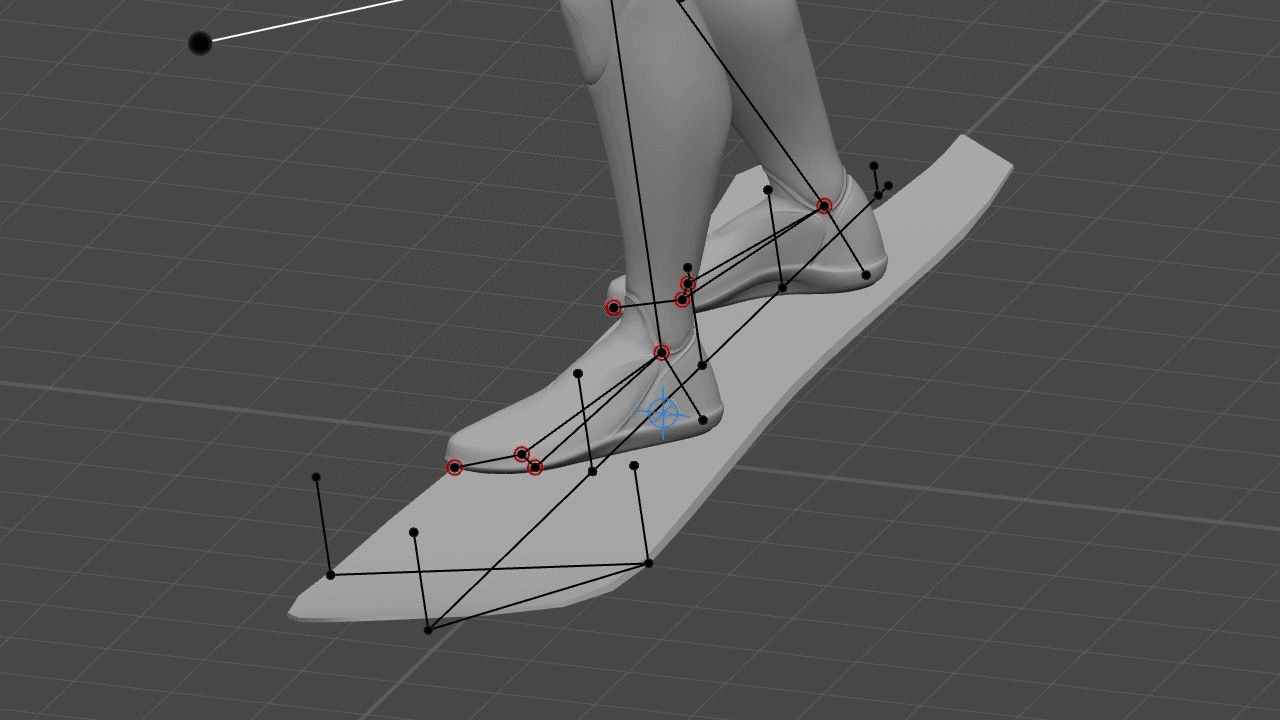
Additionally, I added
two bone positions to the board rig where the
bindings would sit. This let me constrain each foot to its respective binding location, allowing for independent foot positioning and precise control over
stance and angulation, key aspects that vary from rider to rider. Just like in real life, the feet are locked into their bindings, so having those constraints in place makes the animation feel more grounded and realistic.
- Break Down the Movement
Instead of trying to animate a full carving turn all at once (which can quickly become overwhelming), I split it into two stages:
- Stage 1: Stationary Body Mechanics
I animate the snowboard as a static object and focus on how the rider’s body shifts from toe edge to heel edge. This isolates the lateral weight transfer and makes it easier to get the posture, balance, and transitions right.
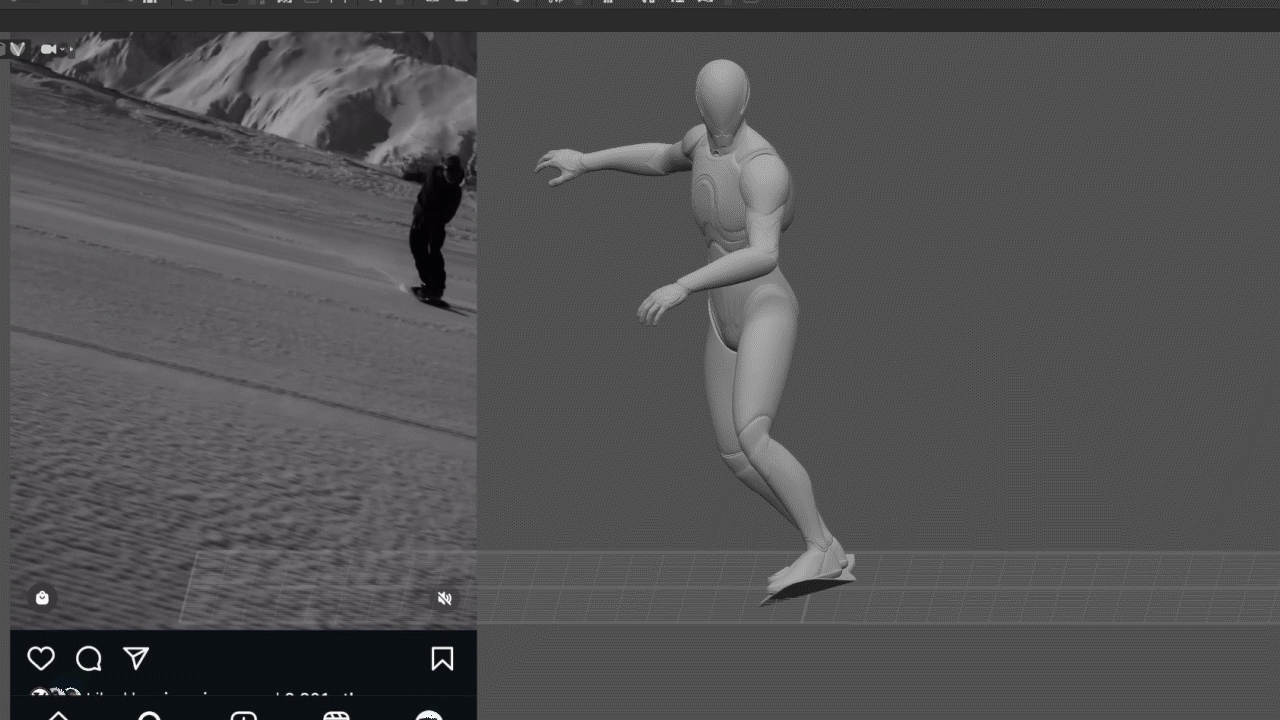
- Stage 2: Apply Motion
Once the body mechanics are dialed in, I apply the actual rotation and translation to both the character and the board to simulate the real turn. This layered approach allows for better control and a more accurate final result.

Why Cascadeur?
One of the biggest game-changers for me has been how much faster I can work with Cascadeur. What used to take me days in other software can now be done in just a few hours, without compromising on realism or detail. That speed means I can experiment more, iterate quickly, and focus on the creative side of the process instead of fighting the tools.
If you’d like to see how these animations look in motion, feel free to check out my Instagram channel!
I regularly post new clips and carving experiments: @carver_arcalis.