Part 3: The Power of Reference – Learning from Live-Action Scenes
by Fjodor Mastikin, Cascadeur’s Technical Writer
(Continuation of Part 2)
This is the third and final part of our ‘Best Shots’ series, and this time, we’ll be doing something a little different.
In the previous articles, we did research on how to use great action scenes as a basis for our own creations, and how to present them in a more appealing light.
But there are many kinds of action scenes out there. And among them, there are those that are not particularly well planned or executed, but still have some appeal because of other reasons.
Take this scene, for example:
It’s easy to tell what is not right about it:
- Less than perfect framing (often, participants are only partially seen)
- Overreliance on cuts and constantly changing angles.
- Questionable lighting conditions.
- Camera shaking way more than it has any right to.
All these issues make it not exactly easy to understand what exactly is going on. And yet, if we go out of our way to look beyond them – then we’ll see that the stunt itself is perfectly valid, and pretty decently executed.
These issues are not exactly specific to this particular film. In the 2000s (which is when it was made), they plagued too many an action movie. Shakycam in particular was the bane of everyone existence and yet despite all the problems, the idea behind this scene is perfectly valid.
So what can we do to, in a way, give it justice?
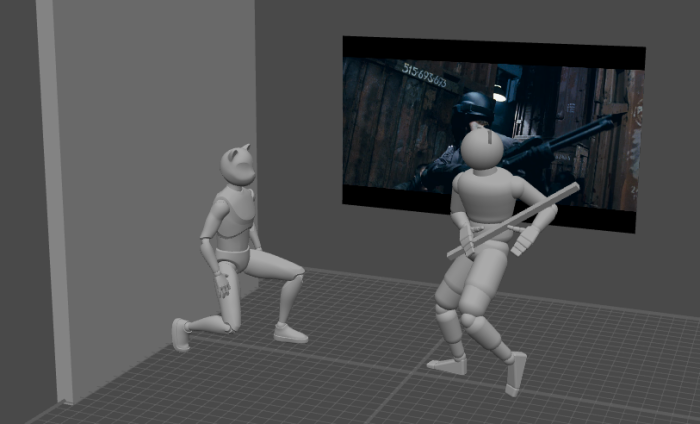
As always, we’ll start by setting up the scene: two characters, a cuboid to represent the wall, and another one in place of whatever one of the characters is holding in his hands.
Note
There are multiple ways to add objects to character rigs. The most simple one is by using Constraints to parent the object to one of the character’s Joints. For our task, that would be more than enough.
We should also add a reference plane. Only unlike our previous exercises, we won’t be using it for motion capture. With a reference like this, the Mocap feature won’t be able to produce an applicable result. This time, it’d be better to just do it by hand.
Of course, there’s no need to manually recreate every frame. What we have to do instead is to locate a few centerpieces of the motion and set them up as our keyframes.
By doing so, we’ll create a sketch animation:
Yes, it’s certainly very rough, but that’s pretty normal for a sketch. At this first stage our goal is not to produce a good-looking animation, but rather to reproduce all the parts of our original scene – and to combine them into one continuous motion (like we did in the previous articles).
The next step would be to polish and improve what we got. As always, this can be done by applying AutoPhysics.
It should be noted, however, that for AutoPhysics to work with two (or more) characters, these characters need a mutual Center of Mass. If your scene doesn’t have one:
- Select both Centers of Mass
- Select Center of Mass → Create Composite from the Commands menu.
After this, a composite Center of Mass should appear in the scene; and with it, AutoPhysics should work properly.
Another important part is the environment and namely – the wall one of the characters uses to ‘climb’.
If you have a Pro version of Cascaeur, you can create a Collision shape for it. With it, AutoPhysics would recognize the wall as a part of the scene, and include it into its simulation – which, of course, would make our work that much easier.
But if you don’t have a Pro version, such a motion can be animated by hand just as well. Only keep in mind that without collision shapes, AutoPhysics won’t be able to properly process it. So it’d be better not to use AutoPhysics for this part of the animation.
Another trick we could use is to animate the camera itself. Scenes that are shown entirely from one point might appear rather plain and even boring sometimes – but a camera that moves could be used to add some emphasis to the character motion and to make things look even more dynamic.
On the other hand, we don’t want to overdo this effect – or else we’ll be at risk of falling into the same pitfall that swallowed the creators of the scene we use as reference. Camera motion is something that should be used only when it really does make a difference.
Either way, once we’re done polishing, we should end up with something like this:
And if we compare this scene with the original scene – the one we took as an inspiration – we’ll see a huge improvement in clarity of motion, in dynamic, and in overall impression that the scene leaves on the viewer.
But what’s more, the original idea is still there – only it’s that much easier to appreciate it now that
So what can we take out of this exercise? Probably that inspiration can be found in many different places, and even a less-that-perfect reference can provide us with enough substance to make something out of it.
And this concludes our venture into the subject of finding references. We thank you all for your attention – and if you have something to add, please do share your thoughts with us by e-Mail.