LEARN CASCADEUR
Tell us what you want to learn 
Tutorials
Skill path

11:16
Tutorial
Level
Get Started in Cascadeur | Your First Animation Tutorial
Interface, Keyframe Animation

25:54
Tutorial
Level
Physics Pipeline | Everything You Need to Know about AutoPhysics in Cascadeur
Keyframe Animation, Physics

05:42
Tutorial
Level
All You Need to Know about Fulcrum Points
Physics

14:29
Tutorial
Level
Rokoko Mocap | Cleanup and Editing in Cascadeur
Mocap & Editing
New

16:39
Tutorial
Level
Rigging a Horse in Cascadeur | AutoPosing for Quadrupeds
Rigging
New

05:21
Tutorial
Level
Generate Animation Cycles in Cascadeur
AI, Mocap & Editing
New

13:14
Tutorial
Level
Animating Metahumans using Unreal Engine Live Link | Cascadeur 2026
AI, External Soft, Mocap & Editing
New
05:22
Tutorial
Level
Collision Penetration Cleaning Tool
Interface, Mocap & Editing

07:31
Tutorial
Level
Generate Creative Animations with Root Motion
AI, Mocap & Editing

06:21
Tutorial
Level
Improved Live Link with Unreal Engine 5
External Soft

06:44
Tutorial
Level
Add Noise to Objects | Animation Scripts in Cascadeur
Mocap & Editing

10:31
Master class
Level
Rigging the Character and Props in Cascadeur | Mocap Cleanup Master Class Part 1
Mocap & Editing, Rigging
01:33:32
Get started. First steps in Cascadeur
0/7

01:30:12
Mocap cleanup course
0/7

47:54
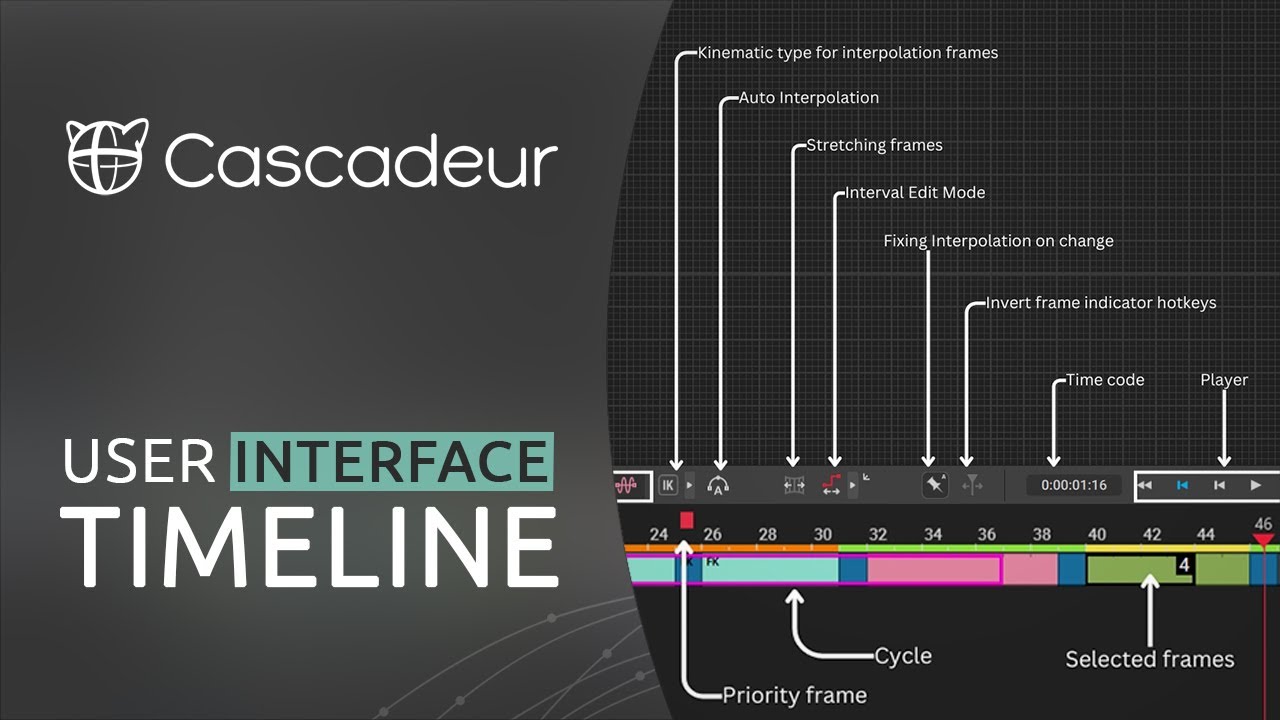
Interface Overview
0/9
38:35
Introduction to scripting in Cascadeur
0/3