Using Mixamo Rig in Cascadeur
- Home
- Getting Started
- Import FBX/DAE
- Using Mixamo Rig in Cascadeur
Warning
This page is intended for users who already have some experience with rigging in Cascadeur.
To learn the basics of creating rigs, check out our tutorials.
To learn more about rigging and rigs in general, see the Rig section of the manual.
Mixamo models (both stock and custom) use standardised skeleton that can be rigged to be used in Cascadeur.
Model Import
Start with exporting your model from Mixamo.
We recommend using either binary FBX, ASCII FBX or Collada formats. Either should work fine.

After this, import the model to Cascadeur.
To do this, select either Import FBX/DAE → Scene or Import FBX/DAE → Model from the File menu.
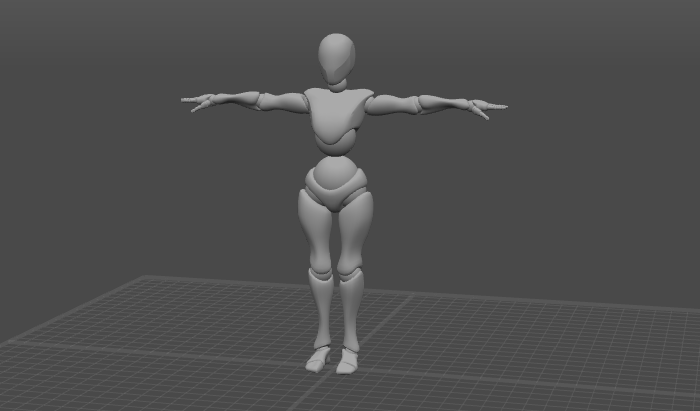
You should end up with something like this.
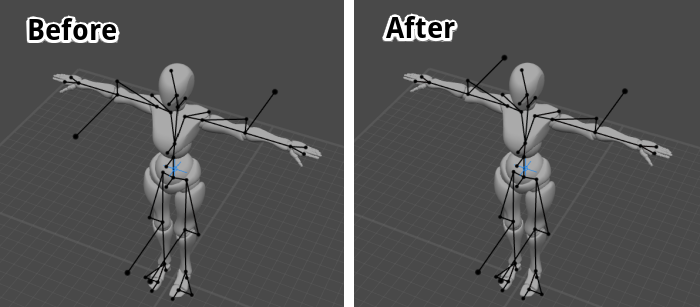
Preparing the Arms
By default, character arms in Mixamo skeleton form a straight line:
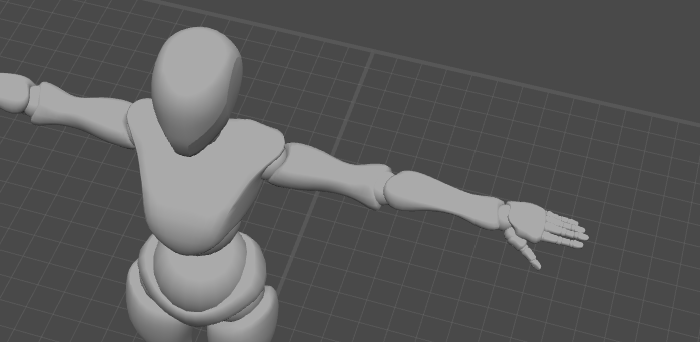
This might lead to incorrect bending in the finalized rig (see here to learn more about it).
To prevent this from happening, you’ll need to manually fold the limbs before rigging:
1. Switch to the Joint Mode.
2. Select the joints after the elbow.
3. Go to the Scene Settings panel.
4. On the Manipulators tab, enable the Fix rotation step parameter:

5. Set the value for Fix angle (5, for example).
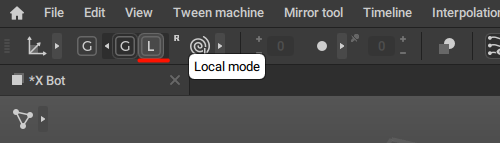
6. On the Toolbar, set the Local Mode for the manipulators:
7. Use Rotate manipulator to bend the arm.
8. Do the same for the other arm.
After this, everything should be ready for rigging.
Rigging
The base of the rig can be created using Quick Rigging Tool.
However, it is recommended to then use the regular Rigging Tool for making refinements to the prototype rig.
As usual, your goal is to create sets of Prototype objects for the joints associated with your character.
Joints
Character skeleton in Mixamo is structured similarly to the one used by standard Cascadeur models, but its structure is a bit more complex, and some of the joint names are different.
The following tables list the main joints in the Cascadeur skeleton and their counterparts in Mixamo skeleton.
| Cascadeur | Mixamo |
| pelvis | mixamorig:Hips |
| stomach | mixamorig:Spine |
| chest | mixamorig:Spine2 |
| neck | mixamorig:Neck |
| head | mixamorig:Head |
| clavicle_r | mixamorig:RightShoulder |
| arm_r | mixamorig:RightArm |
| forearm_r | mixamorig:RightForeArm |
| hand_r | mixamorig:RightHand |
| thigh_r | mixamorig:RightUpLeg |
| calf_r | mixamorig:RightLeg |
| foot_r | mixamorig:RightFoot |
| toe_r | mixamorig:RightToeBase |
If a joint has two or more counterparts in the Mixamo skeleton, we recommend rigging all of these joints with one set of prototypes. See Rigging Complex Skeletons.
Direction Controllers
Direction Controllers in elbows should face backwards for the arms to bend properly. In the case one of them faces the opposite direction:
1. Select the prototype Point Controller in the corresponding elbow.
2. In the Outliner, open the Hinge settings behavior tab.
3. Disable Direction controller is right:
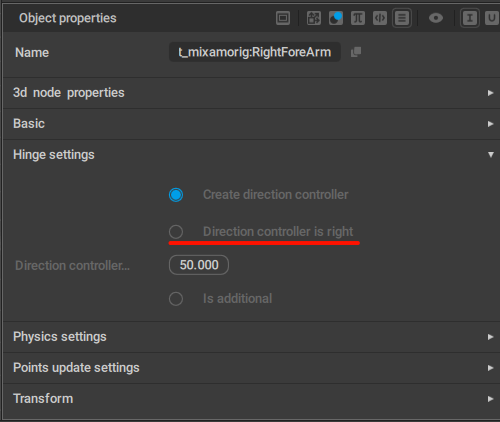
After this both controllers will be facing the right direction:
Finalizing the Rig
Once everything is set, click Generate rig:
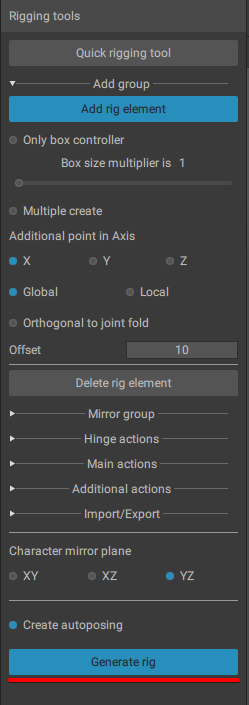
Then wait a bit, and your character should be fully rigged and ready for animation.
Animation
To add animation to a Mixamo character:
1. Select File → Import Fbx/Dae → Animation:
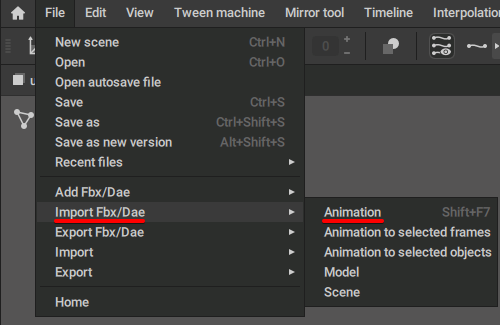
2. Specify the file (in FBX or Collada format) containing the animation.
After this, the animation should be imported and applied to the character.
To learn more about importing animation see here.