Drafting (Creating Poses)
- Home
- Animation Pipeline
- Drafting (Creating Poses)
To create your character’s pose, you need to use the functions and instruments described below. To learn more about them, visit the respective sections of this manual.
Keyframes
In Cascadeur, poses are set in the Keyframes (keys for short). To create a keyframe:
- Select a frame on the Timeline
- Click the Add or remove key button (F)
Once you have a key, it is time to add a pose to it.
Manipulators
To create a pose, select controllers and adjust their positions using manipulators.
Point Controller Mode
The Point Controller Mode is the main mode for working with poses. In this mode, controllers are represented as small black points. By selecting and moving these points you can move the character’s body parts.
Manipulators are applied to every selected point (selected points are colored yellow). The more points you select, the bigger is the region you control. For example, you can select controllers in the character’s hand to move only the hand, or you can select every controller down from the shoulder and move the entire arm.
If you select a group of points and use the Rotate manipulator, the group will rotate across the point that has the highest position in the hierarchy. To rotate the group across a different point, click that point with the Right Mouse Button.

You can fix a specific body part in its place if you don’t want it to be affected by the adjustments that you make to other parts. This is done by selecting a controller and pressing the R key. Fixed controllers are marked with a red frame.
Fixing controllers doesn’t affect the animation. On interpolation intervals, fixed points would move according to the type of interpolation.
Box Controller Mode
When you need to edit smaller elements of your character, such as fingers or clothing elements, which don’t affect the physical behavior of the character, use Box Controller mode.
Box controllers adhere to the same rules: by double-clicking a box controller you’ll select it and all of its child controllers. Box controllers can influence each other, and they too can be pinned to their positions with the R hotkey.
Monitoring Poses
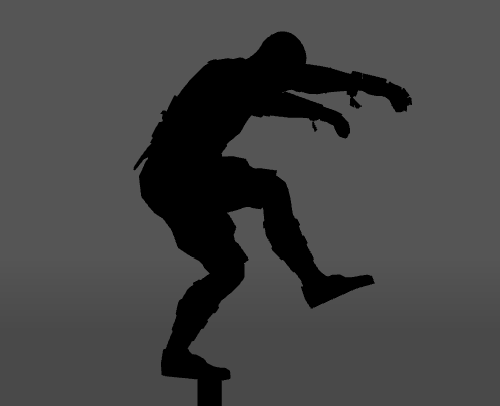
Silhouette Mode
A good practice is to make the key poses in your animation readable, i.e. the viewer should be able to understand what the character is doing from the first glance.
Cascadeur has a dedicated feature - the Silhouette Mode - specifically for this task.
To enable it, click the Silhouette Mode button on the Toolbar:

Now, the characters in your scene should be rendered as silhouettes:
Points of View
If the animation is supposed to be looked at from different points of view, it might be a good practice to make sure it is readable in every case.
To adjust the point of view:
1. Hold Alt.
2. Hold Left Mouse Button.
3. Move the mouse.
Also, there are several default perspectives: the front view, the top-down view and so on. These default views can be switched using the View Cube at the upper right corner of the Viewport window:
Tips and Lifehacks
- A rotate manipulator should not be applied to a single point!
- The center of mass can be fixed just as well! A fixed center of mass can be moved, and the character will move along with it.
- If timing feels wrong, you can always improve it by moving keys across the Timeline.
- To make a character squat, simply select every controller above the knees and move them a bit down.
- To raise a character on tiptoes, fix the toes and move up the controllers in the base of the feet. Alternatively, move up the entire upper part of the character
- Hips can be rotated and tilted by moving pelvis controllers
Now you should have an idea of how to create key frames and set poses in them. By creating poses, one after another, you get a draft of your animation
If timing feels wrong, you can always improve it by moving keys across the Timeline.
And once you are satisfied with your draft, it is finally time to turn it into a fully-fledged animation. This is done by adding smooth transitions between key poses.
To learn about this, see the next section